
>>

Fudgy brownies layered with a creamy cheesecake topping and bright cherry pie filling — the perfect indulgent bar for gatherings and potlucks.
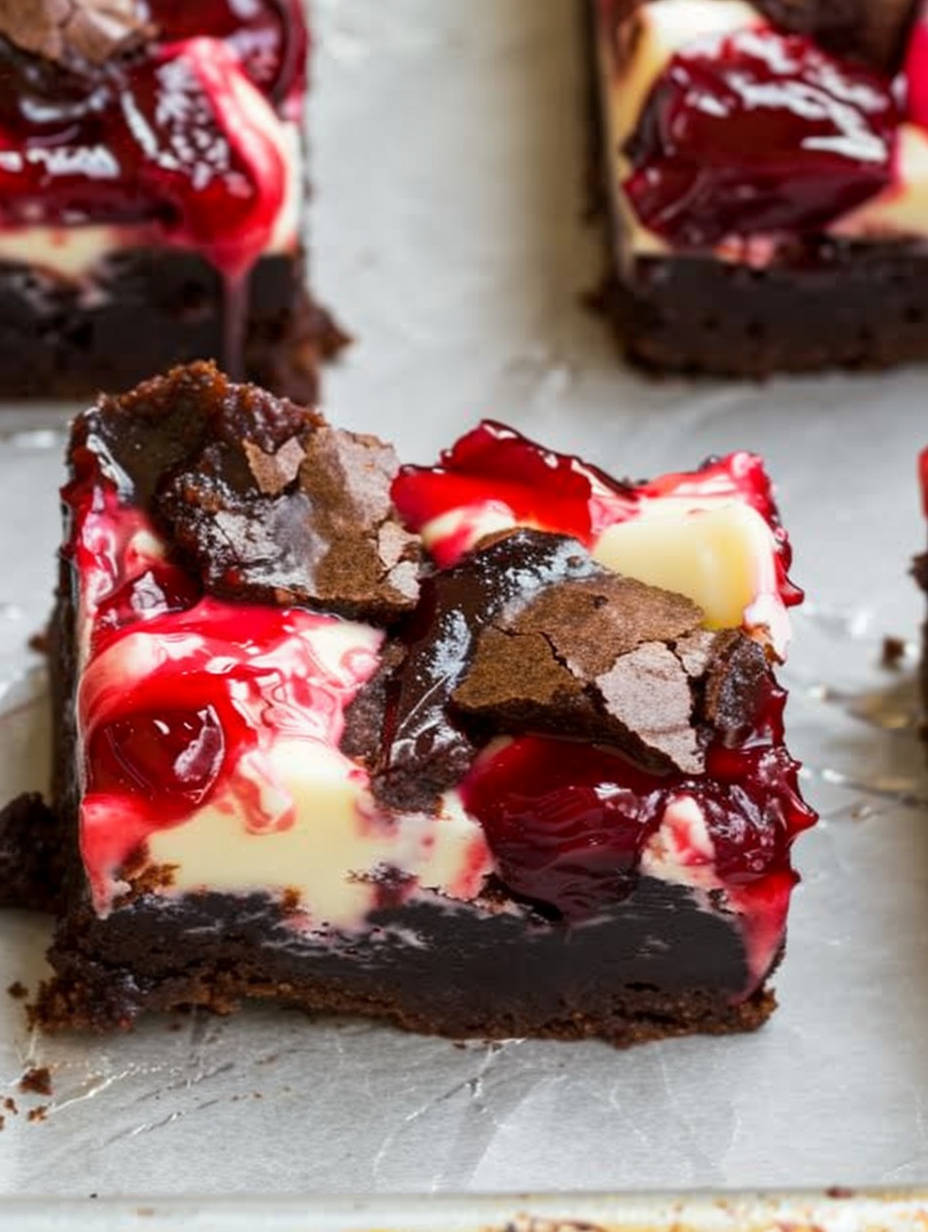
These Cherry Cheesecake Brownies are my go-to when I want something that reads like celebration in every bite. I first made them for a summer potluck years ago when I wanted to bring a dessert that tasted rich but still looked festive without a lot of fuss. The combination of dense, fudgy base, a silky cheesecake layer, and pockets of bright cherry pie filling creates a contrast of textures and flavors that always disappears fast. They feel special enough for holidays and simple enough for weeknight cravings.
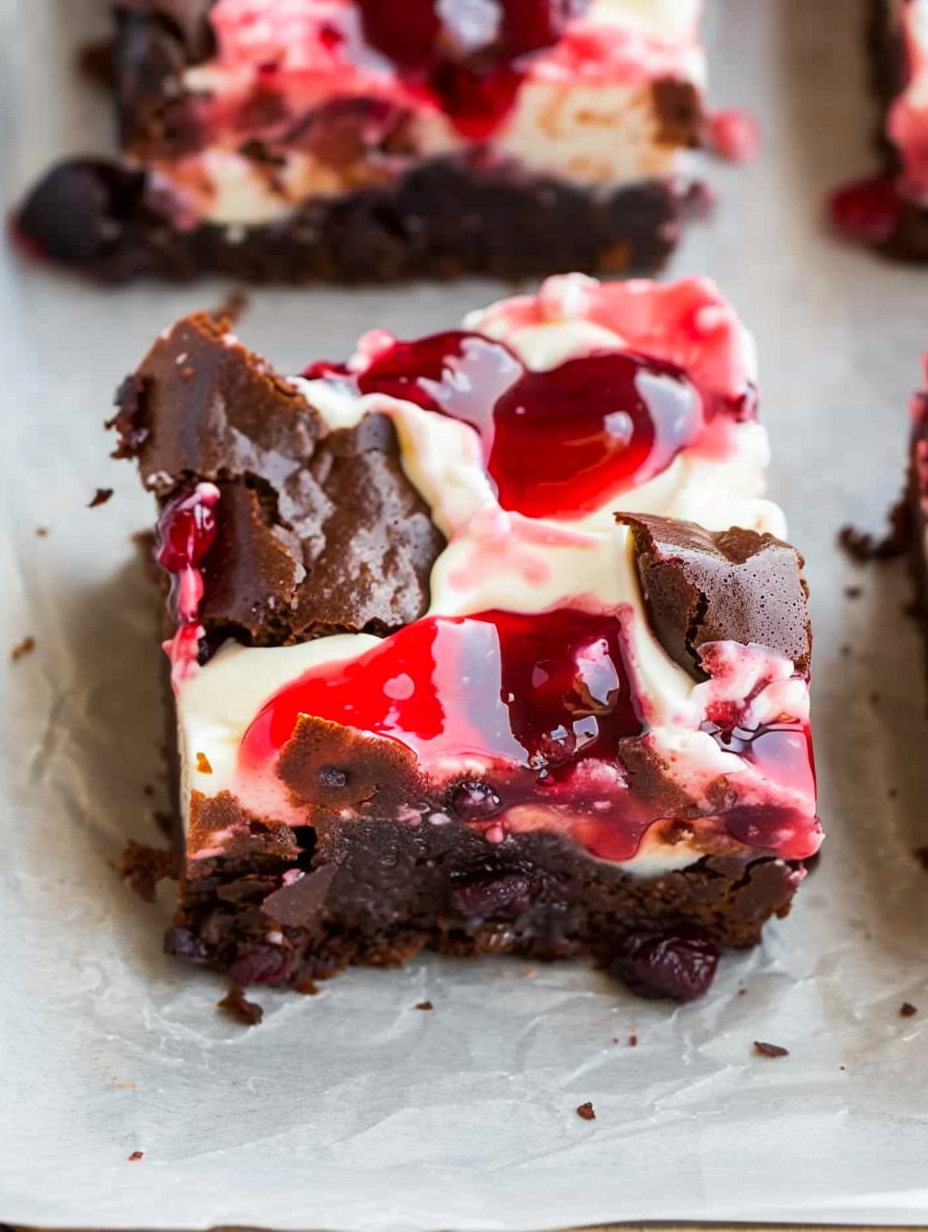
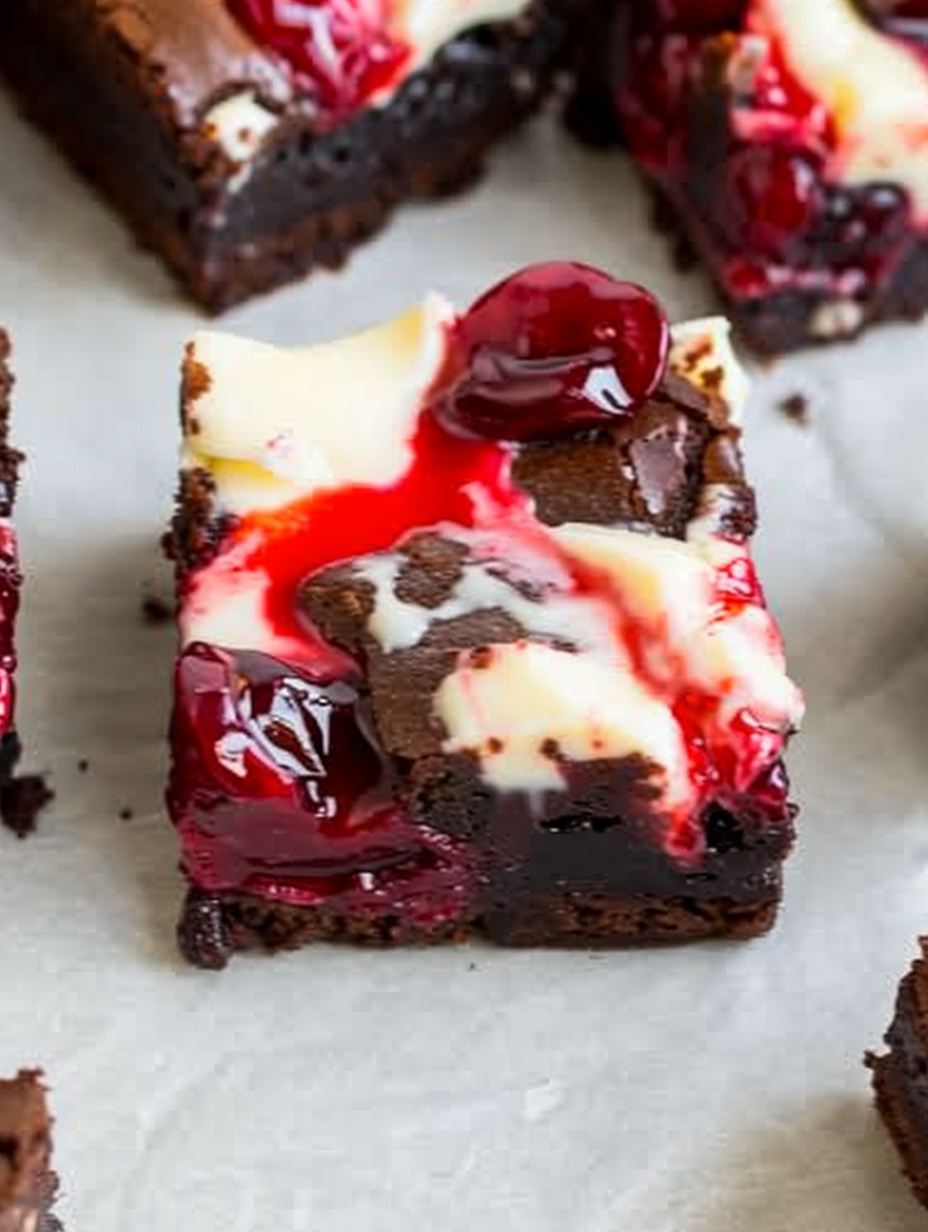
I discovered this particular composition the morning I was experimenting with pantry staples and a leftover can of cherry pie filling. The first batch came out with a slightly crackled brownie top, a creamy middle, and glossy cherries peeking through. My family declared them the best brownies they'd ever had — a title they still hold. The texture is what makes them memorable: brownie that’s just set, cheesecake that’s custardy, and cherries that add a tart burst. Every bite balances sweet and tangy with decadent chocolate undertones.
I’ve brought these bars to summer barbecues, holiday parties, and late-night study sessions. One year my niece asked for them as her birthday dessert; she loved that the cherries felt like a surprise in the middle. They’re the kind of treat that sparks compliments from friends who usually avoid sweets — people keep coming back to the table for another piece.
My favorite thing about these bars is the way guests react when they bite into a square and discover the cherry surprise. Once at a family reunion, an uncle who usually prefers plain brownies asked for the recipe — he loved the hint of tartness the cherry provided against the rich chocolate. Every holiday they reappear on the dessert table.
Store cooled bars in an airtight container in the refrigerator for up to 4 days. If you want to stack layers, place parchment paper between them to prevent sticking. For longer storage, freeze individual squares on a baking sheet until solid, then transfer to a freezer-safe bag and press out excess air — they’ll keep for up to 3 months. Thaw overnight in the fridge before serving; for a quick serve, microwave a chilled bar for 8–10 seconds to take the chill off without melting the filling.
If you prefer a slightly lighter texture, swap half the butter for unsweetened applesauce (equal volume) and reduce sugar by 1/4 cup. To make gluten-free bars, replace the flour with a 1:1 gluten-free flour blend and add 1/4 teaspoon xanthan gum if your blend lacks it. For a dairy-free variation, use vegan cream cheese and a plant-based butter alternative — expect a slightly different melt and flavor, but the concept remains delicious.
Serve these bars slightly chilled or at room temperature. Garnish with a dusting of powdered sugar, a few fresh cherries, or a drizzle of melted dark chocolate for contrast. They pair beautifully with coffee, a scoop of vanilla ice cream, or a dollop of whipped cream. For brunch or dessert buffets, cut into smaller squares and arrange on a platter for easy grabbing.
Brownies and cheesecake are both beloved American treats with layered dessert traditions — combining them is a natural evolution of American baking creativity. Layered bars like these echo classic mash-ups that appeared in mid-20th-century home baking, where convenience and flavor merged. The addition of cherry pie filling nods to classic American fruit fillings, giving the bars a nostalgic pie-like element.
In winter swap cherries for spiced cherry preserves or cranberries with orange zest to bring holiday warmth. Summer calls for fresh cherry halves or mixed berry filling. For spring, a lemon cheesecake layer (add 1 tablespoon lemon zest and 1 tablespoon juice) brightens the profile. Tiny adjustments in fillings and zest can adapt the bars to any season or celebration.
To meal-prep for the week, bake and slice into individual portions, then refrigerate in stackable containers separated by parchment. These bars make satisfying dessert portions or an occasional sweet snack with breakfast coffee. If prepping batches, double the recipe and use two pans; label frozen containers with the date and reheat briefly before serving for best texture.
These Cherry Cheesecake Brownies have become a staple because they’re reliably delicious and adaptable. Whether you bring them to a party or keep a pan for yourself, they feel like a little celebration in every square — and they’re one of those recipes that invites personalization, so make them your own.
Soften cream cheese to room temperature to avoid lumps in the cheesecake layer.
Line the 9x13 pan with foil and spray it — bars lift out easily and clean-up is faster.
Chill the pan for at least 2 hours before slicing for clean, neat bars.
This nourishing cherry cheesecake brownies recipe is sure to be a staple in your kitchen. Enjoy every moist, high protein slice — it is perfect for breakfast or as a wholesome snack any time.
This Cherry Cheesecake Brownies recipe makes perfectly juicy, tender, and flavorful steak every time! Serve with potatoes and a side salad for an unforgettable dinner in under 30 minutes.
Line a 9x13-inch pan with tin foil leaving an overhang for easy removal and spray the foil with cooking spray. Preheat oven to 350°F (175°C).
In a large bowl whisk together melted butter and granulated sugar until smooth. Add vanilla and eggs, whisking until combined. Fold in flour, cocoa powder, and salt until just combined; batter will be thick.
Spread just over half of the brownie batter into the prepared pan using a wet spatula or greased offset spatula to even the layer.
Beat softened cream cheese with an egg, vanilla, and 1/3 cup sugar until smooth and lump-free using an electric mixer or a vigorous whisk.
Spread the cheesecake mixture over the brownie base, dollop cherry pie filling across the top, then drop spoonfuls of remaining brownie batter over the cherries to cover as much filling as possible.
Bake at 350°F for 30–35 minutes until the center appears set; a slight jiggle is normal. Check with a toothpick in the brownie portion for moist crumbs but not wet batter.
Cool to room temperature in the pan. For cleaner slices refrigerate for a few hours, then lift out using the foil overhang and cut into 16 bars with a sharp knife.
Last Step: Please leave a rating and comment letting us know how you liked this recipe! This helps our business to thrive and continue providing free, high-quality recipes for you.
Leave a comment & rating below or tag
@flavest on social media!

Warm-spiced apple cider donuts with tender apple bits and a glossy cider glaze, fried crisp and irresistibly cozy for fall.

All-day slow cooking turns pork shoulder, potatoes, and carrots into a tender, savory classic with a rich homemade gravy everyone will love.

Tender layers of Yukon gold potatoes with seasoned beef in a creamy, cheddar sauce, baked until bubbly and irresistibly comforting.
Leave a comment & rating below or tag @flavest on social media!
Enjoyed this recipe? Share it with friends and family, and don't forget to leave a review!
This recipe looks amazing! Can't wait to try it.
Comments are stored locally in your browser. Server comments are displayed alongside your local comments.

Join to receive our email series which contains a round-up of some of our quick and easy family favorite recipes.
