
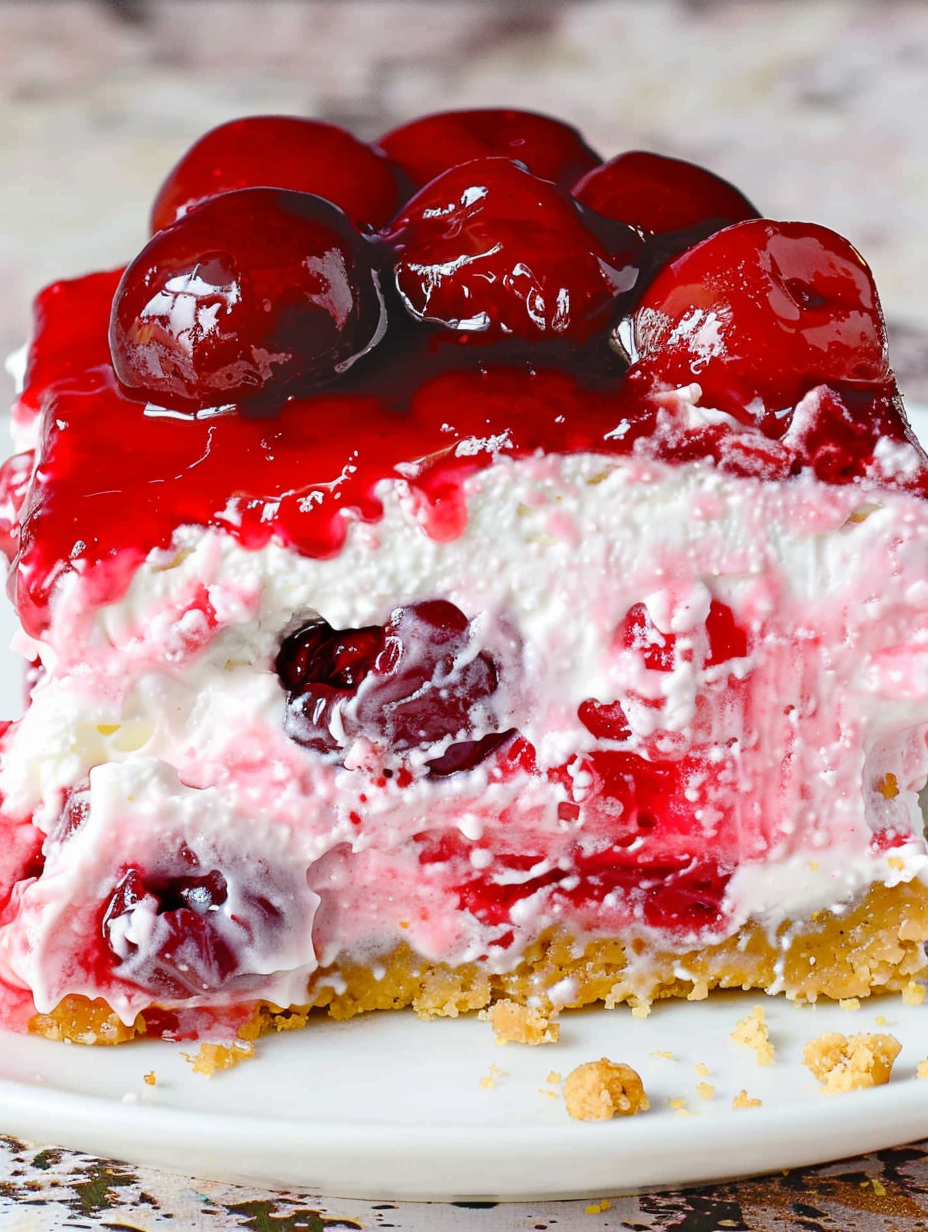
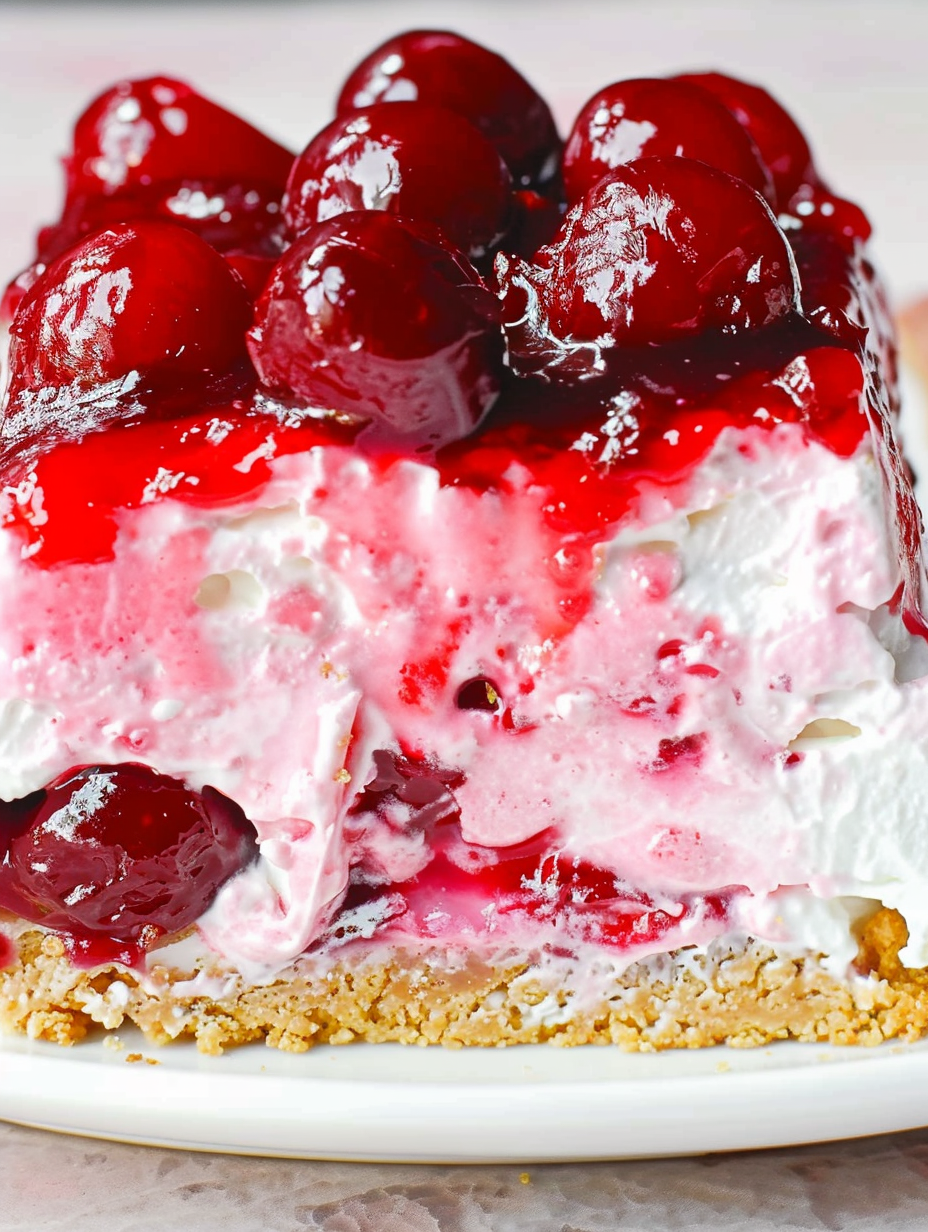
Cherry Cheesecake Lush

An elegant, no-bake layered dessert that combines a buttery graham crust, silky cream cheese layer, and bright cherry topping—perfect for potlucks and holidays.
This Cherry Cheesecake Lush has been my go-to showstopper for potlucks, family dinners, and any time I want a dessert that looks like it took hours but actually comes together quickly. I first discovered a version of this layered treat years ago at a summer picnic where a neighbor brought a similar dish. I adapted it in my kitchen, simplifying the layers and refining the balance between the buttery crust, tangy cream cheese layer, and the bright cherry topping. The result is a dessert that slices neatly, keeps well in the refrigerator, and consistently gets compliments for both flavor and presentation.
The textures are what make this so compelling: a crisp, sandy crust that gives way to a cloudlike cream cheese layer and a smooth, fruity cherry finish. Each bite offers contrast—slightly salty crust, sweet and lightly tangy filling, and a glossy cherry layer that adds acidity and freshness. It has become a reliable option when I want something that feels indulgent yet is forgiving to prepare. If you love classic cherry and cream combinations, this version will quickly become one of your favorites.
Why You'll Love This Recipe
- Ready in about 30 minutes of active work and sets in the refrigerator, so you can make it ahead for stress-free entertaining.
- Uses pantry staples like graham crackers, cream cheese, and Cool Whip, making it accessible and budget-friendly.
- No-bake method eliminates the risk of a cracked top and keeps the filling silky by avoiding overcooking.
- Layered presentation is impressive; slices hold together well for serving at parties and potlucks.
- Easy to customize with different pie fillings, fresh fruit, or a ganache drizzle for seasonal variations.
- Family-friendly: kids love the sweet cherry layer and adults appreciate the creamy tang of the filling.
When I brought this to my sister's birthday brunch, everyone asked for the recipe and several people requested a second piece before dessert plates were cleared. It's an approachable dessert that reads as special, and I often make it the night before so the flavors can fuse overnight for the best texture and taste.
Ingredients
- Graham cracker crumbs: 2 cups of fine crumbs, roughly one 9-ounce sleeve crushed. Look for whole grain graham crackers for a richer flavor or use store-brand for a more neutral crust. Freshly crushed crumbs bind better when mixed with butter.
- Unsalted butter: 1/2 cup melted. Use unsalted so you can control salt levels; salted butter will add a subtle savory note but can make the crust taste slightly saltier.
- Cream cheese: 8 ounces, softened to room temperature. Full-fat cream cheese gives the creamiest mouthfeel. If you prefer lower fat, a reduced-fat block will work but the texture will be less rich.
- Powdered sugar: 1 cup divided. Powdered sugar dissolves smoothly into the cream cheese without graininess; reserve extra for adjusting sweetness to taste.
- Vanilla extract: 2 teaspoons total divided between layers. Use a pure vanilla extract for depth; imitation is fine in a pinch but the flavor will be flatter.
- Cool Whip: 8 ounces thawed for the filling and an additional 2 cups for a light, airy texture. You can substitute whipped heavy cream for a fresher dairy flavor.
- Cherry pie filling: One 21-ounce can; split between the mid layer and the top. Choose a good-quality brand or make your own cherry compote for a fresher result.
Instructions
Prepare the crust: Combine 2 cups graham cracker crumbs and 1/2 cup melted unsalted butter in a medium bowl until the mixture resembles wet sand. Press the mixture firmly into the bottom of a 9x9-inch baking dish in an even layer. Use the bottom of a measuring cup to compact the crumbs for a tidy edge. Chill in the refrigerator while you prepare the next layers so the crust firms up, about 10 minutes. Make the cream cheese layer: In a large mixing bowl, beat 8 ounces softened cream cheese with 1 cup powdered sugar and 1 teaspoon vanilla extract until smooth and creamy, about 2 to 3 minutes with an electric mixer on medium. Scrape the bowl to ensure no lumps remain. Folding technique matters here: gently fold 8 ounces thawed Cool Whip into the cream cheese mixture until homogenous. If substituting freshly whipped cream, whip 1 cup heavy cream with 2 tablespoons powdered sugar to stiff peaks before folding. Assemble the first layers: Spread the cream cheese mixture evenly over the chilled graham crust using a spatula and smooth the top. This layer should be even so subsequent layers look tidy. Place the dish in the freezer for 30 minutes to firm the cream layer, which helps create clean slices when serving. Cherry layer: Stir together half of the 21-ounce can of cherry pie filling with 2 cups Cool Whip and 1/4 cup powdered sugar plus 1 teaspoon vanilla extract until fully combined. Spoon this mixture gently over the chilled cheesecake layer and spread evenly. Freeze for 30 minutes to set the middle layer, then spread the remaining cherry pie filling on top as a glossy finish. This sequence prevents the top cherries from sinking and keeps each layer distinct. Chill until set: Cover the dish tightly and refrigerate for at least 4 hours, or overnight for best texture and flavor melding. For quicker serving, a firm chill of 2 hours will work but slices will be softer. To serve, remove from refrigerator 10 minutes before slicing to make cutting easier and prevent cracking.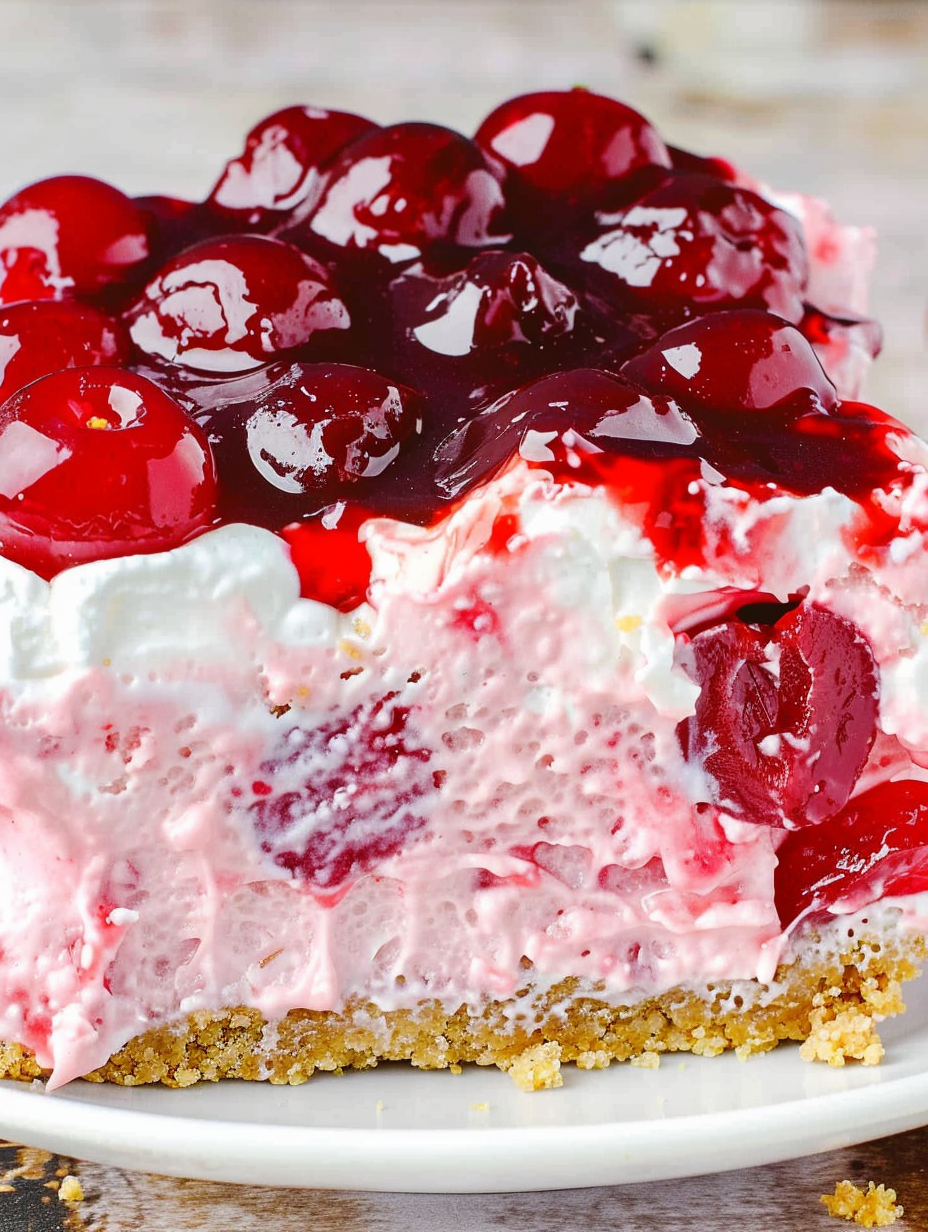
You Must Know
- This dessert keeps well in the refrigerator for up to 4 days when covered tightly and frozen for up to 3 months; thaw overnight in the refrigerator before serving.
- Using full-fat cream cheese and a stabilized whipped component gives the cleanest slices and best mouthfeel; low-fat substitutions will be softer and more watery.
- Freeze the layered dish briefly between layers to prevent blending and preserve clean strata for neat squares when serving.
- This is high in calories and sugar per serving, so it is best enjoyed in moderation or shared at gatherings where portions are small.
- To get precise slices, run a sharp knife under hot water, dry it, then slice with steady pressure for smooth cuts.
My favorite part of this dish is the nostalgic cherry shine on top; it always reminds me of classic diner pies. Family members often request this for birthdays because it feels celebratory without requiring the precision of baking a cheesecake. Slight variations in the filling or fruit topping have produced delightful surprises—try tart cherry preserves for more acidity or swap in raspberry filling for a vivid color change.
Storage Tips
Store covered in an airtight container or wrapped tightly with plastic wrap to prevent absorption of refrigerator odors and drying out of the crust. In the refrigerator, maintain at 40 degrees Fahrenheit or lower and consume within 4 days for best quality. For long-term storage, wrap the baking dish in two layers of plastic wrap followed by foil and freeze for up to 3 months. Thaw overnight in the refrigerator and avoid refreezing after thawing. When reheating individual slices, warm for 10 to 15 seconds in the microwave on low power if you want a slightly softer texture, but I prefer serving chilled.
Ingredient Substitutions
If you prefer a gluten-free version, use gluten-free graham-style crumbs or crushed gluten-free cookies for the crust; press and chill as directed. To avoid Cool Whip or for a fresher dairy flavor, substitute equal volume of heavy whipping cream whipped to stiff peaks. For a lower-sugar option, reduce powdered sugar by 1/4 cup and use a no-sugar cherry filling, though sweetness and texture will differ. For a lighter crust, replace half the butter with coconut oil for a subtle coconut note and firmer set when chilled. Any substitutions change mouthfeel slightly but keep the same assembly order for best results.
Serving Suggestions
Serve chilled in small squares garnished with a few fresh cherries or a sprig of mint for color contrast. Pair with a strong coffee or an espresso martini for adult gatherings. For brunch, offer alongside light fruit salads and mimosas. If presenting for a special occasion, dust the edges with finely grated dark chocolate or drizzle a thin ribbon of warmed chocolate ganache over each serving for added decadence. This dessert also pairs well with a simple lemon or orange shortbread for guests who want a citrus contrast.
Cultural Background
Layered no-bake confections like this are a modern American adaptation of classic European layered pastries and pies. The marriage of cream cheese and fruit toppings draws from the popularity of New York-style cheesecakes and fruit-topped tarts. The concept of a lush, layered dessert became popular in mid-20th-century American home cooking when convenience products like Cool Whip and canned pie fillings made elegant desserts more accessible to home cooks. This style remains popular for its ease and reliable crowd-pleasing results.
Seasonal Adaptations
In summer, swap the cherry filling for fresh macerated berries mixed with a touch of sugar and cornstarch, adjusting the sweetness accordingly. In autumn, use apple pie filling with warm spices like cinnamon and nutmeg to create a harvest version. For winter holidays, consider pomegranate arils on top of a reduced-sugar cranberry compote for a festive red finish. The assembly method stays the same; only the fruit choice and minor adjustments to sweetness and thickening are needed.
Meal Prep Tips
Make the crust and cream layer up to 24 hours in advance and keep covered in the refrigerator; add the cherry layers the next day for the freshest top. For easy transport to parties, use a pan with a tight-fitting lid or a disposable aluminum pan covered with foil. If you need individual portions, assemble in a muffin tin lined with plastic wrap or small clear cups for grab-and-go servings. Label the dish with the date if storing in a shared refrigerator to avoid confusion.
This dessert is one I return to again and again because it offers both nostalgia and room for creativity. It is forgiving for bakers of all levels and always draws compliments. Make it ahead, make it for a crowd, and make it your own with seasonal fruit or a drizzle of chocolate. The joy is in the layers and the smiles on faces when the first slice is served.
Pro Tips
Chill the dish between layers to keep each layer distinct and to make slicing easier.
Use room-temperature cream cheese to avoid lumps and achieve a silky filling.
Warm your knife under hot water and dry it before slicing for cleaner cuts.
This nourishing cherry cheesecake lush recipe is sure to be a staple in your kitchen. Enjoy every moist, high protein slice — it is perfect for breakfast or as a wholesome snack any time.
Tags
Cherry Cheesecake Lush
This Cherry Cheesecake Lush recipe makes perfectly juicy, tender, and flavorful steak every time! Serve with potatoes and a side salad for an unforgettable dinner in under 30 minutes.
Ingredients
Crust
Filling
Cherry Layers
Instructions
Prepare the crust
Combine graham cracker crumbs and melted butter until the mixture resembles wet sand. Press firmly into the bottom of a 9x9-inch baking dish and chill for 10 minutes to set.
Make the cream cheese layer
Beat softened cream cheese with powdered sugar and vanilla until smooth. Fold in Cool Whip until homogeneous and spread evenly over chilled crust.
Chill and set
Place the dish in the freezer for 30 minutes to firm the cream layer before adding the cherry mid-layer to keep layers distinct.
Prepare cherry mid-layer
Stir half the cherry pie filling with 2 cups Cool Whip, powdered sugar, and vanilla. Spread over the chilled cream layer and freeze for 30 minutes.
Top and chill
Spread the remaining cherry pie filling on top as a glossy finish. Cover and refrigerate at least 4 hours or overnight before slicing.
Last Step: Please leave a rating and comment letting us know how you liked this recipe! This helps our business to thrive and continue providing free, high-quality recipes for you.
Nutrition
Did You Make This?
Leave a comment & rating below or tag
@flavest on social media!
Categories:
You might also like...

Glazed Apple Cider Donuts
Warm-spiced apple cider donuts with tender apple bits and a glossy cider glaze, fried crisp and irresistibly cozy for fall.

Slow Cooker Pork Pot Roast
All-day slow cooking turns pork shoulder, potatoes, and carrots into a tender, savory classic with a rich homemade gravy everyone will love.

Cheesy Hamburger Potato Casserole
Tender layers of Yukon gold potatoes with seasoned beef in a creamy, cheddar sauce, baked until bubbly and irresistibly comforting.
Did You Make This?
Leave a comment & rating below or tag @flavest on social media!
Rate This Recipe
Share This Recipe
Enjoyed this recipe? Share it with friends and family, and don't forget to leave a review!
Comments (1)
This recipe looks amazing! Can't wait to try it.
Comments are stored locally in your browser. Server comments are displayed alongside your local comments.

Hi, I'm Maria!
What's Popular

30-Minute Meals!
Join to receive our email series which contains a round-up of some of our quick and easy family favorite recipes.