
Cherry Crumble Bars

Simple, buttery crumble bars filled with bright cherry pie filling and a light vanilla icing. Minimal ingredients, maximum comfort—perfect for potlucks and weeknight sweets.
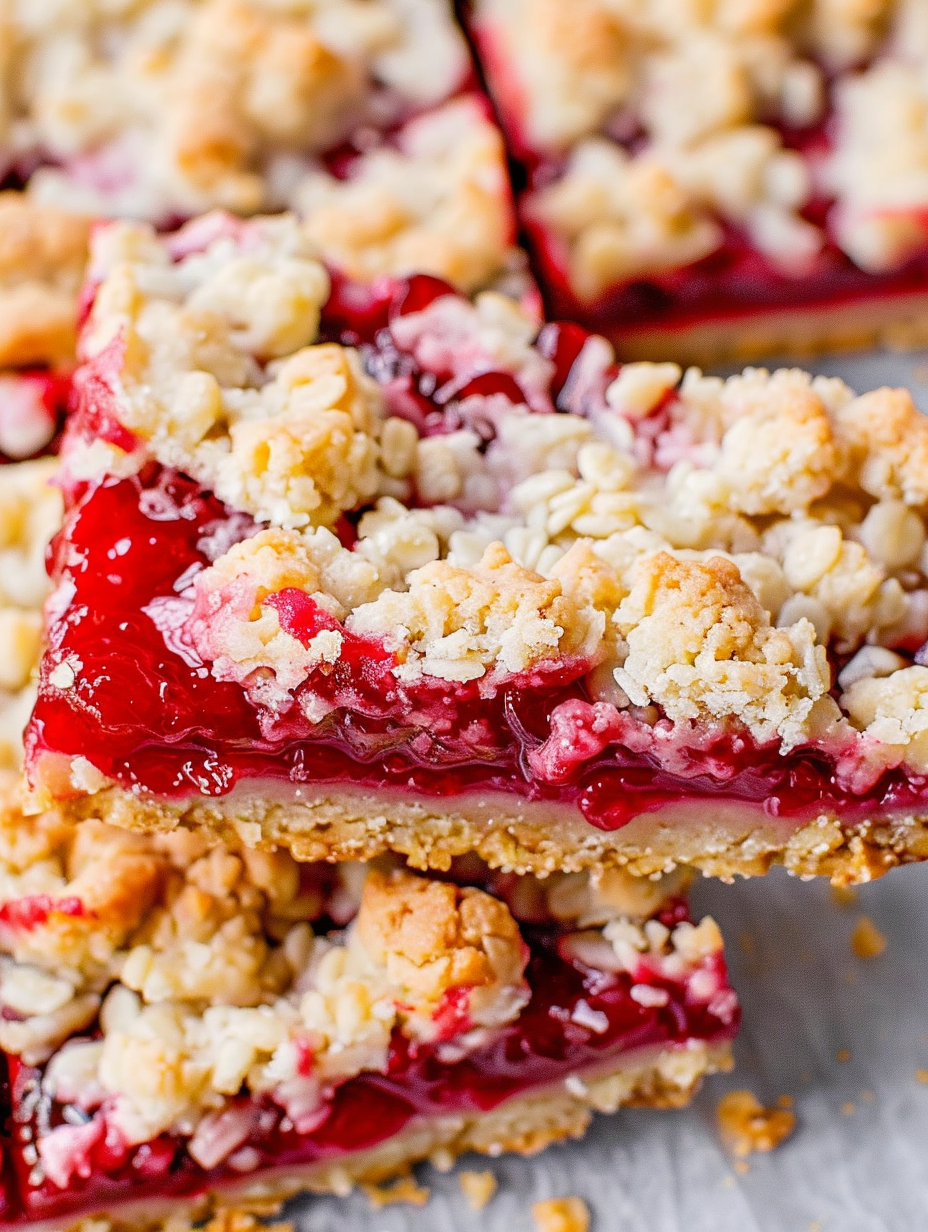
This recipe for Cherry Crumble Bars is one of those simple, reliably delicious treats I turn to when I want to bring something sweet that everyone will love without a lot of fuss. I first made these on a rainy afternoon when the pantry was low and I only had a couple of cans of cherry pie filling on hand. The combination of a tender, buttery crust and crunchy crumble topping with a glossy, fruity center was so good that my family immediately requested I add it to the regular rotation. The bars hit the perfect balance between sweet and tart, with a pleasant textural contrast that keeps each bite interesting.
I value recipes that are forgiving and quick, and these bars fit the bill. They use pantry staples, require only a few steps, and come together in under an hour of oven time. The topping never fully seals the fruit so you get lovely pockets of cherry in every square. I usually serve them slightly warm with a scoop of vanilla ice cream for a weekend treat, or chilled for a bake-sale friendly option. They transport well and slice cleanly after a short rest, making them ideal for sharing at potlucks or school events.
Why You'll Love This Recipe
- Minimal ingredients and simple technique make this an easy choice for beginner bakers and busy weeknights; most of the work is mixing and pressing into a pan.
- Ready in just about 1 hour 30 minutes from start to finish, including cooling time; active prep is only 15 minutes.
- Uses pantry staples such as flour, sugar, butter and canned cherry pie filling so you can make it on short notice without specialty shopping.
- Double-duty dough: half becomes a soft base while the remainder crumbles into a golden topping, giving both tender and crunchy textures in one bake.
- Make-ahead friendly: bars store well in the fridge or freeze well for up to 3 months, making them perfect for meal prep or entertaining planning.
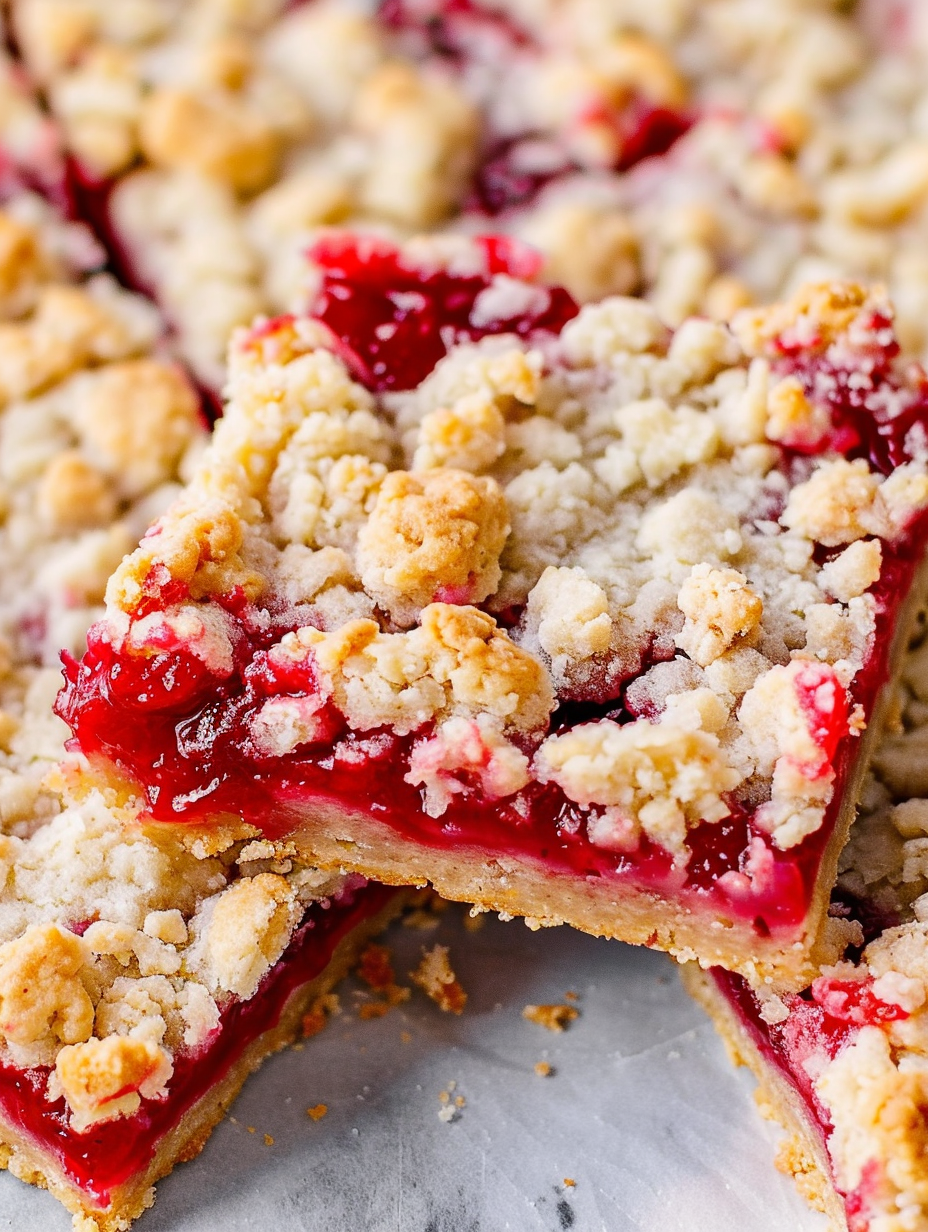
- Crowd-pleasing appeal: bright cherry flavor contrasts with buttery crumble, pleasing kids and adults alike at gatherings.
In my kitchen these bars quickly became a favorite for informal gatherings. Neighbors who popped by for coffee left with a slice and came back the next week asking for the recipe. They are a reminder that a few good-quality staples and a little patience in the oven will always yield something special.
Ingredients
- All-purpose flour: 2 1/2 cups sifted. Use a reliable brand such as King Arthur or Pillsbury for consistent results; spoon into the cup and level for accuracy. Flour builds structure and gives the base its tender crumb.
- Granulated sugar: 1 cup. Provides sweetness and helps the dough brown lightly. Caster sugar is fine if you prefer a slightly finer texture.
- Baking powder: 3/4 teaspoon. A small amount of leavening lifts the base just enough so the topping doesn’t feel heavy.
- Salt: 1/2 teaspoon. Enhances the other flavors and balances sweetness—don’t omit.
- Unsalted butter: 2 sticks (1 cup), room temperature and cubed. Using unsalted allows you to control salt; room temperature butter creamates into the flour for a tender crumb and buttery flavor.
- Large egg: 1. Binds the dough and adds a bit of richness and color.
- Vanilla extract: 1 teaspoon. A quality pure vanilla adds depth to the dough.
- Cherry pie filling: Two 20-ounce cans. The filling provides the vibrant fruit layer; look for fillings with whole cherries for better texture.
- For the icing: 1 cup powdered sugar, 1 to 2 tablespoons milk, 1 teaspoon vanilla extract. A simple glaze brightens the top and makes the bars feel finished.
Instructions
Prepare the pan and oven: Preheat the oven to 350 F. Line a jelly-roll pan or a 15x10x1-inch rimmed baking sheet with parchment paper and leave an overhang so you can lift the bars out after baking. If you do not have parchment, lightly grease the pan with nonstick spray. Proper pan prep prevents sticking and gives clean edges when slicing. Combine dry ingredients: Whisk together 2 1/2 cups sifted all-purpose flour, 1 cup granulated sugar, 3/4 teaspoon baking powder, and 1/2 teaspoon salt in a medium bowl until evenly blended. Sifting and whisking aerates the flour and makes it easier to incorporate the butter. Cut in the butter: Using an electric mixer on low, beat in 4 to 5 tablespoons of the cubed room-temperature butter at a time until the mixture resembles coarse crumbs. You want little pea-sized pieces of butter distributed through the flour so they melt during baking and create a tender, slightly flaky texture. Add egg and vanilla: Stir in the large egg and 1 teaspoon vanilla extract until combined. The dough will be slightly shaggy; it should hold together when pressed but still be crumbly enough to use as a topping. Form the base: Press about half of the dough evenly into the prepared pan, using the back of a measuring cup to smooth the surface and compact it slightly. A firm, even press ensures a stable base that won’t fall apart when sliced. Par-bake the crust: Bake the base for 12 to 15 minutes, until the top turns a light golden color and the dough looks set. Par-baking prevents the filling from making the crust soggy. Assemble with filling: Remove the pan from the oven and spread both cans of cherry pie filling evenly over the warm crust. Spread gently to avoid breaking whole cherries too much; an even layer prevents thin or thick spots when cutting. Add crumble topping: Crumble the remaining dough over the cherry layer so most of the filling is covered but not completely sealed. Leaving some gaps allows the fruit to peek through and caramelize at the edges. Bake until golden: Return to the oven and bake for an additional 30 to 40 minutes, until the topping is a light golden brown and the filling bubbles at a few spots. If the top browns too fast, tent loosely with foil for the last 10 minutes. Make the icing and finish: While bars bake, whisk together 1 cup powdered sugar, 1 teaspoon vanilla extract, and 1 to 2 tablespoons milk, starting with 1 tablespoon and adding more until the glaze is pourable. Let the bars cool in the pan for 20 minutes, then drizzle the icing over the surface and allow it to set another 15 minutes before slicing into 12 bars.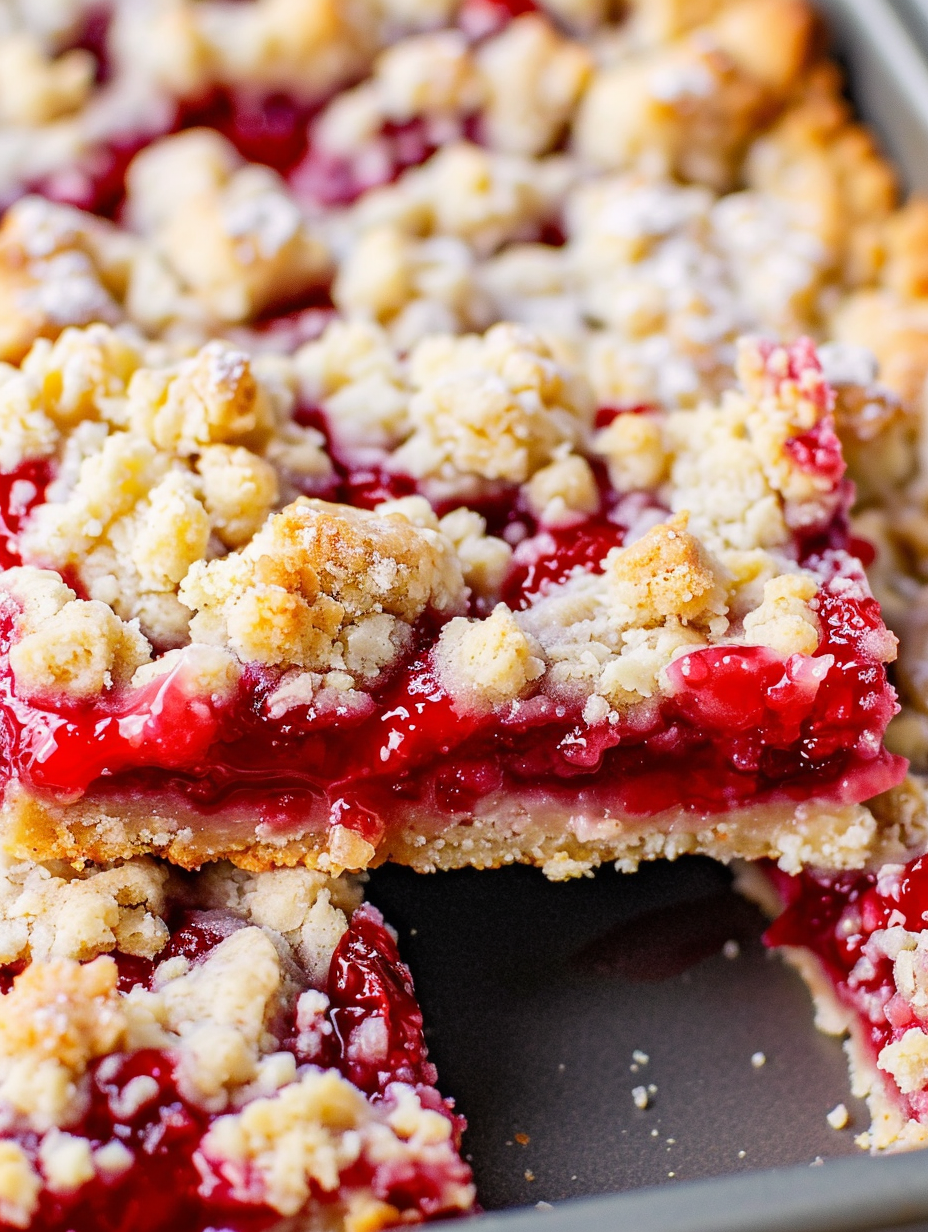
You Must Know
- These bars freeze well for up to 3 months. Cool completely, wrap the pan tightly in plastic and foil, and thaw overnight in the refrigerator before glazing.
- Store leftover bars in an airtight container at room temperature for up to 2 days or refrigerated for up to 5 days. Warm briefly before serving if chilled.
- Cherries bring Vitamin C and a bright tartness; combined with butter and sugar, each bar is a balance of sweet and tangy flavors.
- If your cherries are too wet, dab excess syrup with a paper towel before spreading to avoid a soggy base.
What I love most is how forgiving these bars are. Even when I have slightly overcreamed the butter or pressed the crust unevenly, the berries and crumble mask small imperfections and still taste fantastic. Family members have commented that the texture reminds them of a cross between a shortbread and a fruit crisp, which makes it versatile for dessert or a sweet snack with coffee.
Storage Tips
To preserve texture, cool bars completely before storing. For short-term storage keep them in a single layer in an airtight container at room temperature up to 48 hours. For longer life refrigerate up to 5 days; bring to room temperature or warm gently before serving. To freeze, cut bars and place parchment between layers in a freezer-safe container. Thaw in the refrigerator overnight and finish with a quick warm-up in a 300 F oven for five minutes to refresh the crumble.
Ingredient Substitutions
If you prefer a less sweet version use 3/4 cup granulated sugar in the dough. For a gluten-free option, substitute a 1-to-1 gluten-free flour blend and allow a slightly longer bake to set. To make the filling from scratch, use 3 cups pitted fresh or frozen cherries, 3/4 cup sugar, 2 tablespoons cornstarch, and 1 tablespoon lemon juice, simmered until thickened; this reduces the overly glossy syrup that canned fillings sometimes have.
Serving Suggestions
Serve warm with vanilla ice cream or whipped cream for a classic dessert. For brunch, pair with strong coffee or a citrusy tea. Garnish with fresh mint leaves or a light dusting of powdered sugar for a pretty presentation. Cut into squares for potlucks or into smaller bite-sized pieces for dessert trays.
Cultural Background
Fruit-filled crumb bars are a cousin of classic American fruit pies and coffee cakes. The methodology borrows from European streusel traditions while using canned fillings popularized in mid-20th century American pantries. This version celebrates convenience without sacrificing homemade flavors, marrying the nostalgia of cherry pie with the simplicity of bar baking.
Seasonal Adaptations
In summer swap canned filling for fresh pie cherries to brighten the flavor; in winter use frozen cherries and add a pinch of warm spices such as cinnamon or nutmeg to the dough. For autumn try apple or pear filling with a crumble spiced with cardamom. Holiday versions look lovely drizzled with white chocolate and sprinkled with toasted sliced almonds.
Meal Prep Tips
Make the dough ahead and refrigerate for up to two days, or freeze the assembled unbaked pan for up to one month; when ready to bake, thaw overnight in the refrigerator and add 5 to 10 minutes to the bake time. The icing can be prepared and stored in a small jar for up to one week; shake before using.
These cherry crumble bars are a testament to how straightforward baking can produce a memorable dessert. Whether you’re headed to a picnic or just need something sweet at home, they are simple to make and delightful to eat. I hope you make them your own and enjoy sharing them as much as my family and I do.
Pro Tips
Measure flour by spooning into the cup and leveling with a knife to avoid dense crusts.
Press the base firmly into the pan to create an even foundation; an offset spatula or the bottom of a measuring cup works well.
If the topping browns too quickly, tent loosely with foil during the last 10 minutes of baking.
This nourishing cherry crumble bars recipe is sure to be a staple in your kitchen. Enjoy every moist, high protein slice — it is perfect for breakfast or as a wholesome snack any time.
FAQs about Recipes
Can I use fresh cherries instead of canned?
Yes. You can use fresh or frozen pitted cherries; simmer with sugar and cornstarch until thickened to use as a filling.
How long do these keep in the freezer?
Freeze cooled, sliced bars in an airtight container for up to 3 months. Thaw overnight in the refrigerator before serving.
Tags
Cherry Crumble Bars
This Cherry Crumble Bars recipe makes perfectly juicy, tender, and flavorful steak every time! Serve with potatoes and a side salad for an unforgettable dinner in under 30 minutes.
Ingredients
Base and topping
Filling
Icing
Instructions
Preheat and prep pan
Preheat oven to 350 F. Line a 9x13-inch jelly-roll pan with parchment paper or spray with nonstick spray, leaving an overhang for lifting the bars out after baking.
Mix dry ingredients
Whisk together sifted flour, granulated sugar, baking powder, and salt to aerate and evenly distribute the leavening.
Cut in butter
Using an electric mixer, beat in cold cubed butter a few tablespoons at a time until the mixture resembles coarse crumbs with pea-sized bits of butter throughout.
Add egg and vanilla
Stir in the large egg and vanilla extract until the dough comes together in a slightly shaggy mixture that can be pressed into the pan.
Form and par-bake the base
Press half of the dough evenly into the prepared pan and bake 12 to 15 minutes until the crust is set and lightly golden.
Add filling and crumb topping
Spread both cans of cherry pie filling over the warm crust. Crumble the remaining dough over the cherries to cover most of the surface.
Bake until golden
Bake for 30 to 40 minutes until the topping is light golden and the filling bubbles in a few places. Tent with foil if top browns too quickly.
Make icing and cool
Whisk powdered sugar, vanilla, and milk until smooth and pourable. Cool the bars 20 minutes, drizzle with icing, and allow 15 minutes to set before slicing into 12 pieces.
Last Step: Please leave a rating and comment letting us know how you liked this recipe! This helps our business to thrive and continue providing free, high-quality recipes for you.
Nutrition
Did You Make This?
Leave a comment & rating below or tag
@flavest on social media!
Categories:
You might also like...

Glazed Apple Cider Donuts
Warm-spiced apple cider donuts with tender apple bits and a glossy cider glaze, fried crisp and irresistibly cozy for fall.

Slow Cooker Pork Pot Roast
All-day slow cooking turns pork shoulder, potatoes, and carrots into a tender, savory classic with a rich homemade gravy everyone will love.

Cheesy Hamburger Potato Casserole
Tender layers of Yukon gold potatoes with seasoned beef in a creamy, cheddar sauce, baked until bubbly and irresistibly comforting.
Did You Make This?
Leave a comment & rating below or tag @flavest on social media!
Rate This Recipe
Share This Recipe
Enjoyed this recipe? Share it with friends and family, and don't forget to leave a review!
Comments (1)
This recipe looks amazing! Can't wait to try it.
Comments are stored locally in your browser. Server comments are displayed alongside your local comments.

Hi, I'm Maria!
What's Popular

30-Minute Meals!
Join to receive our email series which contains a round-up of some of our quick and easy family favorite recipes.