
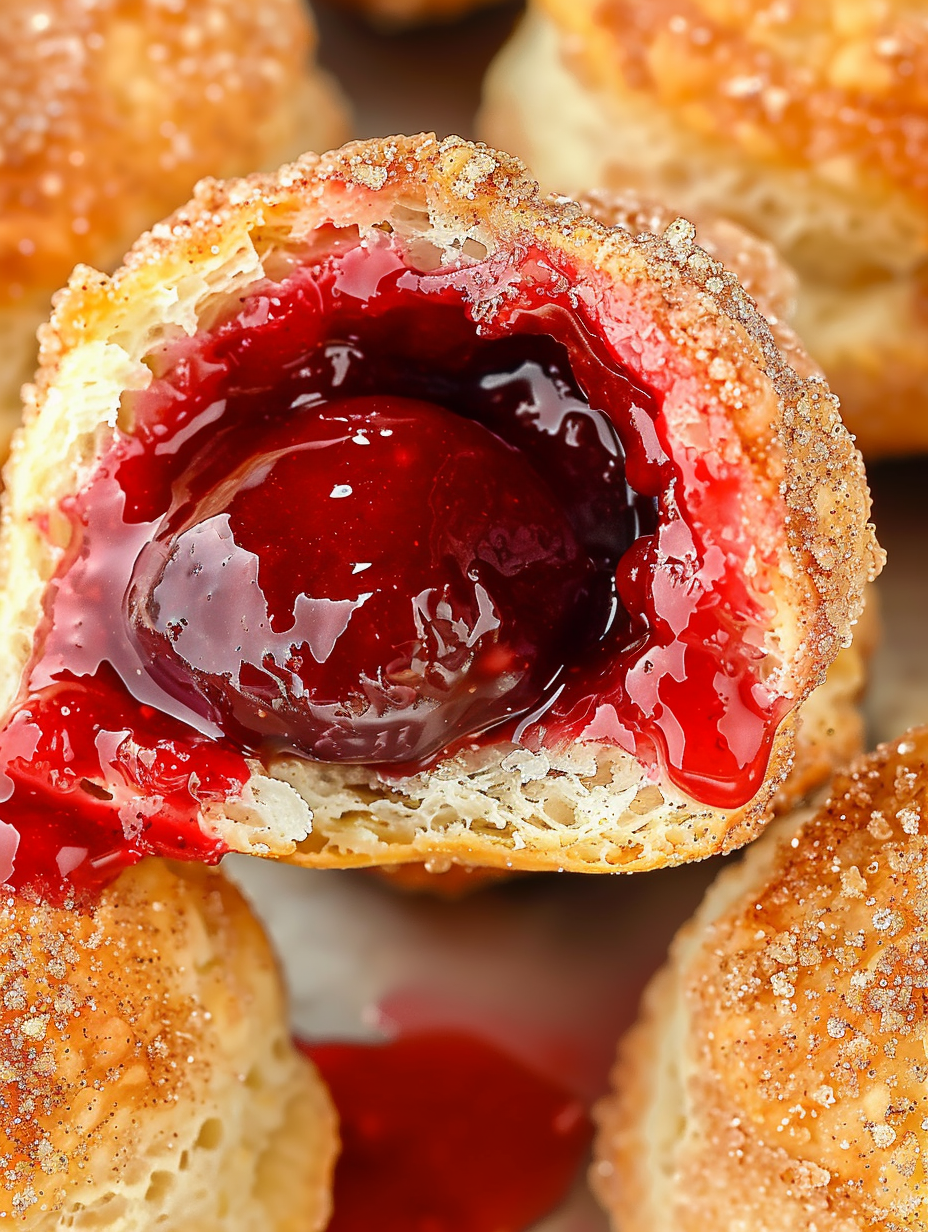
Cherry Pie Bombs

Sweet cherry pie filling tucked into pillowy biscuit dough, rolled in melted butter and cinnamon sugar, then cooked until golden in an air fryer or oven—perfect for spring and summer gatherings.
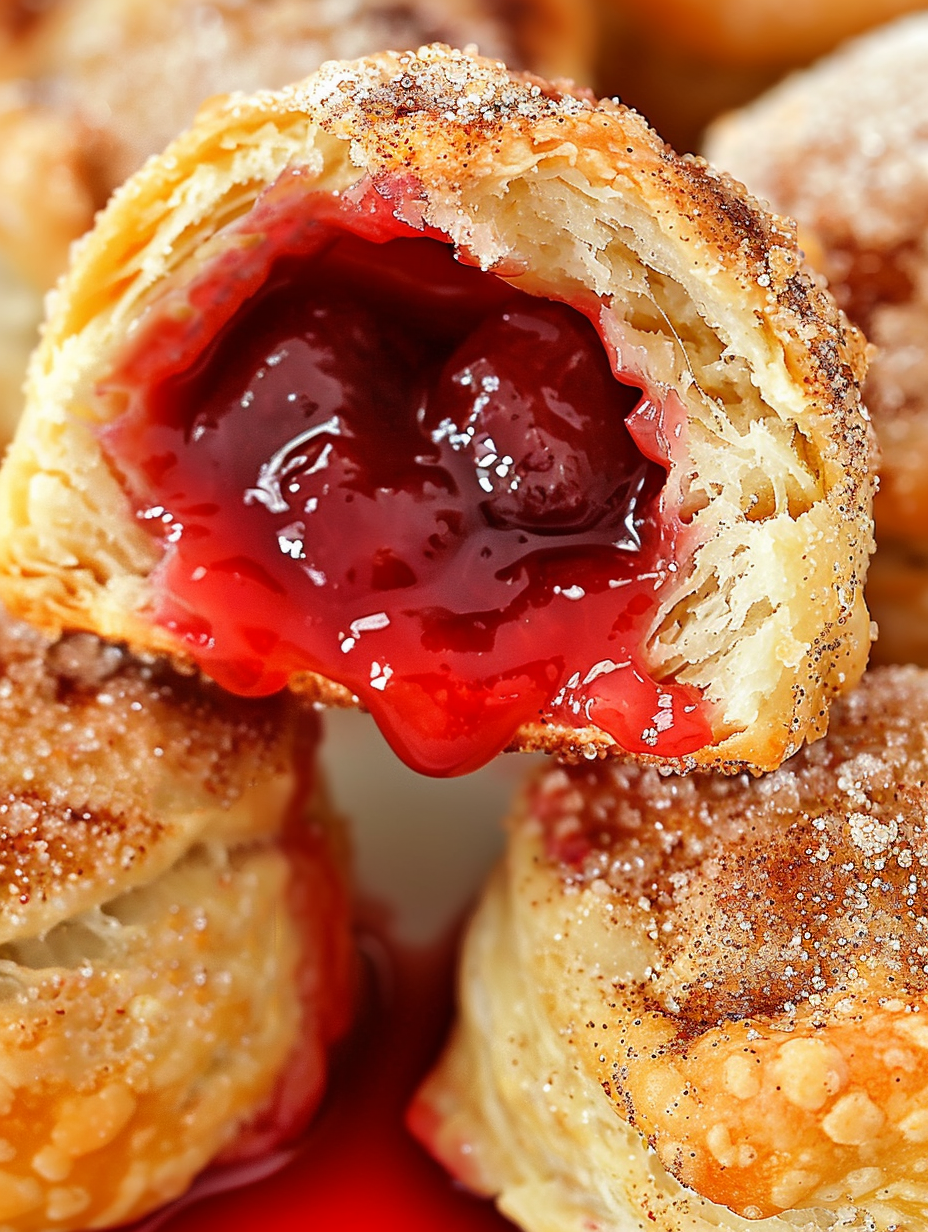
This recipe exists to deliver nostalgia and ease in equal measure. I started making these Cherry Pie Bombs one warm April when a last-minute backyard get-together demanded something handheld, sweet, and fast. The first batch disappeared before I could put out napkins; friends loved the contrast of a soft, biscuit exterior with a molten cherry center that burst with bright, sticky juice. They’re the kind of treat that gets passed around a picnic blanket and talked about for weeks.
What makes these bombs special is their simplicity: a can of biscuit dough becomes the perfect vessel, the cinnamon-sugar coating adds a crunchy, fragrant finish, and the cherry filling—store-bought or homemade—gives a tart-sweet pop. They take just minutes to assemble and cook quickly in an air fryer or oven, making them ideal for parties, potlucks, or a quick dessert fix. I often halve the batch for a small family dessert and double it when company comes over, and the technique scales beautifully.
Why You'll Love This Recipe
- Ready in under 20 minutes from start to finish, which is a lifesaver when guests arrive unexpectedly.
- Uses pantry-friendly ingredients: canned biscuits and jarred or homemade cherry filling keep things simple and accessible.
- Air fryer method produces a crisp, golden exterior while keeping the inside soft and gooey—no deep-frying required.
- Highly portable and mess-free once cooled slightly; perfect for spring and summer parties, picnics, or potlucks.
- Flexible: make the filling from scratch with fresh or frozen cherries, or use a high-quality store-bought pie filling for speed.
From my own gatherings, these always spark conversation. My neighbor asked for the recipe after her daughter went back for a third piece, and at a recent block party, someone requested them as the official dessert for next year. They feel indulgent without being fussy, and that balance is what keeps me coming back to this preparation.
Ingredients
- Grand biscuits (1 can, 8-count): Use original canned biscuits (not flaky layers or crescent dough) for consistent thickness and an even rise; Pillsbury Grands work well.
- Cherry pie filling (1 cup): Store-bought pie filling saves time; choose a brand with whole cherries for texture. See notes below for a quick homemade version if you prefer a fresher flavor.
- Unsalted butter (1/2 cup, 1 stick), melted: Brushing with melted butter helps the cinnamon-sugar adhere and gives a rich, golden finish; unsalted lets you control the salt levels.
- Cinnamon-sugar blend (1/2 cup): Mix 1/2 cup granulated sugar with 1 to 2 teaspoons ground cinnamon—adjust to taste for more spice.
- Optional for homemade filling: Granulated sugar, fresh or frozen pitted cherries, lemon juice, cornstarch, and water. Homemade yields about 1 cup.
Instructions
Prepare the dough:Separate the biscuit can into two layers and place them on a clean surface. Gently press or roll each biscuit until it is about 4 inches in diameter—thin enough to wrap but not so thin it tears. You should end up with 16 rounds total. Work quickly so the dough stays pliable; if it becomes too soft, pop it in the fridge for 5 minutes.Fill and seal:Spoon about 1 tablespoon of cherry pie filling into the center of each dough round. Use a wet finger to moisten the edges if needed, then pinch the dough together to seal completely. Roll each sealed pocket between your palms into a smooth ball to ensure no seams are left exposed. Proper sealing prevents leaking during cooking.Coat the bombs:Brush each bomb all over with melted butter, then roll it in the cinnamon-sugar mixture so every surface is coated. The butter acts as glue for the sugar and promotes even browning, while the cinnamon-sugar crisps into a crunchy shell as it cooks.Air fryer method:Lightly spray the air fryer basket or racks with neutral oil. Arrange bombs in a single layer, spaced about 2 inches apart to allow expansion. Air fry at 330°F for 6 to 7 minutes, then gently wiggle each bomb to check for release. Continue cooking 1 to 2 minutes more until deep golden brown and crisp. Internal filling should be warm and bubbly; total air-fry time is roughly 8 minutes but can vary by model.Oven method:Preheat the oven to 375°F and line a baking sheet with parchment paper. Place bombs 2 inches apart and bake for 12 to 15 minutes, rotating the sheet halfway if your oven runs hot. Remove when golden and the filling is soft and gooey. Let rest for 3 to 5 minutes before serving to avoid burns from hot filling.Make homemade cherry filling (optional):Combine 2 cups pitted cherries (fresh or thawed frozen) with 1/2 cup sugar and 1 tablespoon lemon juice in a small saucepan over medium-low heat. Simmer 10 to 12 minutes until cherries soften. Whisk 3 tablespoons cornstarch with 4 tablespoons warm water to make a slurry, stir into cherries, and simmer 2 to 3 minutes until thickened. Cool to room temperature before filling dough pockets. This yields about 1 cup of filling.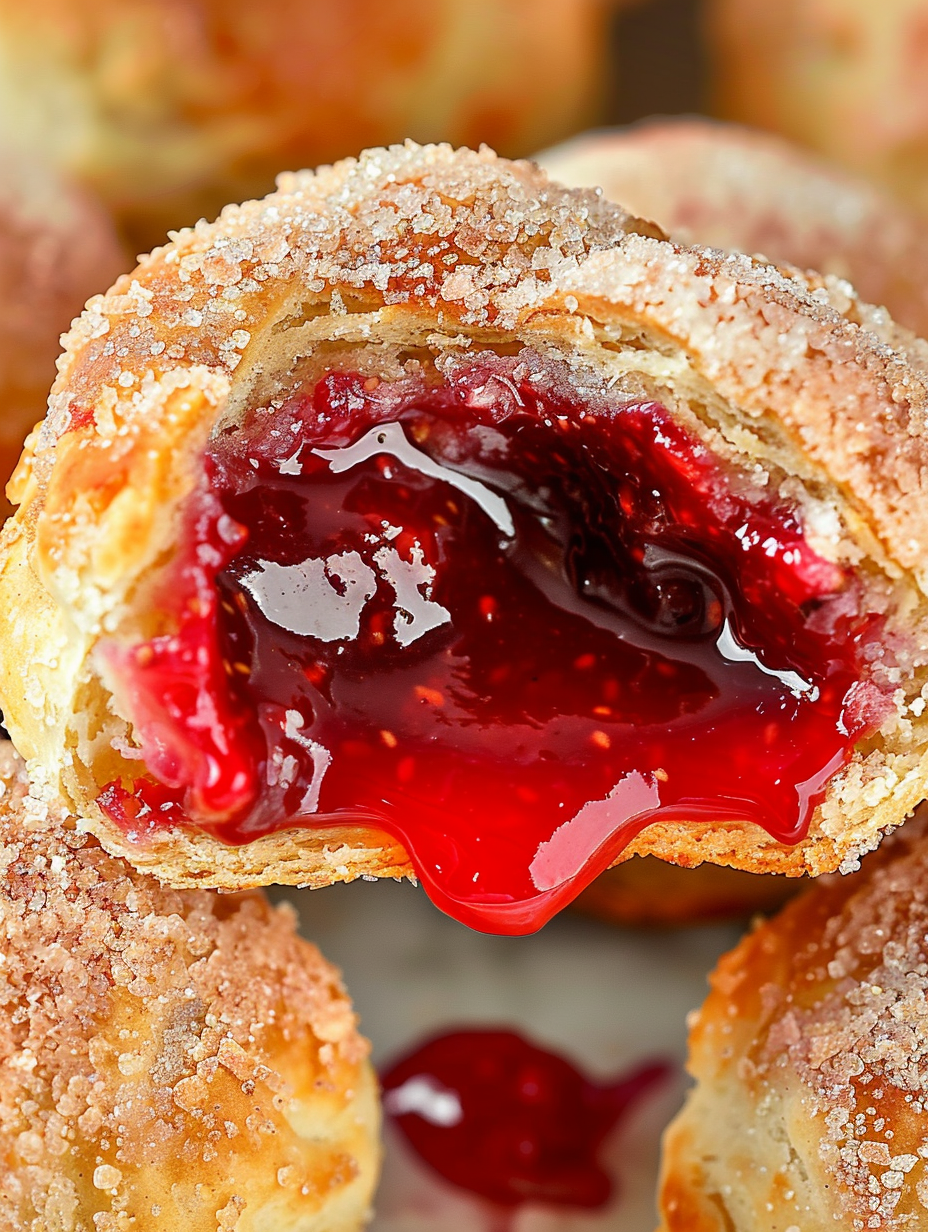
You Must Know
- These hold well at room temperature for up to 4 hours, making them ideal for outdoor gatherings.
- Refrigerate leftovers in an airtight container for up to 3 days; reheat in an air fryer or oven to restore crispness.
- If using store-bought filling, choose a brand with whole cherries to avoid too runny a center; thicker fillings minimize leaking.
- High sugar content means they freeze well; freeze unbaked bombs on a tray, then transfer to a bag. Bake from frozen, adding a few minutes to cooking time.
My favorite part is how adaptable they are. I once doubled the recipe for a graduation party and stored half frozen unbaked; the day-of bake was as good as fresh. The family always rallies for the first warm one; it's become a small ritual to test the temperature and hand the first to whoever cheers the loudest.
Storage Tips
For short-term serving, keep bombs at room temperature on a serving platter covered loosely with foil for up to 4 hours. For refrigeration, allow them to cool completely, then store in an airtight container for up to 3 days—place parchment between layers to prevent sticking. To reheat, air fry at 320°F for 3 to 4 minutes or bake at 350°F for 6 to 8 minutes until warmed through and crisp. For longer storage, freeze unbaked bombs on a tray until solid, then transfer to a freezer bag for up to 3 months; bake from frozen, adding 3 to 5 minutes to the cooking time.
Ingredient Substitutions
If you prefer a different dumpling, use refrigerated biscuit dough sheets or even square biscuit dough cut into rounds, though cooking times may vary. For a butter-free coating, substitute neutral oil spray and roll in sugar-cinnamon for crunch. Swap cherries for blueberry or apple pie filling—reduce added sugar for tart fruit. Use gluten-free biscuit dough to make a gluten-free version, but expect a slightly different texture. To make them dairy-free, use vegan butter or coconut oil for brushing.
Serving Suggestions
Serve warm with small ramekins of vanilla ice cream or whipped cream for dipping; a dusting of powdered sugar adds a pretty finish. For a brunch spread, pair with coffee, tea, or a sparkling rosé. Garnish with a sprig of mint or a light drizzle of warmed cherry syrup. For a party, place on tiered trays for easy grabbing and label as 'Cherry Bombs' so guests know they contain hot filling.
Cultural Background
These are a playful riff on deep-fried or baked turnovers and dumplings found in many American picnic traditions. The idea of enclosing fruit in dough dates back to early American potpies and hand pies. Using canned biscuit dough is a modern convenience adaptation that keeps the spirit of pocket pies alive while making them accessible to busy hosts. They capture the American love of handheld desserts with roots in both European pastry and Southern biscuit traditions.
Seasonal Adaptations
Spring and summer favor fresh cherry filling; late-season cherries are ideal. In fall, swap cherries for apple-cinnamon filling and add a pinch of nutmeg to the coating. For holiday versions, mix dried cranberries with orange zest and use a spiced sugar blend. Fresh, frozen, or canned fruit all work—adjust sugar in the filling to balance natural sweetness.
Meal Prep Tips
Make the cherry filling up to 3 days ahead and store in the refrigerator. Assemble bombs up to a day ahead and keep covered in the fridge on a parchment-lined tray. For larger gatherings, assemble and freeze unbaked bombs on a tray, then pop into freezer bags; bake straight from frozen, adding a few minutes. Pack baked bombs in insulated containers with a separate small jar of powdered sugar for sprinkling at serving time.
These bombs are fun to make and even more fun to share. The simplicity of ingredients, quick assembly, and versatile cooking methods make them a go-to for warm-weather entertaining. Try them with homemade filling once—you’ll notice the bright cherry flavor that keeps guests coming back.
Make them your own, enjoy the warm, sticky centers, and don’t forget napkins—these are deliciously messy in the best way.
Pro Tips
Roll biscuits to about 4 inches diameter—thin enough to seal but thick enough to hold filling without tearing.
Chill the assembled bombs for 5 minutes if the dough becomes too warm; this helps maintain shape during cooking.
Always space bombs about 2 inches apart in the air fryer or oven to allow even browning and expansion.
Cool for 3 to 5 minutes after cooking to avoid burns from hot filling but serve while still warm for the best texture.
This nourishing cherry pie bombs recipe is sure to be a staple in your kitchen. Enjoy every moist, high protein slice — it is perfect for breakfast or as a wholesome snack any time.
FAQs about Recipes
Can I use store-bought cherry pie filling?
Yes. You can use store-bought cherry pie filling directly, or make the homemade filling in the notes which yields about 1 cup.
Can I freeze them?
Yes. Freeze unbaked bombs on a tray until firm, then transfer to a sealed bag. Bake from frozen, adding 3 to 5 minutes to the cooking time.
Tags
Cherry Pie Bombs
This Cherry Pie Bombs recipe makes perfectly juicy, tender, and flavorful steak every time! Serve with potatoes and a side salad for an unforgettable dinner in under 30 minutes.
Ingredients
Dough
Filling
Coating
Homemade Cherry Filling (optional)
Instructions
Prepare the dough rounds
Separate the biscuits into two layers and place them on a clean surface. Press or roll each biscuit to about 4 inches in diameter; aim for 16 rounds total. Keep dough chilled if it becomes too soft.
Fill and seal each bomb
Place about 1 tablespoon of cherry pie filling in the center of each round. Wet the edges lightly with water if needed, pinch to seal, and roll into a smooth ball to prevent seams.
Butter and sugar coating
Brush each ball with melted butter, then roll in the cinnamon-sugar mixture until fully coated. Ensure an even layer for the best crunch and color.
Air fry method
Spray the air fryer basket lightly with oil. Arrange bombs 2 inches apart and air fry at 330°F for 6–7 minutes. Wiggle gently, then air fry 1–2 minutes more until deep golden and crisp. Let rest 3–5 minutes before serving.
Oven method
Preheat oven to 375°F and line a baking sheet with parchment. Place bombs 2 inches apart and bake 12–15 minutes until golden brown. Allow to cool slightly before serving.
Make homemade filling (optional)
Combine cherries and sugar in a saucepan over medium-low heat for 10–12 minutes. Mix cornstarch with warm water into a slurry, stir into cherries, simmer 2–3 minutes until thickened, then cool to room temperature before using.
Last Step: Please leave a rating and comment letting us know how you liked this recipe! This helps our business to thrive and continue providing free, high-quality recipes for you.
Nutrition
Did You Make This?
Leave a comment & rating below or tag
@flavest on social media!
Categories:
You might also like...

Glazed Apple Cider Donuts
Warm-spiced apple cider donuts with tender apple bits and a glossy cider glaze, fried crisp and irresistibly cozy for fall.

Slow Cooker Pork Pot Roast
All-day slow cooking turns pork shoulder, potatoes, and carrots into a tender, savory classic with a rich homemade gravy everyone will love.

Cheesy Hamburger Potato Casserole
Tender layers of Yukon gold potatoes with seasoned beef in a creamy, cheddar sauce, baked until bubbly and irresistibly comforting.
Did You Make This?
Leave a comment & rating below or tag @flavest on social media!
Rate This Recipe
Share This Recipe
Enjoyed this recipe? Share it with friends and family, and don't forget to leave a review!
Comments (1)
This recipe looks amazing! Can't wait to try it.
Comments are stored locally in your browser. Server comments are displayed alongside your local comments.

Hi, I'm Maria!
What's Popular

30-Minute Meals!
Join to receive our email series which contains a round-up of some of our quick and easy family favorite recipes.