
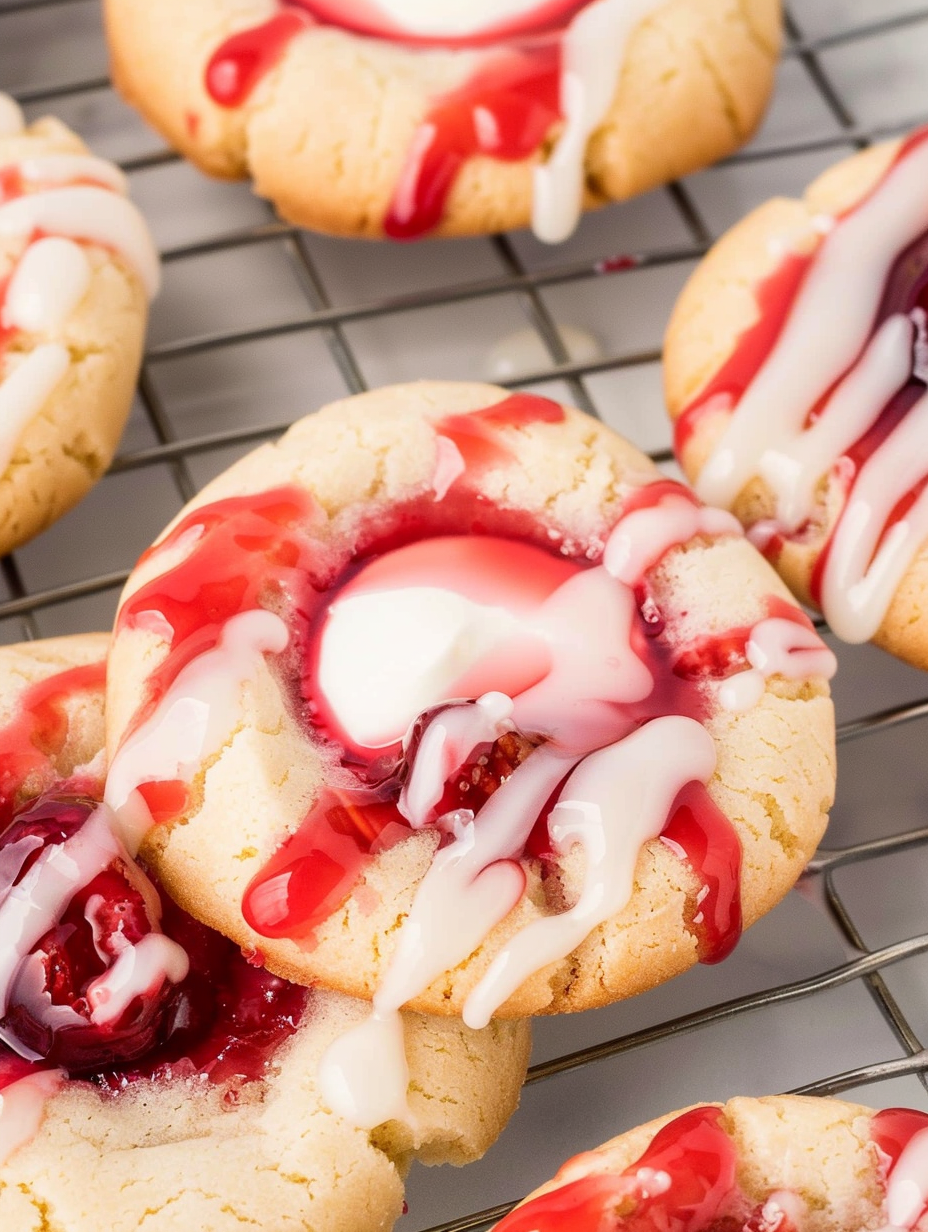
Cherry Pie Cookies

Buttery thumbprint cookies filled with bright cherry pie filling and a simple vanilla glaze, perfect for holidays, bake sales, and weeknight treats.
This recipe for Cherry Pie Cookies has been one of my quick go to desserts for unexpected company and after school baking sessions. I first came upon the idea on a rainy afternoon while raiding the pantry for something sweet that did not require a lot of fuss. The combination of a soft, buttery cookie base and a jewel red cherry center reminded me of classic thumbprint cookies I grew up with but with the nostalgic warmth of cherry pie filling. Every time I make them the house fills with a gentle pastry aroma and someone always asks where the cherries came from.
What makes these cookies special is how effortless they are to pull together with simple pantry ingredients and one can of cherry pie filling. The dough is straightforward to mix by hand or with a mixer and the small spoonful of filling bakes into a glossy, slightly jammy center that stays tender. I like them for baking with kids because the thumbprint step is tactile and fun and for weeknight baking because they are ready in about 30 minutes from start to finish. Serve them warm or cool and drizzle a thin vanilla glaze over the top for a little shine and extra sweetness.
Why You'll Love This Recipe
- Ready in about 30 minutes total, making these an ideal last minute dessert for gatherings or a quick after dinner treat.
- Uses pantry staples you likely already have, and one can of cherry pie filling adds a big flavor payoff with very little effort.
- Simple technique that is beginner friendly, with tactile steps kids enjoy like creating thumbprint wells and spooning in the filling.
- Easy to scale up for parties or scale down for a small batch and they travel well in a tin or on a platter.
- Make ahead friendly, the dough can be chilled or the finished cookies freeze well for up to three months.
- Glaze gives a polished look in minutes and can be omitted for lower sugar or drizzled with melted chocolate for a richer finish.
I remember bringing a tray of these to a neighbor block party and watching people come back for seconds. A friend who usually prefers chocolate conceded these were irresistible. Over the years I have refined the dough texture to be tender but firm enough to hold a spoonful of filling without spreading too much during baking. The result is a cookie that looks homemade and tastes like cherry pie in a bite sized form.
Ingredients
- Unsalted butter: 1/2 cup softened, room temperature butter creates a tender, buttery base. Use a high quality brand such as Land O Lakes or Plugra when you can, it makes a noticeable difference in richness.
- Granulated sugar: 1/2 cup for sweetness and a light crisp edge. Caster sugar works fine if you prefer a finer texture but regular granulated is ideal for most kitchens.
- Egg: 1 large egg binds the dough and adds structure while keeping the bite tender.
- Vanilla extract: 1/2 teaspoon for background flavor. Pure vanilla is preferable to imitation for depth.
- All purpose flour: 1 1/2 cups provides structure. Spoon and level the flour for accurate measurement to avoid dense cookies.
- Baking powder: 1/2 teaspoon gives a gentle lift and keeps the cookies from becoming flat.
- Salt: 1/4 teaspoon to balance sweetness and enhance the butter notes.
- Cherry pie filling: About 1 cup from a 21 ounce can. Use a high quality store brand or a jarred pie filling with visible cherry pieces for best texture.
- For the glaze: 1/2 cup powdered sugar, 1 to 2 tablespoons milk, and 1/4 teaspoon vanilla extract. Adjust thickness by adding more powdered sugar or milk.
Instructions
Preheat and prepare:Preheat the oven to 350 F and line baking sheets with parchment paper. Position racks in the center third of the oven so the cookies bake evenly and the bottoms do not brown too quickly.Cream butter and sugar:In a large bowl or a stand mixer fitted with the paddle attachment, cream 1/2 cup softened butter with 1/2 cup granulated sugar until light and fluffy about 2 to 3 minutes. Scrape the bowl to ensure even creaming. Proper creaming traps tiny air pockets that give the cookie a tender lift.Add egg and vanilla:Beat in 1 large egg and 1/2 teaspoon vanilla extract until well combined and smooth. The mixture should be glossy and slightly thickened which helps incorporate the dry ingredients without over mixing.Combine dry ingredients:In a separate bowl whisk together 1 1/2 cups all purpose flour, 1/2 teaspoon baking powder, and 1/4 teaspoon salt. Whisking ensures even distribution of leavening so the cookies rise uniformly.Mix dough:Gradually add the dry mixture to the wet mixture in two additions, mixing on low until just combined. Avoid over mixing to keep the texture tender. The dough should hold together and be soft but not sticky.Portion and make wells:Using a tablespoon or a cookie scoop, portion dough into tablespoon sized balls and place them on the prepared baking sheet leaving about 1 1/2 inches between each. Use your thumb or the back of a spoon to press an indentation into the center of each ball, creating a well for the filling.Fill with cherry pie filling:Spoon about 1/2 to 3/4 teaspoon cherry pie filling into each indentation. Do not overfill or the filling will spill over while baking. If the filling is very runny drain a little of the syrup so the cherries stay mostly intact.Bake:Bake for 12 to 15 minutes or until the edges are just turning golden. Watch closely in the final minutes to avoid over baking. The centers will set as they cool and you want the cookies to remain tender.Cool and glaze:Allow the cookies to cool on the baking sheet for 3 to 5 minutes before transferring to a wire rack to cool completely. For the glaze whisk together 1/2 cup powdered sugar with 1 to 2 tablespoons milk and 1/4 teaspoon vanilla until smooth. Drizzle the glaze over cooled cookies using a spoon or a small piping bag.
You Must Know
- These cookies keep well at room temperature for up to 2 days in an airtight container and up to 5 days refrigerated.
- Freeze baked cookies in a single layer on a tray then transfer to a freezer safe container for up to 3 months. Thaw at room temperature and refresh in a 300 F oven for 5 minutes if desired.
- Nutrition per cookie is about 109 calories with roughly 17 grams of carbohydrates and 5 grams of fat, making them a light sweet treat portioned for control.
- Use good quality pie filling for the best results and drain excess syrup if it looks runny to prevent spreading during baking.
My favorite aspect is how these cookies bridge two comforts, a classic thumbprint cookie and a slice of cherry pie. Friends have used them at baby showers and kids birthday parties and reported they were the first to disappear from the dessert table. They are forgiving to make and offer room for small improvisations without risking the outcome.
Storage Tips
Store cooled cookies in an airtight container at room temperature for up to 48 hours. For longer storage refrigerate them in a single layer separated by parchment paper for up to 5 days. To freeze, lay baked cookies on a tray in a single layer and flash freeze for 1 hour, then transfer to a freezer safe container with parchment between layers. When reheating from frozen, warm gently in a 300 F oven for 5 to 8 minutes to restore tenderness without melting the glaze too much. Avoid storing in direct sunlight or humid spots which can soften the crust.
Ingredient Substitutions
If you need to switch ingredients swap unsalted butter for salted butter and reduce added salt slightly. For a dairy free option use a plant based butter stick with similar fat content and milk in the glaze can be replaced with almond or oat milk. For a gluten free version use an all purpose gluten free flour blend measured by spooning it into the cup then leveling. Note that texture will vary slightly with substitutions and the cookie may be a bit more crumbly with gluten free flour.
Serving Suggestions
These are great alongside a cup of coffee or with a scoop of vanilla ice cream for a more decadent dessert. Garnish with a light sprinkle of finely grated lemon zest on the glaze to add brightness or drizzle melted dark chocolate for contrast. For holiday platters arrange with other small cookies and sugared nuts to provide variety and color contrast. They also make a thoughtful homemade gift in a simple bakery box.
Cultural Background
Thumbprint style cookies have roots in European baking traditions where small indented cookies were filled with preserves. The adaptation using commercial pie filling borrows the bold fruit flavor of American pie kitchens and makes it accessible in cookie form. This hybrid has become part of community bake sale culture in the United States because it pairs familiar pie flavors with easy to execute cookie technique.
Seasonal Adaptations
In summer swap cherry pie filling for fresh cherry compote or strawberry preserves and reduce sugar in the glaze by 1 to 2 teaspoons. For winter consider using spiced apple butter or cranberry orange conserva in the wells. Add warm spices like cinnamon or cardamom to the dough for seasonal depth. Small changes like these keep the same base technique fresh throughout the year.
Meal Prep Tips
Prepare the dough a day ahead and keep it chilled wrapped in plastic for up to 24 hours, then scoop and bake when you are ready. Alternatively portion the dough into rounds on a tray and freeze raw for quick baking later. Bake time may increase by 1 to 2 minutes from frozen. Label containers with baking dates and use within three months for best quality.
These cookies are a perfect example of simple techniques yielding bright results. They are approachable for bakers at every level and flexible enough to adapt for seasons and diets. I hope you enjoy making them as much as I do and that they become part of your baking rotation.
Pro Tips
Chill the dough briefly if it feels too soft to shape, 10 minutes in the fridge firms it up without changing the texture.
Do not overfill the wells, 1/2 to 3/4 teaspoon of filling prevents overflow during baking.
Use a small cookie scoop for uniform sizes so baking times remain consistent.
If glaze is too thin add more powdered sugar one tablespoon at a time to thicken it.
This nourishing cherry pie cookies recipe is sure to be a staple in your kitchen. Enjoy every moist, high protein slice — it is perfect for breakfast or as a wholesome snack any time.
Tags
Cherry Pie Cookies
This Cherry Pie Cookies recipe makes perfectly juicy, tender, and flavorful steak every time! Serve with potatoes and a side salad for an unforgettable dinner in under 30 minutes.
Ingredients
Dough
Filling and Glaze
Instructions
Preheat and prepare
Preheat oven to 350 F and line baking sheets with parchment paper. Place racks in the center third for even baking.
Cream butter and sugar
Cream 1/2 cup softened butter with 1/2 cup sugar until light and fluffy about 2 to 3 minutes. Scrape the bowl as needed.
Add egg and vanilla
Beat in 1 large egg and 1/2 teaspoon vanilla until smooth and glossy to help incorporate dry ingredients with minimal mixing.
Combine dry ingredients
Whisk together 1 1/2 cups flour, 1/2 teaspoon baking powder, and 1/4 teaspoon salt in a separate bowl for even leavening distribution.
Mix dough
Add dry ingredients to wet in two additions and mix on low until just combined. Dough should be soft but not sticky.
Portion and create wells
Portion dough into tablespoon sized balls and press a thumbprint indentation in each. Leave 1 1/2 inches between cookies on the sheet.
Fill and bake
Spoon 1/2 to 3/4 teaspoon cherry pie filling into each well and bake 12 to 15 minutes until edges are just golden.
Cool and glaze
Cool on sheet 3 to 5 minutes then transfer to a rack. Whisk 1/2 cup powdered sugar with 1 to 2 tablespoons milk and 1/4 teaspoon vanilla and drizzle over cooled cookies.
Last Step: Please leave a rating and comment letting us know how you liked this recipe! This helps our business to thrive and continue providing free, high-quality recipes for you.
Nutrition
Did You Make This?
Leave a comment & rating below or tag
@flavest on social media!
Categories:
You might also like...

Glazed Apple Cider Donuts
Warm-spiced apple cider donuts with tender apple bits and a glossy cider glaze, fried crisp and irresistibly cozy for fall.

Slow Cooker Pork Pot Roast
All-day slow cooking turns pork shoulder, potatoes, and carrots into a tender, savory classic with a rich homemade gravy everyone will love.

Cheesy Hamburger Potato Casserole
Tender layers of Yukon gold potatoes with seasoned beef in a creamy, cheddar sauce, baked until bubbly and irresistibly comforting.
Did You Make This?
Leave a comment & rating below or tag @flavest on social media!
Rate This Recipe
Share This Recipe
Enjoyed this recipe? Share it with friends and family, and don't forget to leave a review!
Comments (1)
This recipe looks amazing! Can't wait to try it.
Comments are stored locally in your browser. Server comments are displayed alongside your local comments.

Hi, I'm Maria!
What's Popular

30-Minute Meals!
Join to receive our email series which contains a round-up of some of our quick and easy family favorite recipes.