
>>

Colorful bell peppers filled with creamy cheese, shredded chicken, and zesty salsa—an easy, family-friendly twist on taco night.
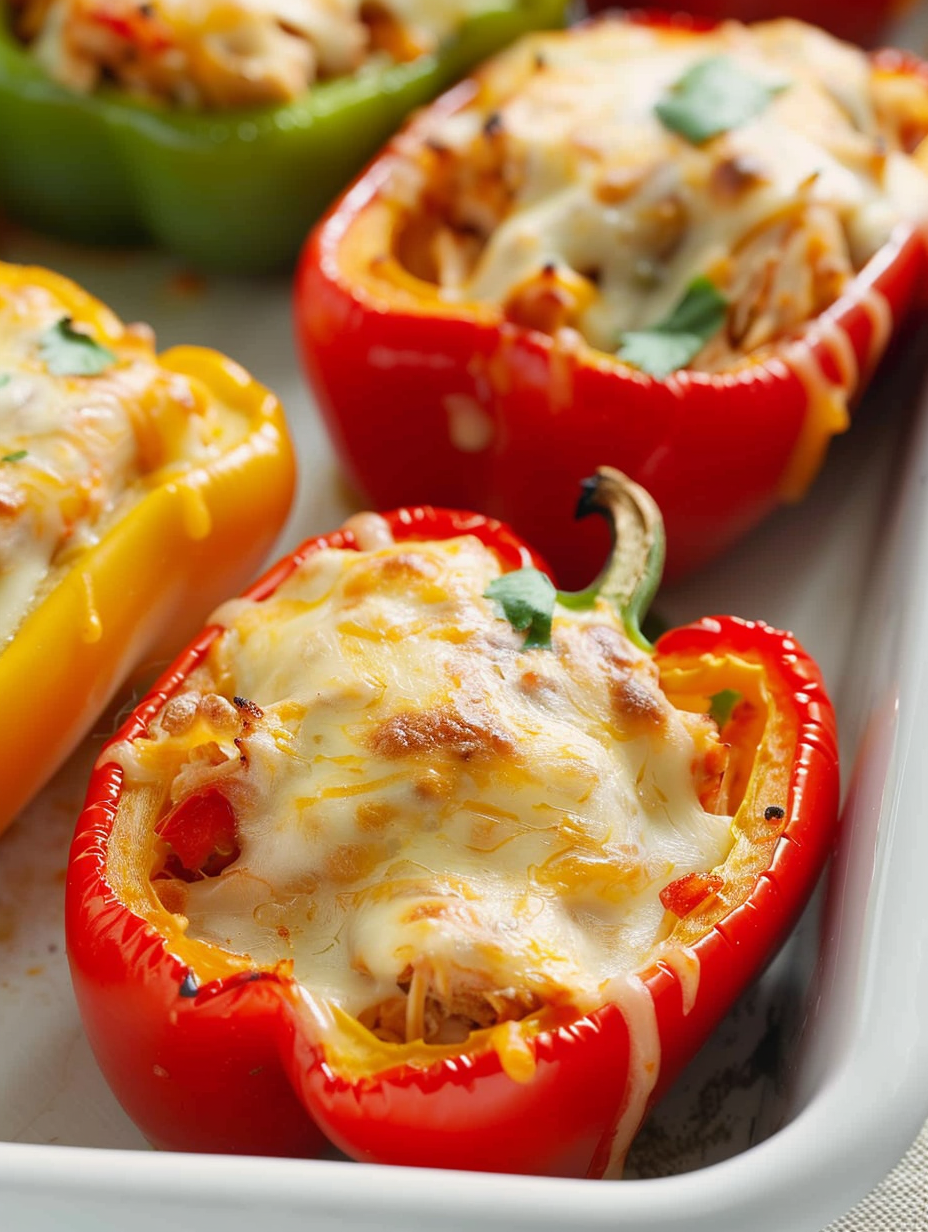
This recipe for chicken stuffed bell peppers has been one of my go-to solutions for busy weeknights since I first threw it together on a whim. I discovered it during a frantic week of after-school activities and late meetings when I needed something quick, comforting, and loved by everyone at the table. The contrast between the slightly crisp roasted pepper, the creamy cream cheese base, and the savory, spiced chicken filling creates a bite that always feels festive even when it's on the simplest of evenings.
I love how adaptable these peppers are: they travel well from the oven to a picnic blanket, they reheat beautifully for leftovers, and they tuck easily into a meal plan when I need to stretch a rotisserie bird or Sunday-roasted chicken into several dinners. The texture is a standout—the peppers soften without becoming mushy, and the filling remains creamy and cohesive thanks to the softened cream cheese and melty shredded cheese. Every family gathering where I bring these, someone asks for the recipe, and more often than not the peppers disappear before I have a chance to grab a second serving.
In my kitchen this dish became a staple after I used up a leftover roast chicken; my kids declared it a new taco night favorite and my partner loved that it felt like a lighter alternative to stuffed pasta or heavy casseroles. Over time I've learned small tricks—like softening the cream cheese and spraying the underside of the foil—to keep the top cheese from sticking and to achieve an evenly baked pepper every time.
My favorite thing about this dish is how it stretches a small amount of rotisserie chicken into a memorable meal. At potlucks these peppers always disappear first because they look festive and hold together well on a buffet line. One winter evening I brought a pan to a volunteer dinner and returned home with an empty dish and a request to share the recipe with three different families—proof that simple comfort food travels well.
Refrigerate leftovers within two hours of baking. Place cooled peppers in a single layer in an airtight container or shallow baking dish covered tightly with plastic wrap to retain moisture. For freezing, arrange peppers in a freezer-safe dish or tray, cover with parchment, then foil, and label with the date. To reheat from chilled, bake at 350°F until warmed through (about 15–20 minutes). From frozen, thaw overnight in the refrigerator and reheat as above. Reheating in a covered dish prevents the peppers from drying out; add a splash of salsa if the filling seems dry.
Want a lighter version? Use reduced-fat cream cheese and low-fat shredded cheese, or swap cream cheese for a mixture of ricotta and Greek yogurt (1:1 ratio) for a tangy, lower-fat filling—expect a slightly looser texture. For dairy-free needs, use dairy-free cream cheese and shredded plant-based cheese; be aware melt and flavor will differ slightly. Swap chicken for cooked turkey or cooked lentils for a vegetarian twist—if using lentils, increase the seasonings and add a beaten egg or 1/4 cup of breadcrumbs to help bind the filling.
Serve these alongside a crisp green salad dressed with lime vinaigrette and a side of cilantro-lime rice or black beans for a full meal. Garnish with chopped cilantro, sliced green onions, a dollop of sour cream (or Greek yogurt), and a squeeze of fresh lime to brighten the flavors. For a party, set up a toppings bar with extra salsa, pickled jalapeños, avocado slices, and tortilla chips so guests can customize each pepper.
Stuffing vegetables is a global technique—bell peppers, tomatoes, and grape leaves all lend themselves to filled preparations. These particular peppers borrow flavor profiles from Mexican-inspired taco fillings: the use of taco seasoning, salsa, and shredded cheese melds classic Tex-Mex tastes with a straightforward American casserole approach. While not a traditional regional dish, it’s an example of how comfort cooking adapts cultural flavors into handy, family-friendly formats.
In summer, use freshly roasted or grilled peppers for a smoky note and swap salsa for a fresh pico de gallo. In autumn and winter, add a pinch of smoked paprika and swap sweet peppers for poblano for a deeper, earthier flavor. For holiday gatherings, dress the peppers up by topping them with a lightly spiced corn relish and a sprinkle of toasted pumpkin seeds for crunch.
Make the filling 1–2 days ahead and store it in a covered container. Assemble the peppers and cover them in the baking dish; keep refrigerated until 30–45 minutes before baking to take off the chill. If preparing for a freezer meal, assemble completely, wrap tightly with foil and freeze. Bake from frozen after thawing overnight for an easy worknight dinner. Use a disposable aluminum pan when taking these to events for easy transport and reheating.
I once taught this recipe in a neighborhood cooking night and watched as a non-cook who had been nervous about baking felt confident after seeing how simply everything came together. Families report similar wins: picky eaters who dislike visible bits of vegetables will often accept the softened pepper when it’s stuffed and cheesy. One reader wrote that this dish convinced her teenager to try peppers for the first time—small victories that keep me sharing this recipe.
These stuffed peppers are a reminder that simple ingredients, a few helpful tricks, and a little planning can turn leftover chicken into a meal that feels thoughtful and festive. Give them a try on your next taco night or busy week—then make the recipe your own.
Soften the cream cheese at room temperature for smoother blending and a creamier filling.
Spray the underside of the foil before covering the baking dish to prevent melted cheese from sticking.
If the salsa seems watery, drain a little before mixing to keep the filling from becoming soupy.
Use a rotisserie chicken to save time and add extra flavor with minimal prep.
This nourishing chicken stuffed bell peppers recipe is sure to be a staple in your kitchen. Enjoy every moist, high protein slice — it is perfect for breakfast or as a wholesome snack any time.
This Chicken Stuffed Bell Peppers recipe makes perfectly juicy, tender, and flavorful steak every time! Serve with potatoes and a side salad for an unforgettable dinner in under 30 minutes.
Preheat the oven to 350°F. Spray a 9 x 13-inch casserole dish with non-stick spray and position a rack in the center of the oven for even heat distribution.
Wash peppers, remove stems, and cut each pepper lengthwise into halves. Remove seeds and membranes and arrange the halves cut-side up in the prepared dish so they sit snugly but not overlapping.
Place the softened 8 ounces of cream cheese in a large bowl and add 1 tablespoon of taco seasoning. Beat with an electric mixer until smooth to ensure a lump-free, creamy base for the filling.
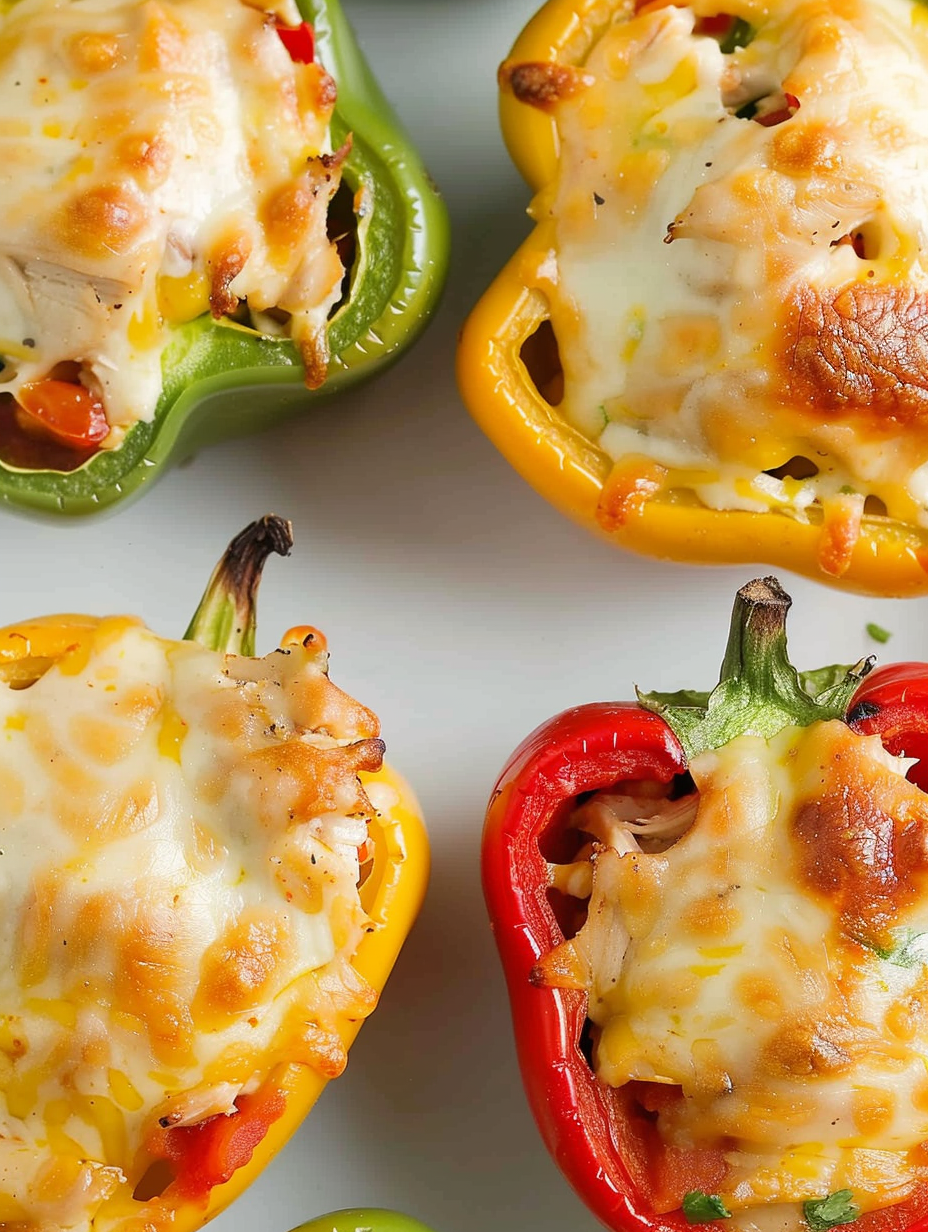
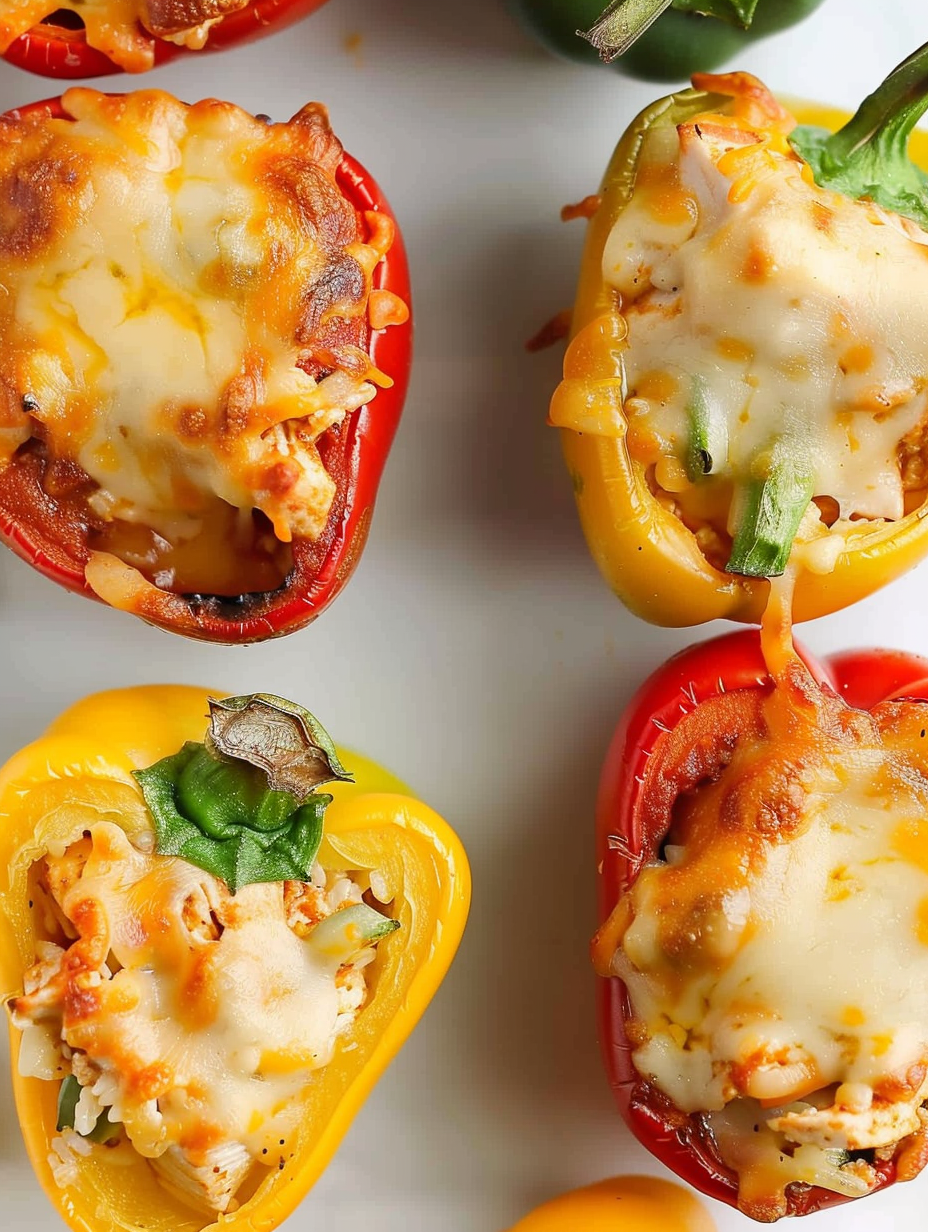
Stir in 1 cup of shredded cheese, 2 cups of shredded cooked chicken, and 1 cup of salsa until evenly combined. Taste and adjust seasoning if necessary; the mixture should be moist but not runny.
Spoon the chicken mixture into each pepper half, packing gently. Sprinkle the remaining 1 cup of shredded cheese over the stuffed peppers to create a melty top during baking.
Cover the dish tightly with foil (spray underside with non-stick spray to prevent sticking) and bake at 350°F for 30 minutes. Carefully remove the foil and serve warm; optionally broil 2–3 minutes to brown the cheese.
Last Step: Please leave a rating and comment letting us know how you liked this recipe! This helps our business to thrive and continue providing free, high-quality recipes for you.
Leave a comment & rating below or tag
@flavest on social media!

Warm-spiced apple cider donuts with tender apple bits and a glossy cider glaze, fried crisp and irresistibly cozy for fall.

All-day slow cooking turns pork shoulder, potatoes, and carrots into a tender, savory classic with a rich homemade gravy everyone will love.

Tender layers of Yukon gold potatoes with seasoned beef in a creamy, cheddar sauce, baked until bubbly and irresistibly comforting.
Leave a comment & rating below or tag @flavest on social media!
Enjoyed this recipe? Share it with friends and family, and don't forget to leave a review!
This recipe looks amazing! Can't wait to try it.
Comments are stored locally in your browser. Server comments are displayed alongside your local comments.

Join to receive our email series which contains a round-up of some of our quick and easy family favorite recipes.
