
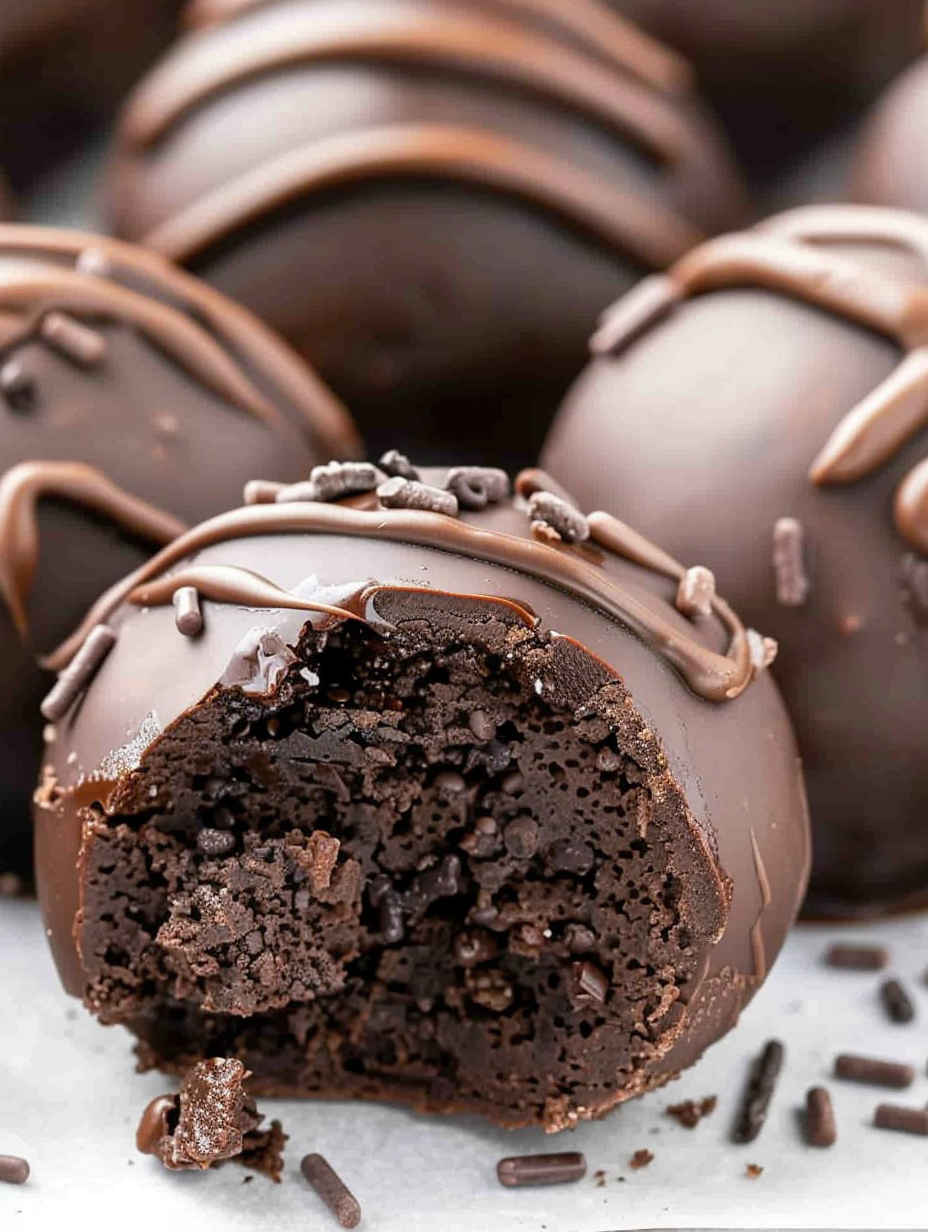
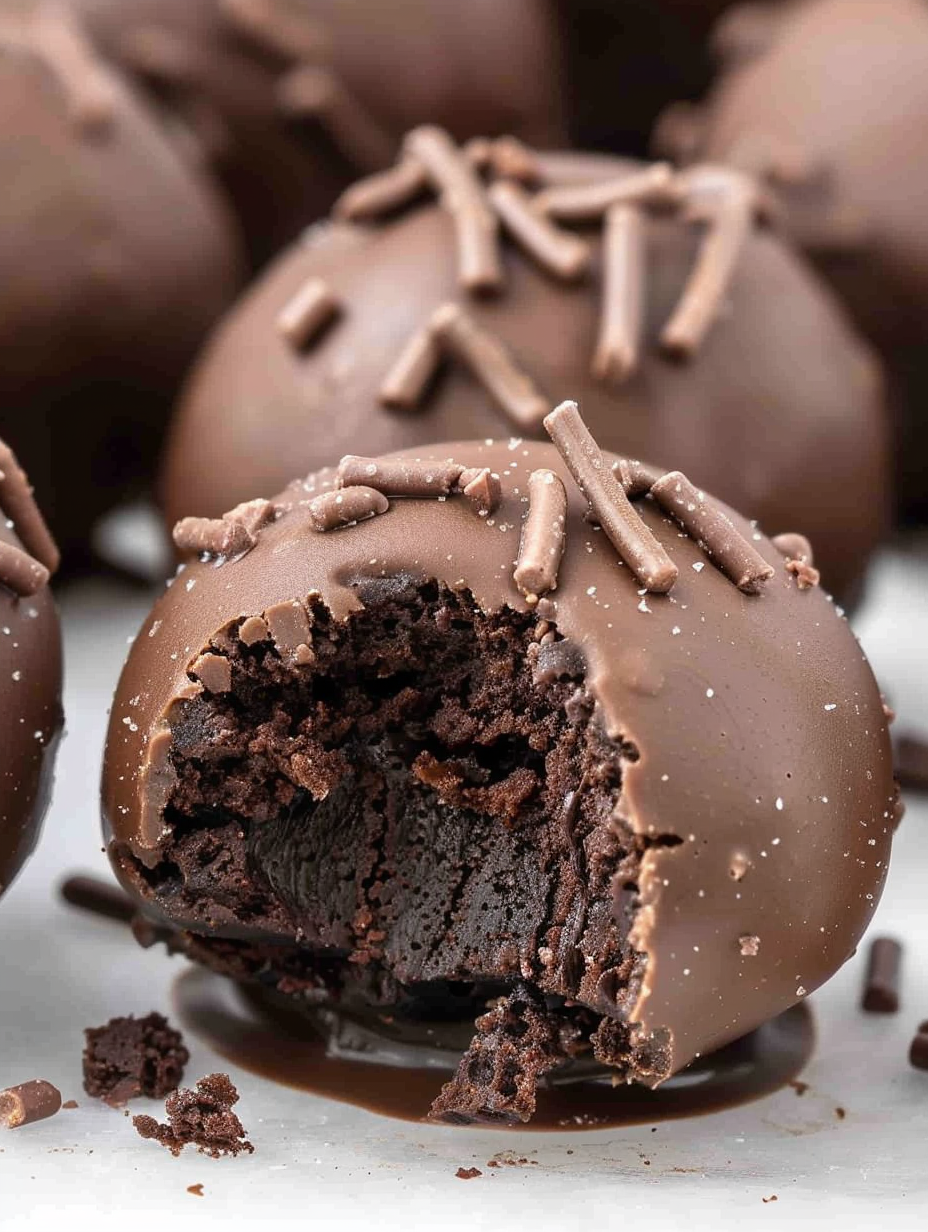
Chocolate Cheesecake Truffles

Decadent cheesecake-and-cake mix centers dipped in rich chocolate coating — perfect for potlucks, holiday trays, or an indulgent treat for yourself.
These chocolate cheesecake truffles are one of those small, irresistible bites that disappear before anyone has a chance to say what they are. I first made them for a holiday cookie swap after discovering that combining dry cake mix with cream cheese yields the creamiest, most flavorful filling with almost no effort. The contrast between the velvety cheesecake center and the crisp chocolate shell is what keeps people coming back for more. I remember watching guests close their eyes after the first bite and then asking for the recipe. They are that good.
I adapted this version over several seasons, learning a few tricks along the way. The crucial step is heat-treating the dry cake mix before adding it to the cream cheese to eliminate any concerns about uncooked flour. Also, letting the shaped centers rest well chilled helps the coating adhere cleanly and prevents cracks. When assembled, these truffles are indulgent but small, so they feel like a proper treat without going overboard. They are perfect for potlucks, family gatherings, or little boxes of gifts for friends.
Why You'll Love This Recipe
- Ready with minimal active time: about 10 minutes of hands-on work and then a 2 hour chill, so the truffles are mostly hands-off while they set.
- Uses pantry-friendly ingredients: a boxed chocolate fudge cake mix and a standard 8 ounce package of cream cheese make the filling rich without complicated shopping.
- Make-ahead friendly: the centers can sit refrigerated overnight before coating, which is great for busy hosts preparing desserts ahead of time.
- Crowd-pleasing texture: creamy, slightly tangy interior balanced by a crisp chocolate shell that gives a satisfying bite and elegant presentation.
- Easy to customize: swap coatings, add liqueurs or extracts, or roll in nuts or sprinkles for different looks and flavors.
From my experience serving these at neighborhood potlucks, they always vanish first. Friends comment on the familiar cheesecake tang enhanced by a chocolate cake undertone. The best part is how simple they are to scale up without losing quality.
Ingredients
- Chocolate fudge cake mix (1 box, 15.25 ounces): I use a standard boxed mix such as Duncan Hines or Betty Crocker for consistent chocolate flavor and sugar balance. Heat-treat the dry mix before use to make it safe and avoid any raw flour taste.
- Cream cheese (1 package, 8 ounces), softened: Full-fat cream cheese gives the richest, creamiest texture. Let it come to room temperature for at least 30 minutes so it whips smooth without lumps; I prefer Philadelphia brand for reliability.
- Chocolate almond bark (8 ounces, about 1 cup): This melts glossy and sets firm for a clean shell. You can substitute high-quality melting wafers or chopped chocolate with a tablespoon of vegetable shortening if needed.
- Chocolate sprinkles (2 tablespoons): These add a pretty finishing touch and a subtle crunch. Use nonpareils or jimmies depending on the texture you prefer.
Instructions
Heat-treat the cake mix: Pour the dry cake mix into a medium heat-safe bowl and microwave in two 30-second intervals, stirring after each interval to distribute heat evenly. This step brings the mix up to a safe temperature and improves the final texture. Let the mix cool completely to room temperature before combining with the cream cheese; this prevents the fat in the cheese from melting prematurely. Whip the cream cheese: Place the softened cream cheese into a medium bowl. Using a handheld mixer on medium-high, beat for 2 to 2 1/2 minutes until completely smooth and free of lumps. Scrape the sides with a rubber spatula to ensure even texture. Properly whipped cream cheese creates a silkier center and makes the dough easier to scoop. Combine with cake mix: Sprinkle the cooled, heat-treated cake mix over the whipped cream cheese. Mix on low to medium speed just until evenly incorporated. The mixture will form a thick, pliable dough that holds shape but is still soft to the touch. Avoid overmixing which can dry the mixture out. Chill the dough: Tightly cover the bowl with plastic wrap and refrigerate for at least 2 hours. Chilling firms the dough and improves scoopability. If you are planning ahead, you can chill overnight; the centers will set up nicely and be simpler to coat later. Shape the centers: Line a baking sheet with parchment paper. Use a 1 tablespoon scoop to portion the chilled dough and roll each portion between your palms into a smooth ball. Place the balls on the lined sheet, spacing them about 1/2 inch apart. If the dough becomes sticky, chill briefly until firm enough to handle. Melt the coating: Place the chocolate almond bark in a microwave-safe bowl and heat in 30-second intervals, stirring between each, until fully melted and glossy. Do not overheat; stop and stir frequently to avoid seizing. A smooth shining coating yields a crisp shell. Coat the truffles: Using a fork, dip each cheesecake ball into the melted coating, tapping gently to remove excess. If bare spots appear, spoon a little coating over them. Transfer each coated ball back onto the parchment-lined sheet. Immediately sprinkle with chocolate sprinkles before the coating sets to ensure they adhere. Set and store: Return the coated truffles to the refrigerator until the shell is firm, about 15 to 30 minutes. For best texture, allow them to chill at least another hour before serving so the center is cool and firm. Store in an airtight container in the refrigerator for up to 5 days, or freeze for up to 3 months.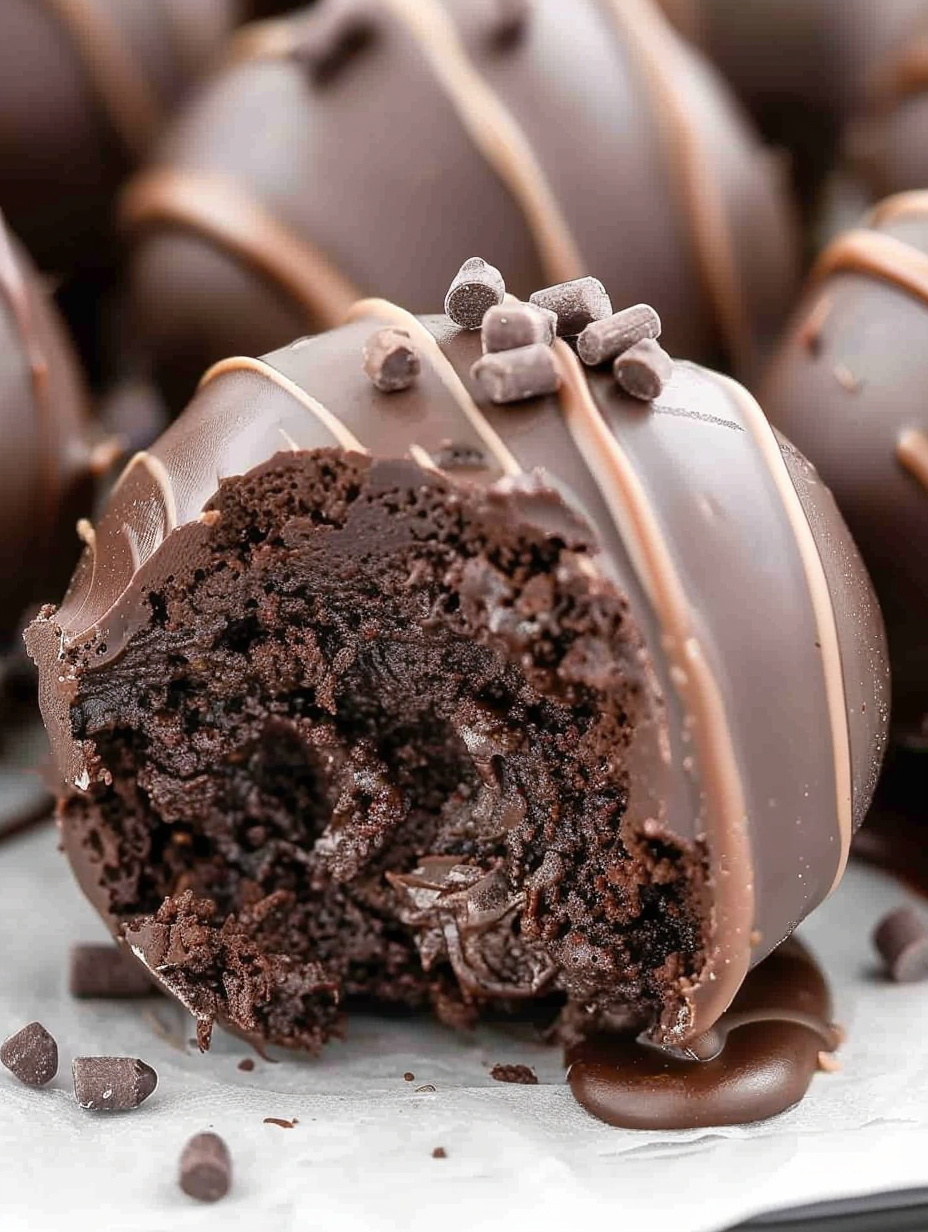
You Must Know
- Nutrition snapshot: roughly 120 calories per bite with about 18 grams of carbohydrates and 2 grams of protein. These are small indulgences best enjoyed in moderation.
- Storage: keep chilled in an airtight container. They maintain best texture for 3 to 5 days refrigerated and freeze well for up to 3 months when stored flat in a single layer inside a freezer-safe container.
- Safety: heat-treating the boxed cake mix is essential to avoid raw flour concerns and to improve finished flavor.
- Coating tips: if the chocolate shell cracks after refrigeration, allow the truffles to return to refrigerator temperature before serving and avoid rapid temperature changes.
My favorite part is how adaptable these truffles are. I once swapped the almond bark for white chocolate and added a teaspoon of instant espresso to the cake mix for a mocha version that stole the show. Friends love them because they look elegant but are incredibly simple to prepare.
Storage Tips
Store the finished truffles in an airtight container in a single layer separated with parchment or wax paper. Refrigerated they will stay fresh for up to five days. For longer storage, freeze them on a baking sheet until solid, then layer them with parchment in a freezer-safe container for up to three months. Thaw in the refrigerator for several hours before serving. Avoid leaving them at room temperature more than two hours, especially in warm climates, to prevent softening of the center and sweating of the coating.
Ingredient Substitutions
If you prefer a different flavor profile, swap the chocolate fudge cake mix for devil's food or a German chocolate mix. For a lighter chocolate shell, use high-quality melting wafers or tempered chocolate. Those avoiding dairy could try a nondairy cream cheese alternative, though texture and flavor will vary and may require additional chilling time to firm. To make them nut-free, check that the coating is free from almond content and choose sprinkles that are allergen-free. If you want a boozy variation, add 1 to 2 teaspoons of liqueur such as Kahlua or Grand Marnier to the dough, reducing cake mix slightly if the mixture becomes too loose.
Serving Suggestions
Serve these truffles on a decorative platter with small paper liners for an elegant presentation. They pair beautifully with strong coffee, espresso, or a dessert wine such as tawny port. For a party, alternate flavors by rolling some centers in finely chopped toasted nuts, cocoa powder, or shredded coconut before chilling and coating. They also make thoughtful edible gifts when arranged in small boxes tied with ribbon.
Cultural Background
Cheesecake truffles draw on two culinary traditions: the creamy, comforting profile of American-style cheesecake and the bite-sized, chocolate-dipped confection technique common in European patisserie. The idea of combining cake crumbs or cake mix with dairy to create no-bake centers is a classic American shortcut that gained popularity through community cookbooks and potluck culture, where simple, scalable desserts are prized.
Seasonal Adaptations
Adapt these truffles for the seasons by adjusting coatings and decorations. For the holidays, use red and green sprinkles or crushed candy canes. In autumn, add 1/2 teaspoon ground cinnamon and a pinch of nutmeg to the cake mix and top with a dusting of crushed gingersnap crumbs. For spring celebrations, dip in white chocolate and garnish with pastel sprinkles. These small changes make the same base feel festive throughout the year.
Meal Prep Tips
Make the centers up to two days in advance and keep chilled. This is a great way to prepare for gatherings: shape and refrigerate the centers, then coat on the day of the event for the freshest appearance. If you plan to freeze, freeze uncoated centers for up to a month and dip from frozen; the coating will set quickly on the cold surface. Use portion scoops for uniform size so the truffles look professional and finish evenly during coating.
These chocolate cheesecake truffles are proof that a few humble ingredients can produce something memorable. Whether you bring them to a party or keep them in your refrigerator for an indulgent weekend treat, they are reliable, crowd-pleasing, and easy to customize. I hope you enjoy making them and that they become a quick favorite in your dessert rotation.
Pro Tips
Heat-treat the boxed cake mix before use to eliminate any raw flour concerns and improve flavor.
Keep the cream cheese at room temperature for smoother mixing and a lump-free texture.
Chill the centers thoroughly before coating to reduce cracking and ensure a clean shell.
Use a 1 tablespoon scoop for uniform bites and even coating.
If coating cracks after chilling, allow truffles to return to refrigerator temperature and avoid rapid temperature changes.
This nourishing chocolate cheesecake truffles recipe is sure to be a staple in your kitchen. Enjoy every moist, high protein slice — it is perfect for breakfast or as a wholesome snack any time.
Tags
Recipe data validation failed
Please check the recipe data format. See console for details.
Categories:
You might also like...

Glazed Apple Cider Donuts
Warm-spiced apple cider donuts with tender apple bits and a glossy cider glaze, fried crisp and irresistibly cozy for fall.

Slow Cooker Pork Pot Roast
All-day slow cooking turns pork shoulder, potatoes, and carrots into a tender, savory classic with a rich homemade gravy everyone will love.

Cheesy Hamburger Potato Casserole
Tender layers of Yukon gold potatoes with seasoned beef in a creamy, cheddar sauce, baked until bubbly and irresistibly comforting.
Did You Make This?
Leave a comment & rating below or tag @flavest on social media!
Rate This Recipe
Share This Recipe
Enjoyed this recipe? Share it with friends and family, and don't forget to leave a review!
Comments (1)
This recipe looks amazing! Can't wait to try it.
Comments are stored locally in your browser. Server comments are displayed alongside your local comments.

Hi, I'm Maria!
What's Popular

30-Minute Meals!
Join to receive our email series which contains a round-up of some of our quick and easy family favorite recipes.