
Chocolate Cherry Thumbprint Cookies

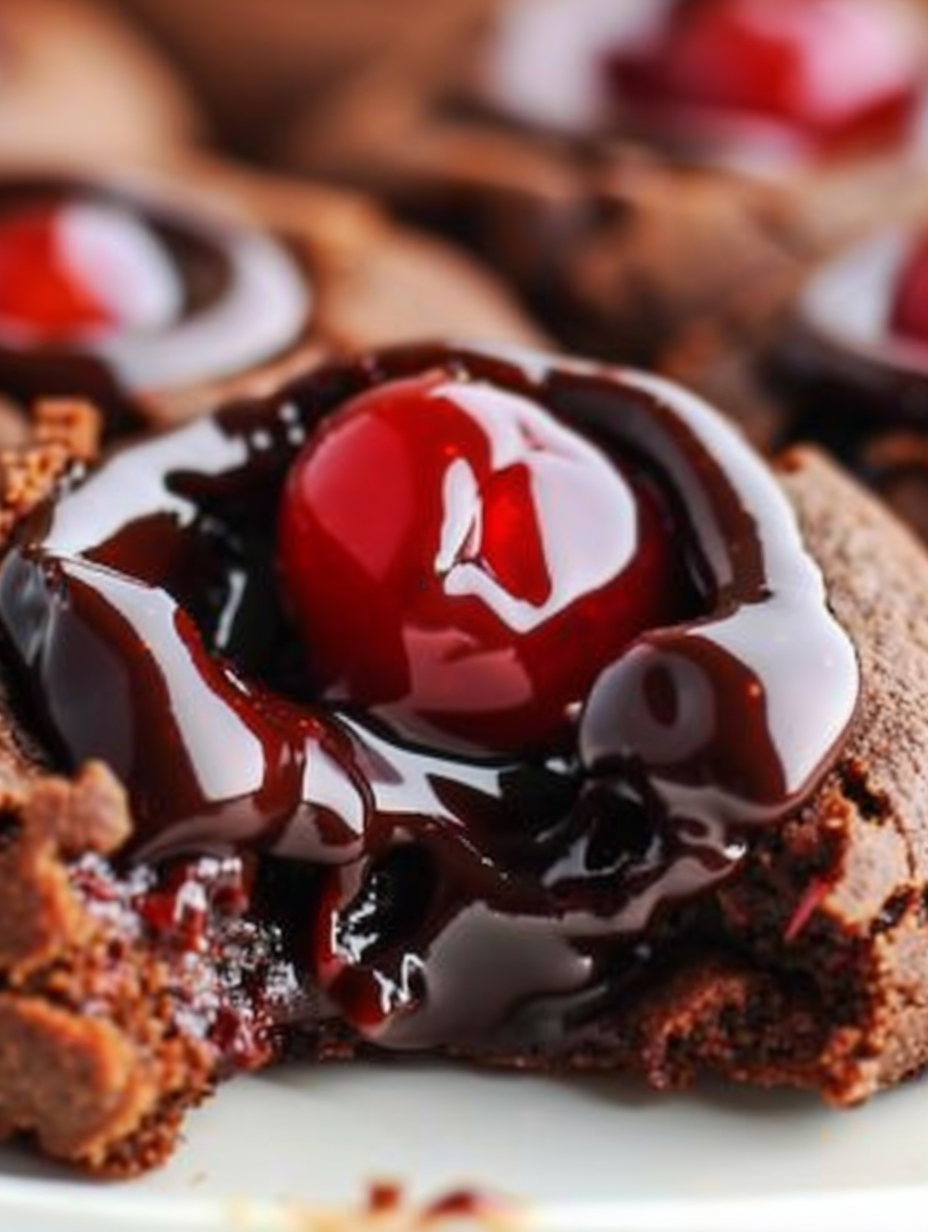
Soft, chewy chocolate cookies filled with bright cherry pie filling and finished with a glossy chocolate glaze — a nostalgic dessert that’s easy to make and impossible to resist.

These Chocolate Cherry Thumbprint cookies have been a staple on my baking table for as long as I can remember. I first made them for a neighborhood potluck on a rainy afternoon when I was craving something both comforting and festive. The resulting cookies were soft and chewy with a whisper of cocoa in the dough and a bright burst of cherry at the center. That contrast — a tender chocolate base and a sweet-tart cherry filling — makes them a hit at any gathering, and they quickly became my go-to cookie when I needed something pretty, portable, and crowd-pleasing.
What makes these especially memorable is their texture and the ritual of making the thumbprints. Pressing the center, shaping the little well and spooning cherries into each indentation is oddly calming, and the resulting cookie keeps both children and adults coming back for seconds. I use a glossy semi-sweet chocolate glaze to crown each cookie; it gives them a professional finish and balances the sweetness of the cherry filling. Over the years I’ve tweaked timing and technique until they produce consistent results: soft but set cookies with a rich chocolate flavor and a jammy cherry center.
Why You'll Love This Recipe
- Perfect balance of textures: a soft, tender base from creamed butter and sugar with a slight chew from brown sugar and the tangy burst of cherry pie filling at the center.
- Quick to make: active prep time is about 15 minutes and baking takes only 9 to 10 minutes, so you can have a batch ready in under 30 minutes from start to finish.
- Uses pantry-friendly ingredients: you likely already have flour, cocoa, sugars, and vanilla; the cherry pie filling and chocolate chips are easy additions for a show-stopping finish.
- Make-ahead friendly: dough can be chilled up to 48 hours for a more developed flavor, or frozen for longer storage, and the cookies reheat wonderfully for a warm treat.
- Family-pleasing and versatile: great for holidays, bake sales, or an everyday dessert — bright enough for celebrations yet simple enough for weeknight baking.
- Glaze option gives a bakery-style look: the semi-sweet chocolate glaze balances the sweetness of the cherries and provides a glossy, long-lasting finish.
Personally, I remember serving these at a winter cookie swap where neighbors kept asking for the recipe. Seeing grown-ups smile when they bit into that cherry center reminded me why I bake: simple ingredients can create little moments of joy. My kids love helping press the thumbprints, and the faster they help, the quicker the cookies are gone.
Ingredients
- All-purpose Flour: 1 1/2 cups — Use a reliable brand and spoon the flour into the measuring cup then level off for accuracy. This creates the structure without making the cookies dense.
- Baking Soda & Baking Powder: 1/2 teaspoon baking soda and 1/2 teaspoon baking powder — Together they give the cookies a gentle lift while keeping them soft and slightly cakey in the center.
- Salt: 1/4 teaspoon — Enhances chocolate flavor and balances the sweetness.
- Unsweetened Cocoa Powder: 1/2 cup — Choose Dutch-processed for a deeper, rounder chocolate flavor or natural cocoa for bright cocoa notes; either works well here.
- Unsalted Butter: 1/2 cup (1 stick), softened — Creaming the butter with the sugars creates tiny air pockets that lead to a tender crumb; softened butter ensures even mixing.
- Granulated Sugar & Brown Sugar: 1/2 cup granulated and 1/2 cup packed brown sugar — Brown sugar adds chew and moisture thanks to its molasses content, while granulated sugar helps spread and crisp the edges slightly.
- Egg: 1 large — Binds the dough and adds moisture; room temperature egg blends more evenly.
- Vanilla Extract: 1 teaspoon — Adds warmth and depth to the chocolate base.
- Cherry Pie Filling: 1 can — Use a good-quality filling for the best texture and flavor; reserve about 3 cherries per cookie.
- Semi-sweet Chocolate Chips: 1 cup — Melted with butter and a touch of syrup and milk to create the shiny glaze that finishes the cookies.
- Glaze Butter, Corn Syrup & Milk: 2 tablespoons butter, 2 tablespoons light corn syrup, 3 tablespoons milk — These create a glossy, pourable glaze that sets with a lovely sheen.
Instructions
Dry Ingredients: In a medium bowl combine 1 1/2 cups all-purpose flour, 1/2 teaspoon baking soda, 1/2 teaspoon baking powder, 1/4 teaspoon salt and 1/2 cup unsweetened cocoa powder. Whisk until uniform so there are no lumps of cocoa. This ensures even distribution and prevents streaks of dry powder in the dough. Cream Butter and Sugars: In a separate large bowl, beat together 1/2 cup softened unsalted butter, 1/2 cup granulated sugar and 1/2 cup packed brown sugar until pale and slightly fluffy, about 2 to 3 minutes with a hand mixer or 1.5 minutes with a stand mixer. Add 1 large egg and 1 teaspoon vanilla and beat until combined. Proper creaming traps air for a tender bite. Combine Dough: Slowly add the dry ingredients to the creamed mixture in two additions, mixing on low until just combined. Overmixing develops gluten and will make the cookies tough. The dough should be soft but hold its shape when scooped. Shape Cookies: Scoop rounded tablespoons of dough and roll into balls. Place each on a parchment-lined baking sheet about 2 inches apart. Using your thumb, press a depression into the center of each ball, then press again across the original imprint to create a shallow X-shaped well. This provides a stable place for the cherry filling and prevents the dough from spreading into the cherries. Fill with Cherries: Spoon roughly three cherries from the pie filling into each indentation along with a small amount of syrup. Avoid overfilling to prevent spillover while baking. The fruit will warm and set in the center during the short bake time. Bake: Preheat the oven to 350°F. Bake the cookies for 9 to 10 minutes, just until the edges are set and the centers look slightly underbaked. They will firm up as they cool; remove the sheet from the oven and let the cookies rest on the tray for 3 minutes before transferring to a wire rack. Prepare Glaze: While the cookies bake, melt 1 cup semi-sweet chocolate chips with 2 tablespoons butter, 2 tablespoons light corn syrup and 3 tablespoons milk in a heatproof bowl over simmering water or in short bursts in the microwave, stirring until smooth. The corn syrup gives the glaze a glossy finish and the milk thins it to a pourable consistency. Glaze and Cool: Once cookies are cooled to warm, spoon or drizzle a thin layer of the glossy chocolate glaze over each cookie, avoiding the cherries themselves if you prefer them visible. Let the glaze set at room temperature or pop the tray briefly in the fridge for 5 to 10 minutes to speed setting.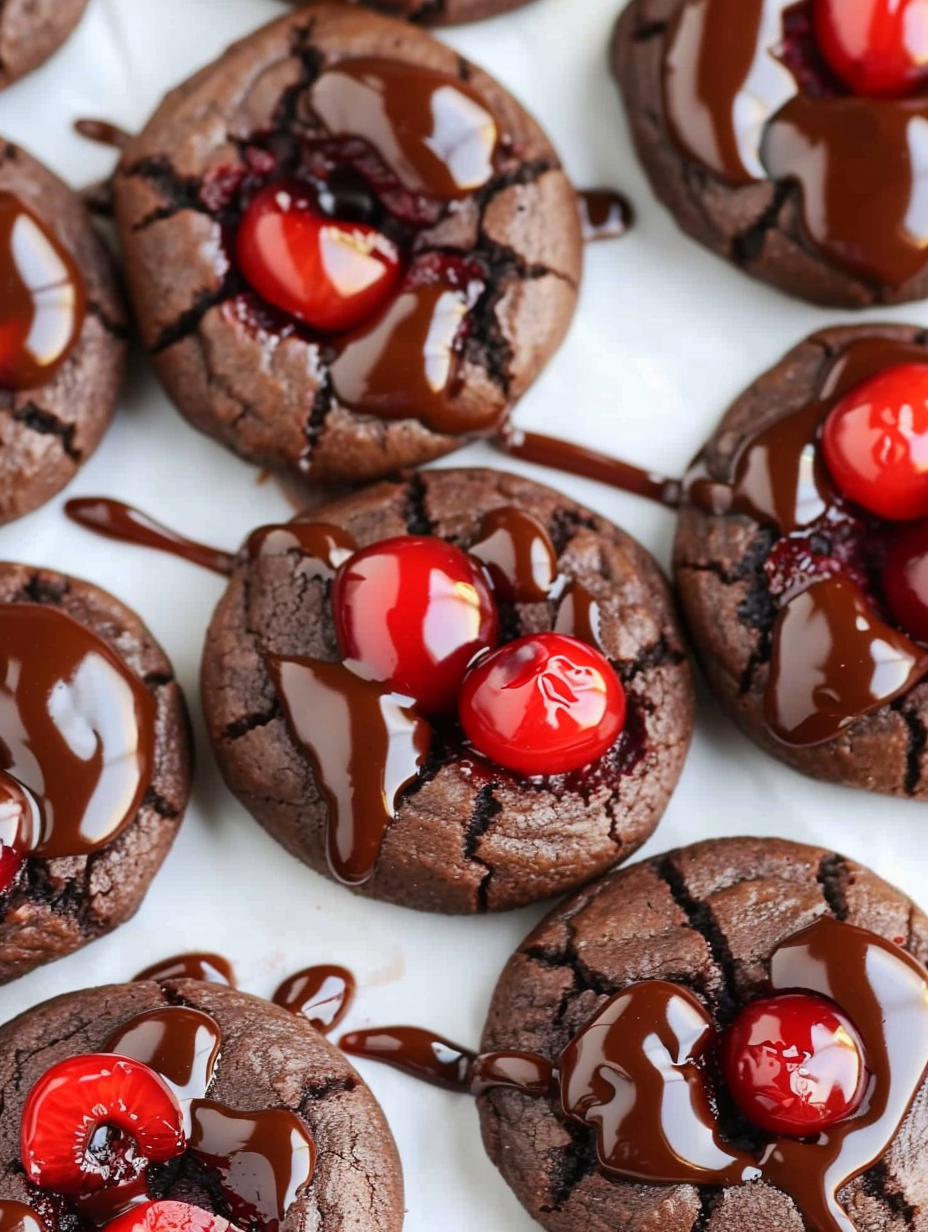
You Must Know
- These cookies freeze well for up to 3 months; freeze baked cookies in an airtight container with parchment between layers and thaw at room temperature.
- They are higher in carbohydrates due to the flour, sugars, and cherry filling; approximate energy is about 160 kcal per cookie when the batch yields 24.
- Store at room temperature for up to 3 days in a covered container; glaze will set best if cookies are fully cooled before stacking.
- The short bake time keeps centers soft; watch closely to avoid overbaking and losing that chewy quality.
My favorite part of making these is the sound of children giggling as they help press the thumbprints and the little rush of pride when someone asks for the recipe. One winter I made three batches for a school fundraiser and the box was emptied before the end of the sale — that’s the truest compliment in my book.
Storage Tips
To keep cookies fresh, store them in a single layer in an airtight container at room temperature for up to three days. If you must stack, place parchment between layers to protect the glaze. For longer storage, flash-freeze the cooled cookies on a sheet pan until firm, then transfer to a freezer-safe container for up to three months. When reheating frozen cookies, bring them to room temperature and then warm briefly in a 300°F oven for 4 to 6 minutes to refresh the texture and melt the glaze slightly.
Ingredient Substitutions
If you prefer a dairy-free version, substitute vegan butter and use a plant-based milk in the glaze, and swap semi-sweet chips for dairy-free chocolate. For a deeper chocolate flavor, use Dutch-processed cocoa and reduce the flour by one tablespoon to retain moisture. If you’d like a brighter berry note, use raspberry pie filling instead of cherry — you may want to lower added glaze sweetness slightly since some fillings are sweeter than others.
Serving Suggestions
Serve these on a festive platter with a dusting of powdered sugar or alongside vanilla ice cream for a plated dessert. They pair beautifully with strong coffee or a milky hot chocolate. For holiday gatherings, arrange them with other small cookies on a tiered tray; the glossy chocolate crowns make them a standout.
Cultural Background
The thumbprint cookie concept has roots in European baking traditions where small depressions were filled with jam or preserves. Over time, variations emerged worldwide using chocolate doughs, nut pastes, and seasonal fillings. The pairing of chocolate and cherry echoes classic European flavor pairings such as black forest cake, where dark chocolate and tart cherries create a balanced, nostalgic combination.
Seasonal Adaptations
In summer, swap canned cherry filling for a quick fresh cherry compote and reduce added glaze sweetness; in winter, add a pinch of cinnamon and a splash of rum or cherry liqueur to the filling for a warming note. For Valentine’s Day, use heart-shaped presses or sprinkle a small pinch of edible glitter on the glaze for a celebratory touch.
Meal Prep Tips
Make the dough one day ahead and refrigerate wrapped for up to 48 hours to deepen flavor. Alternatively, shape the balls and freeze on a tray then transfer to a bag; bake straight from frozen, adding 1 to 2 minutes to the bake time. Make the glaze while cookies cool and store it in the fridge; gently warm before using if it firms up.
These cookies have been a small family tradition for me — a reminder that simple acts in the kitchen can create lasting memories. I hope you make them your own and enjoy the playful process of pressing, filling, and glazing as much as I do.
Pro Tips
Measure flour by spooning into the cup and leveling off to avoid dense cookies.
Use room-temperature egg and butter for an even, smooth dough.
Spoon only a few cherries per cookie to prevent overflow during baking.
Chill shaped dough for 15 minutes if your kitchen is warm to reduce spreading.
Warm the glaze slightly if it firms before use; stir until smooth before glazing.
This nourishing chocolate cherry thumbprint cookies recipe is sure to be a staple in your kitchen. Enjoy every moist, high protein slice — it is perfect for breakfast or as a wholesome snack any time.
FAQs about Recipes
Can I make the dough ahead?
Yes. The dough can be refrigerated for up to 48 hours before baking. Chill longer for more developed flavor.
How long do these cookies keep?
Freeze baked cookies up to 3 months in an airtight container with parchment between layers; thaw at room temperature.
How do I melt the chocolate for the glaze without burning it?
Use a microwave-safe bowl and short 20-second bursts, stirring between intervals, or a double boiler to avoid scorching the chocolate.
Tags
Chocolate Cherry Thumbprint Cookies
This Chocolate Cherry Thumbprint Cookies recipe makes perfectly juicy, tender, and flavorful steak every time! Serve with potatoes and a side salad for an unforgettable dinner in under 30 minutes.
Ingredients
Cookie Dough
Filling & Glaze
Instructions
Combine dry ingredients
Whisk together flour, baking soda, baking powder, salt and cocoa powder in a medium bowl until uniform and lump-free.
Cream butter and sugars
Beat softened butter with granulated and brown sugar until pale and fluffy, then add egg and vanilla and mix until smooth.
Make the dough
Gradually add the dry mixture to the wet ingredients and mix on low until just combined; avoid overmixing to keep cookies tender.
Shape and thumbprint
Scoop rounded tablespoons of dough, roll into balls, and press a shallow X-shaped indentation in the center using your thumb.
Fill with cherries
Spoon about three cherries and a little syrup from the pie filling into each indentation, taking care not to overfill.
Bake
Bake at 350°F for 9 to 10 minutes until edges are set; allow to rest on the baking sheet 3 minutes before transferring to a cooling rack.
Prepare and apply glaze
Melt chocolate chips with butter, corn syrup and milk until smooth. Drizzle or spoon over cooled cookies and let the glaze set.
Last Step: Please leave a rating and comment letting us know how you liked this recipe! This helps our business to thrive and continue providing free, high-quality recipes for you.
Nutrition
Did You Make This?
Leave a comment & rating below or tag
@flavest on social media!
Categories:
You might also like...

Glazed Apple Cider Donuts
Warm-spiced apple cider donuts with tender apple bits and a glossy cider glaze, fried crisp and irresistibly cozy for fall.

Slow Cooker Pork Pot Roast
All-day slow cooking turns pork shoulder, potatoes, and carrots into a tender, savory classic with a rich homemade gravy everyone will love.

Cheesy Hamburger Potato Casserole
Tender layers of Yukon gold potatoes with seasoned beef in a creamy, cheddar sauce, baked until bubbly and irresistibly comforting.
Did You Make This?
Leave a comment & rating below or tag @flavest on social media!
Rate This Recipe
Share This Recipe
Enjoyed this recipe? Share it with friends and family, and don't forget to leave a review!
Comments (1)
This recipe looks amazing! Can't wait to try it.
Comments are stored locally in your browser. Server comments are displayed alongside your local comments.

Hi, I'm Maria!
What's Popular

30-Minute Meals!
Join to receive our email series which contains a round-up of some of our quick and easy family favorite recipes.