
Classic Beef and Rice Stuffed Peppers

Hearty bell peppers filled with seasoned ground beef, tender rice, and tomato sauce. A weeknight favorite that freezes beautifully and feeds a crowd.
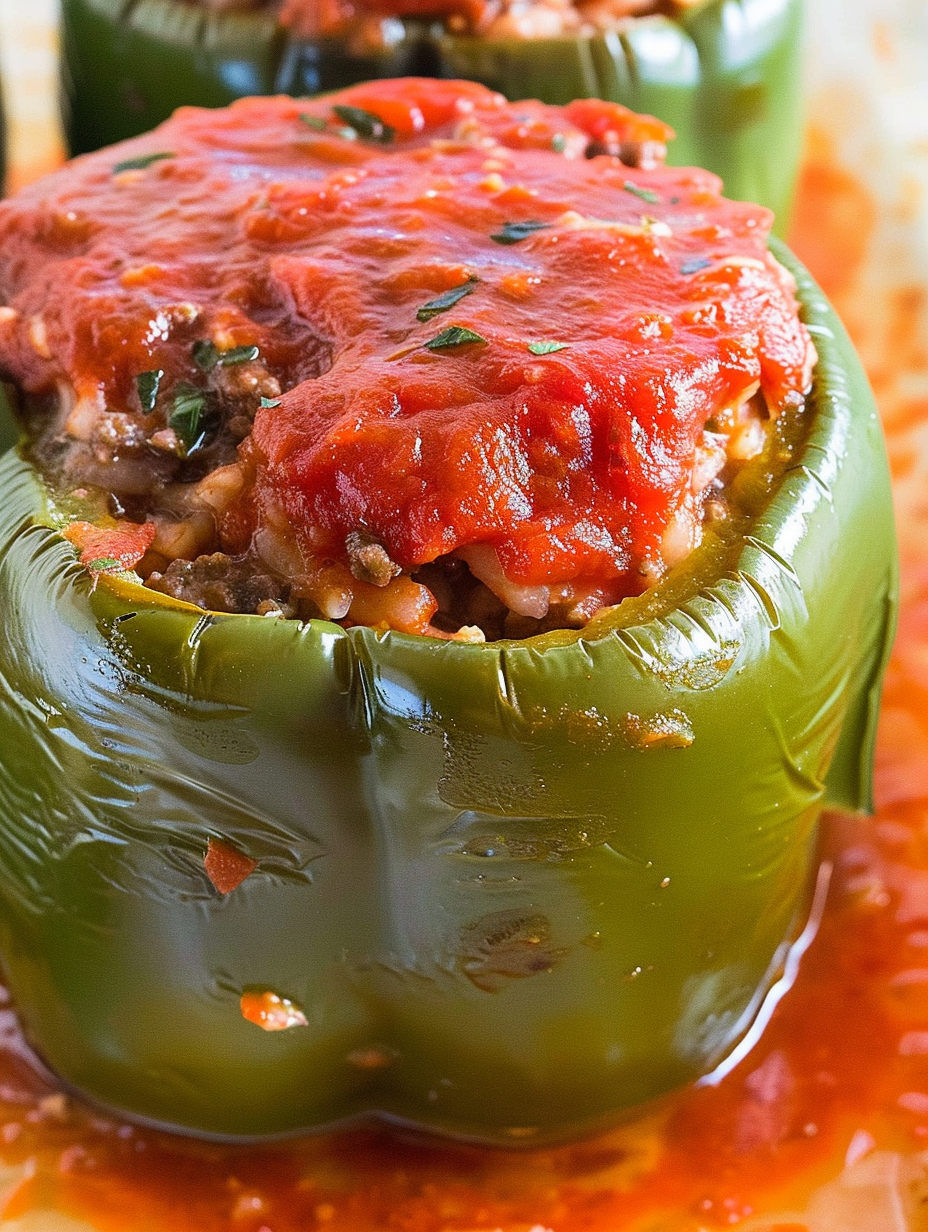
This stuffed peppers dish has been a weekday lifesaver at my house ever since I first pulled it out of the oven on a busy Monday evening. I discovered this combination while cleaning out the fridge one winter, with leftover cooked rice and a pound of ground beef that needed rescuing. The result was a comforting, saucy filling tucked into crisp-tender bell peppers that quickly became a family favorite. The contrast between the slightly charred pepper edges and the soft, well-seasoned filling is what keeps us coming back.
What makes this version special is its simplicity and adaptability. The filling is richly flavored yet not fussy: garlic, parsley, salt, and a touch of tomato sauce bind the beef and rice into a cohesive, spoonable mixture. I often make a double batch and freeze individual peppers for quick lunches or dinners. On special nights I add a sprinkle of cheese on top, but even without dairy these peppers are deeply satisfying. My kids grade these with enthusiastic napkin-waving and ask for the pepper tops, which we happily eat as little spicy lids.
Why You'll Love This Recipe
- Comforting and filling: each pepper is a complete meal with protein, carbohydrates, and vegetables all in one vessel.
- Weeknight-friendly: active prep is only about 20 minutes, so you can prep while the oven heats and dinner is ready in about an hour.
- Pantry and fridge staples: this uses ground beef, cooked rice, canned tomato sauce, and common seasonings—great for using leftovers.
- Freezer-friendly: assemble and freeze before the final bake for quick meals later; reheats well in the oven or microwave.
- Kid-approved and adaptable: leave plain for picky eaters or stir in diced vegetables and spices for adventurous palates.
- Minimal equipment and easy cleanup thanks to a single skillet and one casserole dish.
Personally, I love how forgiving this method is. The first time I made it I was short on time and used leftover rice from takeout; the texture blended perfectly with the beef and tomato sauce. My partner declared it restaurant-worthy, and the next week I added it to our meal rotation. It has since shown up at potlucks, family dinners, and as part of my freezer meal stash for busy weeks.
Ingredients
- Green bell peppers (6): Choose firm peppers with bright green skin and a flat base so they stand upright. Look for peppers about 3 to 4 inches tall; they hold 1/2 to 3/4 cup filling each. If you prefer milder flavor, use red or yellow peppers instead.
- Ground beef (2 pounds): I use 80/20 for a balance of flavor and moisture. Leaner beef will be drier and may need an extra splash of sauce. For a lighter version, swap for ground turkey.
- Granulated garlic and dried parsley: One teaspoon of each adds garlic depth and a hint of herb lift. Use a good brand of dried parsley for color; fresh parsley can be stirred in at the end for brightness.
- Kosher salt and black pepper: Season generously during browning. Kosher salt measures differently than table salt so adjust accordingly if substituting.
- Cooked rice (2 cups): Long grain white rice works well, but leftover short grain or brown rice can be used. Warm or room-temperature rice blends more easily into the hot meat.
- Tomato sauce (4 cups total): Split between the filling and the top. Use your favorite brand or homemade sauce; plain tomato sauce keeps the flavor classic and allows seasonings to shine.
Instructions
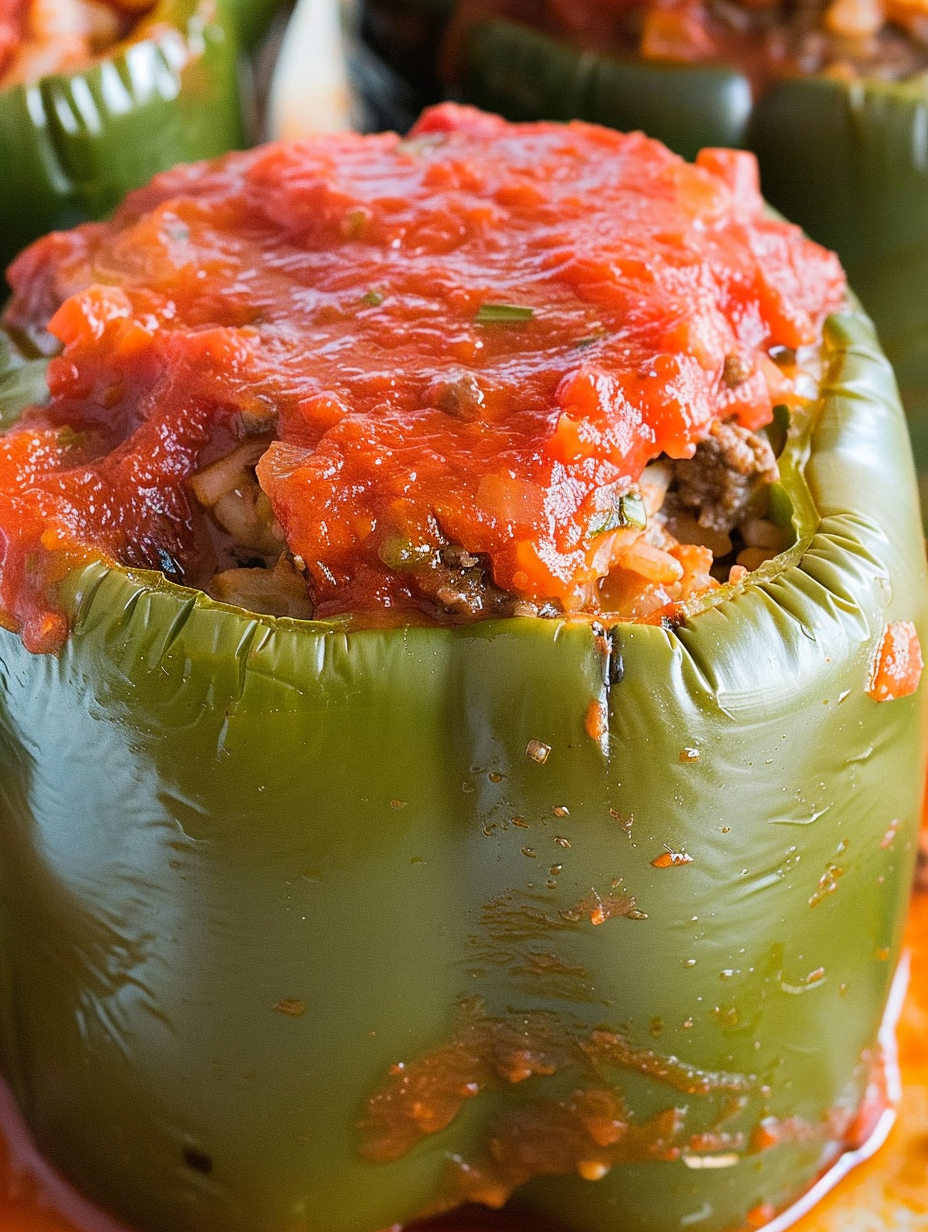
Prepare the peppers: Preheat the oven to 400 degrees Fahrenheit. Trim the tops of the peppers so the cut can be used as a lid and remove seeds and membranes. Arrange the hollowed peppers in a casserole dish or on a rimmed sheet pan with the cut side up. Roast the peppers for about 20 minutes to soften their walls and remove rawness so they will finish beautifully with the filling. Brown the beef: Heat a cast iron skillet or heavy-bottomed pan over medium-high heat. Add the ground beef and break it apart with a spatula. Sprinkle in 1 teaspoon granulated garlic, 1 teaspoon dried parsley, 1 teaspoon kosher salt, and 1/2 teaspoon ground pepper. Cook until no longer pink and beginning to brown, about 6 to 8 minutes. Drain excess fat if desired, leaving a tablespoon for flavor. Add rice and sauce: Lower heat to medium, stir in 1 cup of tomato sauce and 2 cups of cooked rice. Combine thoroughly so the rice absorbs some sauce and the mixture becomes cohesive. Taste and adjust salt and pepper. The filling should be moist but not soupy so it stays in the peppers. Assemble and bake: Carefully remove peppers from the oven and stuff each with the meat and rice mixture, packing gently but leaving room at the top for the lids. Replace the pepper tops. Pour the remaining 3 cups of tomato sauce over and around the peppers to create a saucy base. Cover tightly with foil and reduce oven temperature to 375 degrees Fahrenheit. Bake covered for 30 minutes, then remove foil and bake an additional 10 minutes to allow edges to brown slightly. Let cool 5 to 10 minutes before serving so the filling sets. Make the sauce (optional step): In a bowl, combine the remaining tomato sauce with 1 teaspoon granulated garlic and kosher salt to taste. Use this seasoned sauce to pour over peppers before baking or serve it on the side for extra sauciness.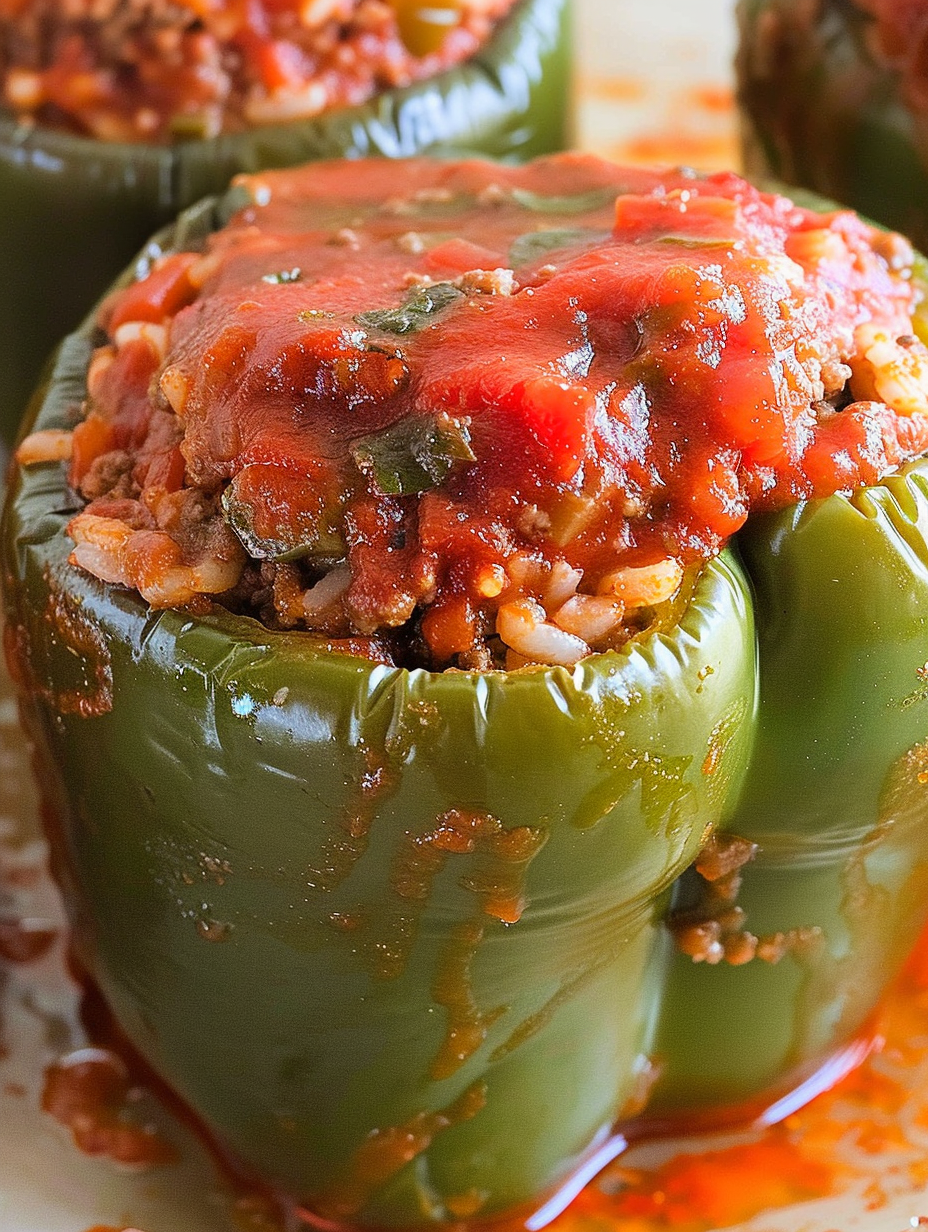
You Must Know
- High in protein: each serving delivers around 33 grams of protein, making it a filling choice for dinner.
- Freezer stability: assembled peppers can be frozen for up to 3 months if wrapped tightly and stored in an airtight container.
- Reheating: thawed peppers reheat best in a 350 degrees Fahrenheit oven for 20 to 30 minutes to preserve texture; microwaving is faster but softens the pepper further.
- Watch sodium: using canned tomato sauce and added kosher salt raises sodium; choose low-sodium sauce if you need to lower the salt content.
My favorite part is how these keep well and still taste homemade after freezing. I once sent a batch with my partner to a week-long work trip and came home to a chorus of compliments. The peppers hold their shape and flavor, and leftovers often taste better because the filling has time to meld. This recipe is reliable for feeding a family or bringing to gatherings where you want something hearty and familiar.
Storage Tips
Store cooled peppers in an airtight container in the refrigerator for up to 4 days. For freezing, cool completely, wrap each pepper individually in plastic wrap and then foil, or place in a single layer in a freezer-safe container with sauce around them; they will keep up to 3 months. Thaw overnight in the refrigerator before reheating. To reheat from frozen, place covered in a 350 degrees Fahrenheit oven for 45 to 60 minutes or until heated through. Look for bubbling sauce and a hot center as signs that reheating is complete.
Ingredient Substitutions
For a leaner option, substitute ground turkey or chicken 1:1 for the beef; increase the tomato sauce by 1/2 cup to add moisture. Use cooked quinoa instead of rice at a 1:1 volume ratio for extra protein and a nuttier texture. If you prefer vegetarian, remove the meat and add 1 can of drained black beans plus 1 cup cooked lentils; season more assertively with smoked paprika and cumin. For dairy lovers, stir 1/2 cup shredded cheese into the filling or sprinkle on top during the last 10 minutes of baking.
Serving Suggestions
Serve stuffed peppers with a crisp green salad and crusty bread or roasted potatoes for a complete plate. Garnish with chopped fresh parsley or basil for color and brightness. A dollop of plain Greek yogurt or sour cream on the side adds creaminess, while a simple arugula salad with lemon vinaigrette provides a peppery contrast. For a family-style meal, slice peppers in half and arrange on a platter topped with extra sauce so guests can spoon more over their portions.
Cultural Background
Stuffed vegetables are a global comfort food with regional twists. In the United States, bell peppers filled with beef and rice are a classic mid-20th century dish that evolved from European stuffed vegetable traditions. Variations appear across Mediterranean and Eastern European cuisines, often featuring local cheeses, grains, and spices. This American adaptation emphasizes tomato sauce and browned beef, reflecting pantry accessibility and a taste for hearty, saucy fillings.
Seasonal Adaptations
Swap pepper colors seasonally: in summer use red, orange, and yellow for sweetness and vibrant presentation, while green peppers in cooler months give a more assertive bite. Add roasted corn and diced zucchini in late summer for freshness. During the holidays stir in chopped dried cranberries and a pinch of cinnamon for a sweet-savory twist. For winter comfort, mix in cooked mushrooms and a splash of Worcestershire sauce for umami depth.
Meal Prep Tips
To save time, brown the beef and prepare the filling up to three days ahead; store in the refrigerator and stuff peppers when ready to bake. Alternatively, pre-roast the peppers and store them layered with paper towels to avoid condensation. Label frozen portions with date and reheating instructions. Use shallow, stackable freezer containers to store assembled peppers flat so they maintain shape. This approach gives you grab-and-bake dinners that feel homemade with minimal evening effort.
These stuffed peppers are straightforward, adaptable, and reliably comforting. Make them your own by switching proteins, grains, or seasonings, and enjoy how this simple dish becomes a memorable family staple with very little fuss.
Pro Tips
Use day-old or cooled rice to prevent the filling from becoming gummy; it mixes into the beef more evenly.
Par-roast the peppers first so they become tender without overcooking the filling during the final bake.
If freezing, undercook by 5 minutes before freezing so reheating finishes the bake without drying the peppers.
Taste and adjust seasoning after adding rice because rice absorbs salt and flavors from the sauce.
This nourishing classic beef and rice stuffed peppers recipe is sure to be a staple in your kitchen. Enjoy every moist, high protein slice — it is perfect for breakfast or as a wholesome snack any time.
Tags
Classic Beef and Rice Stuffed Peppers
This Classic Beef and Rice Stuffed Peppers recipe makes perfectly juicy, tender, and flavorful steak every time! Serve with potatoes and a side salad for an unforgettable dinner in under 30 minutes.
Ingredients
Stuffed Peppers
Tomato Sauce
Instructions
Prepare the peppers
Trim the tops of 6 peppers and remove seeds. Place peppers upright in a casserole dish or on a sheet pan and roast in a 400 degrees Fahrenheit oven for 20 minutes to soften.
Brown the beef
In a cast iron skillet over medium-high heat, brown 2 pounds ground beef with 1 teaspoon granulated garlic, 1 teaspoon dried parsley, 1 teaspoon kosher salt, and 1/2 teaspoon pepper until no longer pink, about 6 to 8 minutes. Drain excess fat if desired.
Combine filling
Reduce heat to medium, stir in 1 cup tomato sauce and 2 cups cooked rice. Mix until combined and adjust seasoning; the mixture should be moist but not runny.
Assemble and bake
Stuff each roasted pepper with the beef and rice mixture, replace pepper tops, pour remaining 3 cups tomato sauce over and around peppers, cover with foil, reduce oven to 375 degrees Fahrenheit, bake covered 30 minutes, then uncover and bake additional 10 minutes.
Make the seasoned sauce (optional)
In a bowl combine remaining tomato sauce with 1 teaspoon granulated garlic and kosher salt to taste. Pour over peppers before baking or serve on the side.
Last Step: Please leave a rating and comment letting us know how you liked this recipe! This helps our business to thrive and continue providing free, high-quality recipes for you.
Nutrition
Did You Make This?
Leave a comment & rating below or tag
@flavest on social media!
Categories:
You might also like...

Glazed Apple Cider Donuts
Warm-spiced apple cider donuts with tender apple bits and a glossy cider glaze, fried crisp and irresistibly cozy for fall.

Slow Cooker Pork Pot Roast
All-day slow cooking turns pork shoulder, potatoes, and carrots into a tender, savory classic with a rich homemade gravy everyone will love.

Cheesy Hamburger Potato Casserole
Tender layers of Yukon gold potatoes with seasoned beef in a creamy, cheddar sauce, baked until bubbly and irresistibly comforting.
Did You Make This?
Leave a comment & rating below or tag @flavest on social media!
Rate This Recipe
Share This Recipe
Enjoyed this recipe? Share it with friends and family, and don't forget to leave a review!
Comments (1)
This recipe looks amazing! Can't wait to try it.
Comments are stored locally in your browser. Server comments are displayed alongside your local comments.

Hi, I'm Maria!
What's Popular

30-Minute Meals!
Join to receive our email series which contains a round-up of some of our quick and easy family favorite recipes.