
>>

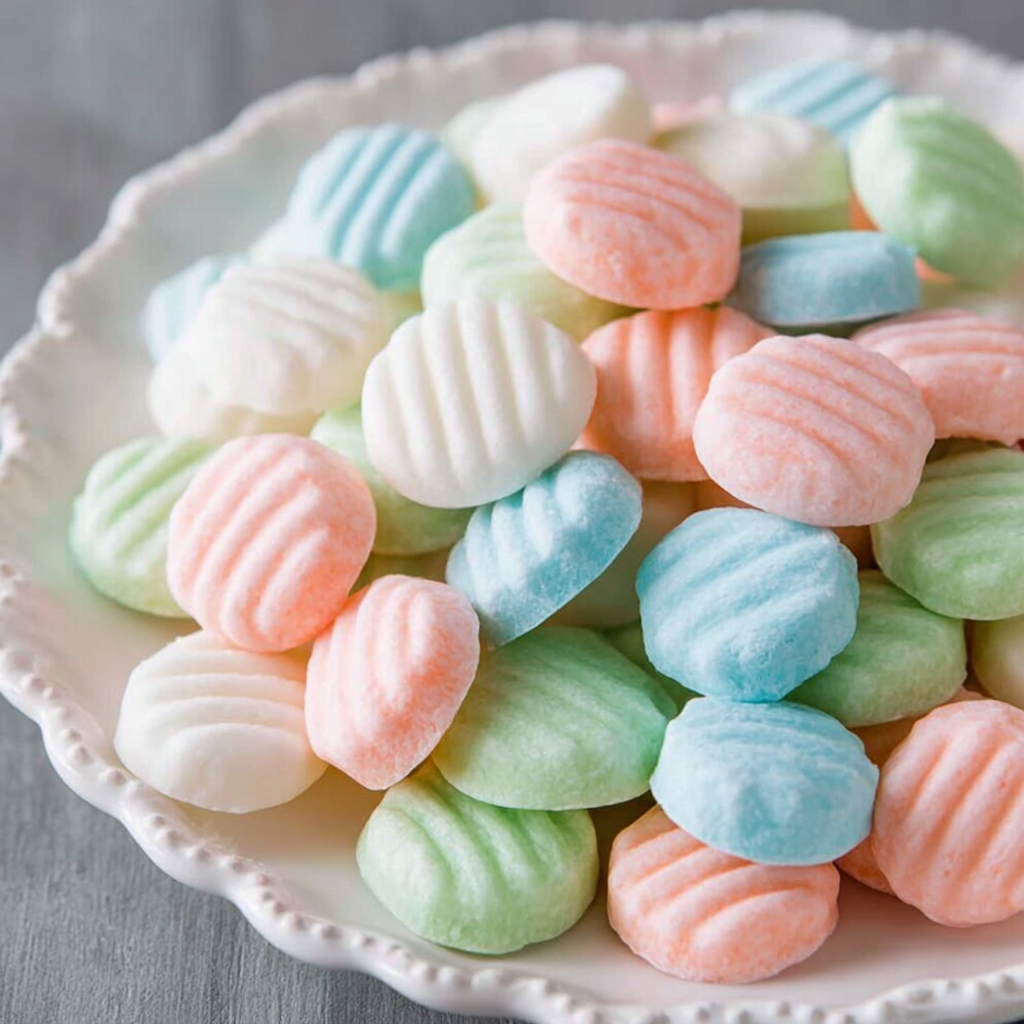
Sweet, nostalgic melt-in-your-mouth cream cheese mints made with only five ingredients — perfect for gifting and holiday trays.
This simple cream cheese mint recipe is one of those nostalgic treats that always brings people together. I first encountered a version of these at a neighborhood holiday exchange and immediately fell in love with the contrast between the pillowy, slightly tangy interior and the bright peppermint finish. I adapted the recipe over a few seasons to use full-fat cream cheese and a touch of butter for improved texture and a smoother mouthfeel. Now, whenever I bring a tin of these to a party, they disappear first.
They are incredibly forgiving: the dough is soft but easy to shape, and the powdered sugar gives them a delicate, melt-on-your-tongue quality. I learned that rolling until the seams disappear prevents cracking, and a light coating of powdered sugar on the fork prevents sticking when you press the tops. These candies are ideal for making ahead and gifting because they hold their shape at room temperature once set. They also offer a great canvas for color, so I like to make small batches in pastel hues for holidays and showers.
When I first perfected the rolling technique, I remember standing in my kitchen with a steaming mug of tea and a sheet pan full of pastel discs drying on the counter. My partner and I sampled one, then another, and by the time guests arrived the tin was already half-empty. They are always a crowd-pleaser, even with folks who usually avoid overly sweet confections.
My favorite aspect is how portable they are. I once made three batches for a charity bake sale and boxed them in small tins; buyers loved the pastel colors and the nostalgic flavor. The texture and bright mint always invite a second piece. Whenever I need a low-stress gift, these are my go-to because they travel well and look lovely stacked in a tin.
Store the candies in an airtight container layered between sheets of parchment to prevent sticking. Keep them refrigerated if you expect them to sit longer than a few days; they will keep up to one month in the fridge. For longer storage, freeze in a single layer on a parchment-lined tray until firm, then transfer to a freezer-safe bag or container for up to six months. Thaw in the refrigerator or at room temperature for about 30 minutes before serving to return them to a soft, melt-in-your-mouth texture.
If you need a dairy-free version, use a vegan cream cheese substitute and a plant-based butter; results will vary, so test a small batch first because texture depends on the stabilizers in vegan products. For a lower-sugar experiment, try replacing part of the powdered sugar with an erythritol-based powdered sweetener designed for baking, keeping in mind sweetness and texture will change. If peppermint extract is unavailable, use 1 teaspoon pure spearmint extract for a milder, slightly fruitier profile.
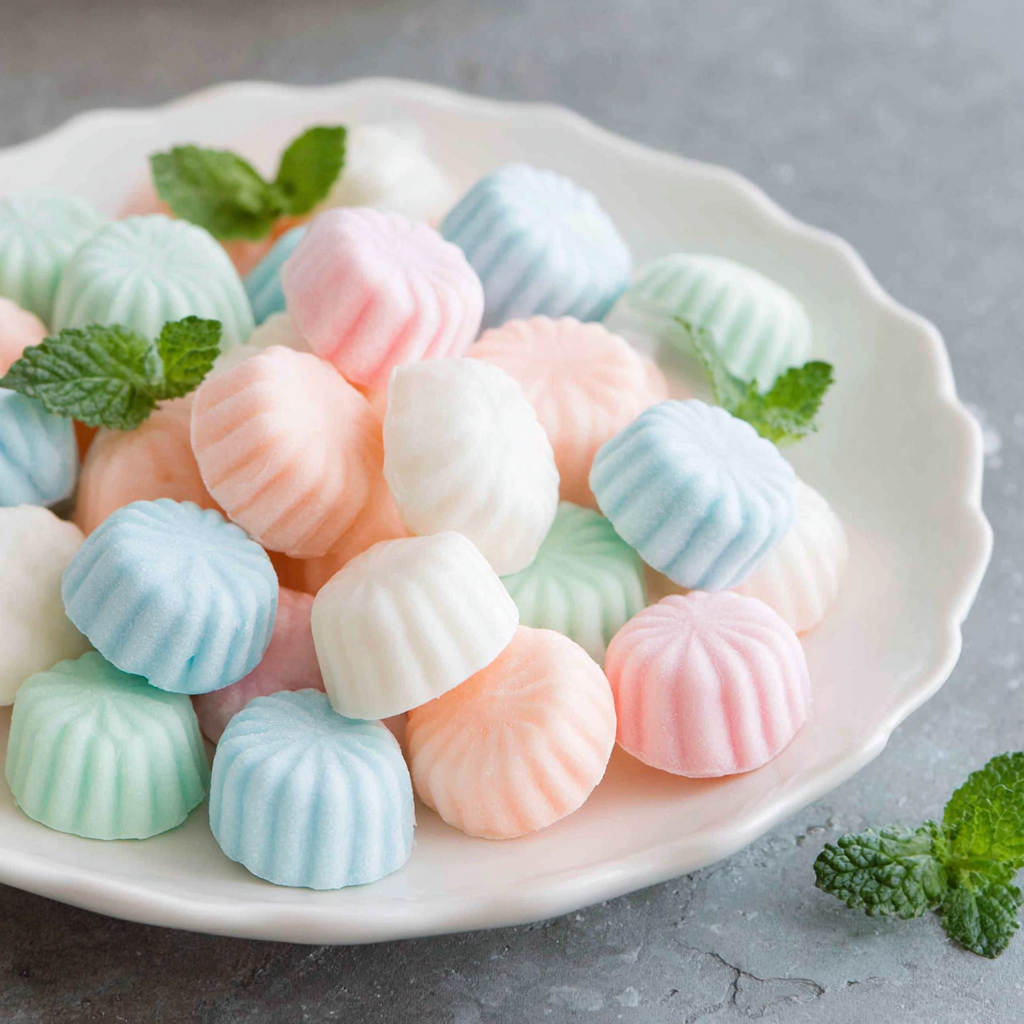
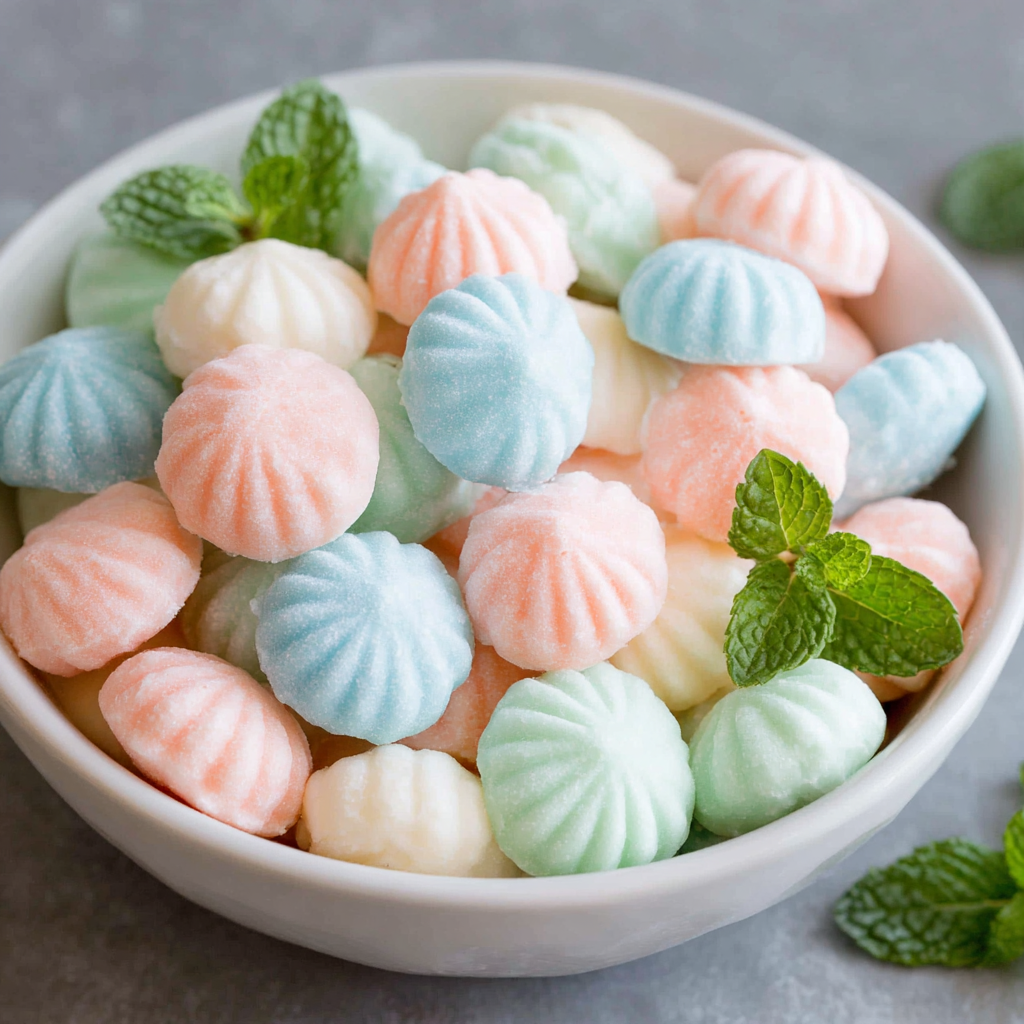
Present these on a small tiered tray, packaged in cellophane bags tied with ribbon, or layered in white tins for a classic look. They pair beautifully with strong black tea, coffee, or after-dinner espresso. For holiday platters, intersperse with dark chocolate truffles and candied nuts to create contrast in flavor and texture. Garnish with a tiny mint leaf when serving individually as a palate cleanser.
The concept of pressed sugar candies dates back centuries, with variations appearing in many European kitchens where sugar, flavoring, and fat were used to create small confections. The combination of cream cheese, powdered sugar, and peppermint likely emerged in mid-20th-century American home cooking as refined sugar became widely available and peppermint extract became a common pantry ingredient. These candies embody mid-century holiday traditions and the American love of small, hand-shaped sweets perfect for gifting.
For winter holidays, tint the candies red and green or keep them frosted white for an elegant look. In spring, use pastel colors for showers or Easter baskets. Add a drop of natural orange oil and a tiny sprinkle of colored sanding sugar for a summery twist. For Valentine’s Day, make them pink and use a heart-shaped press or a small cookie cutter immediately after pressing to create themed shapes.
Make the candies up to two weeks before you need them and store refrigerated; for gift-giving, freeze portions that you plan to mail. Use a small cookie scoop to keep sizes uniform and speed up production. To save time, prepare the dough in the stand mixer and divide into bowls to color in parallel while one tray dries. Label tins with production date and flavor if making multiple colored batches for gifting.
These cream cheese mints are simple, nostalgic, and endlessly adaptable. They reward a little patience with beautiful, melt-in-your-mouth treats that are perfect for sharing. Try a small test batch with different colors and extracts to find your favorite combination, and enjoy giving them as a thoughtful homemade gift.
Use full-fat block-style cream cheese for the smoothest texture; whipped varieties alter the consistency.
Add powdered sugar gradually and mix until silky to avoid a gritty texture in the finished candies.
Dip the fork in powdered sugar before pressing each mint to prevent sticking and to create a clean imprint.
Keep unused dough covered with plastic wrap to prevent drying while you roll other portions.
If tinting, start with less gel color than you think you need; gel is highly concentrated.
This nourishing cream cheese mints recipe is sure to be a staple in your kitchen. Enjoy every moist, high protein slice — it is perfect for breakfast or as a wholesome snack any time.
Let the candies dry at room temperature for at least 2 hours before stacking or storing. This helps them hold their shape and prevents sticking.
Yes. Freeze the candies in a single layer until firm, then transfer to a freezer-safe container for up to 6 months. Thaw in the refrigerator before serving.
This Cream Cheese Mints recipe makes perfectly juicy, tender, and flavorful steak every time! Serve with potatoes and a side salad for an unforgettable dinner in under 30 minutes.
In a stand mixer fitted with the paddle attachment, beat 8 ounces softened cream cheese and 2 tablespoons softened butter on medium speed until completely smooth, about 1 to 2 minutes. Scrape down the bowl as needed.
With the mixer on low, add 1/4 teaspoon fine sea salt and 2 cups powdered sugar. Mix until incorporated and the mixture begins to thicken.
Add 1 1/2 teaspoons peppermint extract. Add the remaining powdered sugar a heaping tablespoon at a time, letting it incorporate between additions. Mix an additional 1 to 2 minutes until silky and cohesive.
If using color, divide dough into small bowls and stir in gel color a drop at a time until desired shade is reached. Gel coloring is concentrated; start with less.
Working with about 1/4 of the dough at a time, scoop 1 teaspoon portions and roll into smooth balls. Place on parchment-lined sheet 2 inches apart. Dip a fork in powdered sugar and press to flatten the tops.
Let the candies dry at room temperature for at least 2 hours to set. Transfer to an airtight container and refrigerate for up to one month or freeze for up to six months.
Last Step: Please leave a rating and comment letting us know how you liked this recipe! This helps our business to thrive and continue providing free, high-quality recipes for you.
Leave a comment & rating below or tag
@flavest on social media!

Warm-spiced apple cider donuts with tender apple bits and a glossy cider glaze, fried crisp and irresistibly cozy for fall.

All-day slow cooking turns pork shoulder, potatoes, and carrots into a tender, savory classic with a rich homemade gravy everyone will love.

Tender layers of Yukon gold potatoes with seasoned beef in a creamy, cheddar sauce, baked until bubbly and irresistibly comforting.
Leave a comment & rating below or tag @flavest on social media!
Enjoyed this recipe? Share it with friends and family, and don't forget to leave a review!
This recipe looks amazing! Can't wait to try it.
Comments are stored locally in your browser. Server comments are displayed alongside your local comments.

Join to receive our email series which contains a round-up of some of our quick and easy family favorite recipes.
