
>>

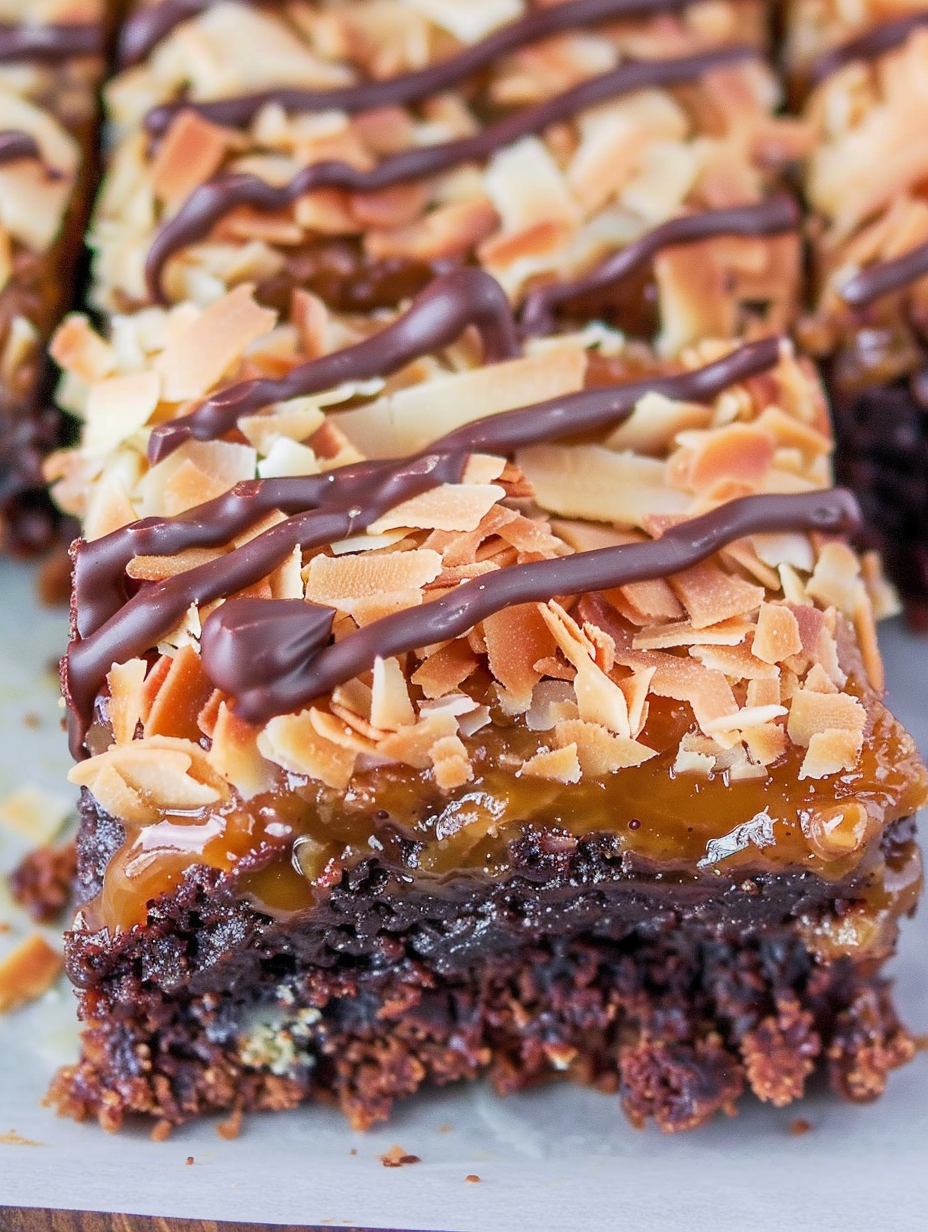
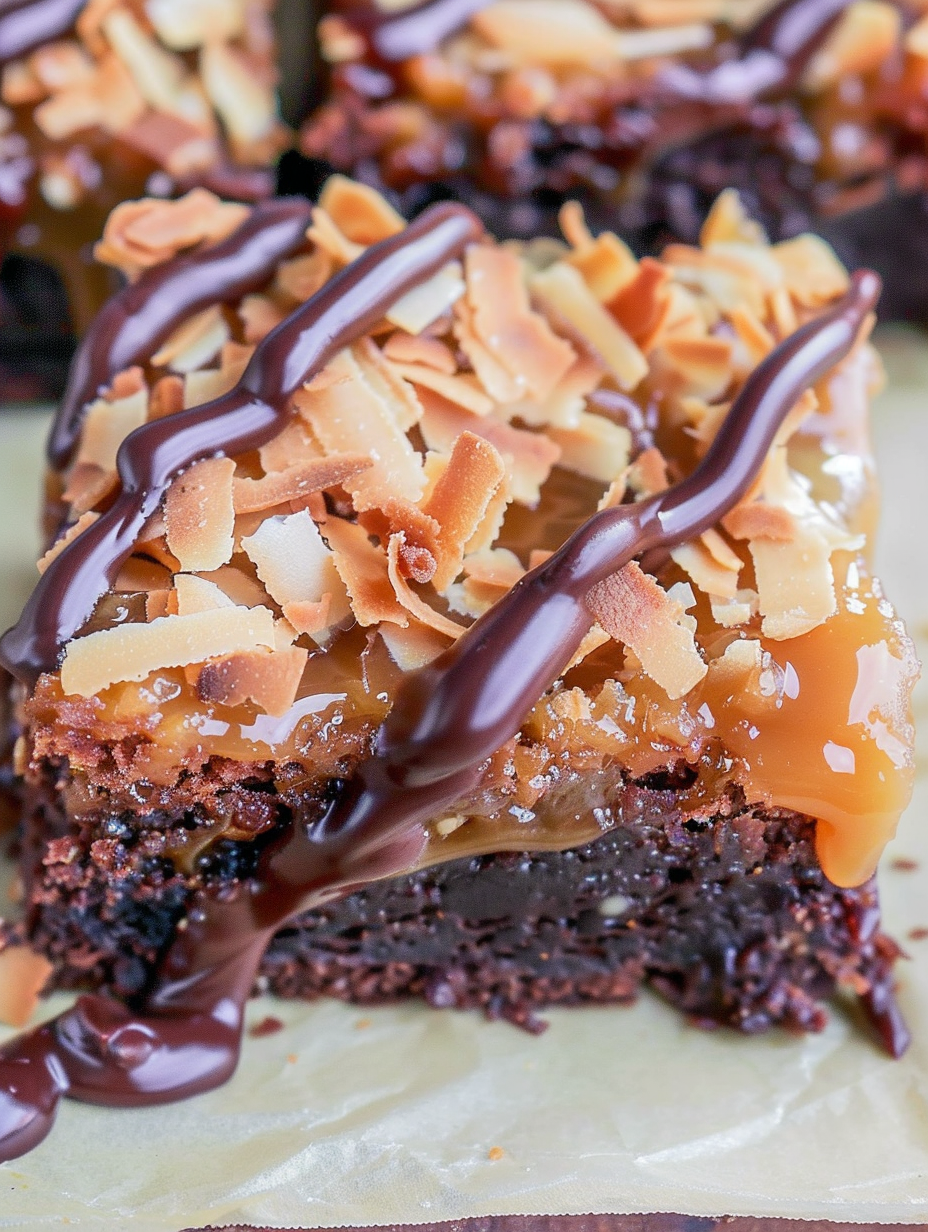
Boxed brownies upgraded with toasted shredded coconut, a caramel layer, and a melty chocolate drizzle — all the flavors of a Samoa cookie in a simple brownie.
These brownies started as a quick weeknight solution and became an instant family favorite the first time I made them. I love a good shortcut, and turning a boxed brownie mix into something that tastes homemade and indulgent is my kind of victory. The combination of a fudgy brownie base, toasted shredded coconut folded with warm caramel, and a glossy chocolate drizzle hits the same nostalgic notes as a Samoa cookie: sweet, crunchy, and utterly comforting. I first discovered this build when I wanted to celebrate a last-minute birthday with what we had on hand — one box mix, a bottle of caramel sauce, and a bag of shredded coconut. The result was so well received that it became my go-to dessert for potlucks and school events.
What makes these special is the contrast of textures and the simplicity of execution. The brownie layer stays soft and slightly dense while the coconut-caramel topping crisps at the edges and remains delightfully gooey toward the center. The final chocolate drizzle sets into thin ribbons that break with a satisfying snap. I remember serving these to neighbors after a rainy Saturday of yard work; everyone lingered for another square and asked for the recipe. If you appreciate a dessert that feels dressed-up but requires minimal time and equipment, these are worth keeping in your repertoire.
My family always asks for these at gatherings — my sister dubbed them "Samoa squares" the first time she tried them. I love hearing the little exclamations as people bite into the layers: the toasted coconut aroma is unmistakable, and the caramel almost steals the show. These bars have earned a spot in my rotation because they’re reliably good and forgiving to prepare.
My favorite thing about these is how portable they are — I’ve sent them to picnics, school bake sales, and office parties with consistently glowing feedback. One year I swapped to a gluten-free brownie mix for a dinner party and hardly anyone noticed the difference. The method adapts well to ingredient swaps without changing the joyful result.
Store leftovers in an airtight container in the refrigerator for up to 4 days to keep the caramel from becoming overly sticky and to maintain firm chocolate ribbons. For longer storage, wrap individual squares tightly in plastic wrap and freeze in a single layer on a baking sheet until solid, then transfer to a freezer-safe bag for up to 3 months. Reheat briefly at room temperature or 30 seconds in the microwave to take the chill off before serving; avoid extended microwaving which can soften the caramel too much.
If you need to adapt the recipe: use an equal-volume gluten-free boxed mix to keep the method identical, or swap sweetened coconut for unsweetened if you prefer less sugar — you may want to add an extra 2 tablespoons of caramel to balance sweetness. For dairy-free versions, select dairy-free chocolate chips and a plant-based caramel sauce; note that texture may vary slightly. To deepen chocolate intensity, use dark chocolate for the drizzle or stir 1/4 cup chopped dark chocolate into the brownie batter before baking.
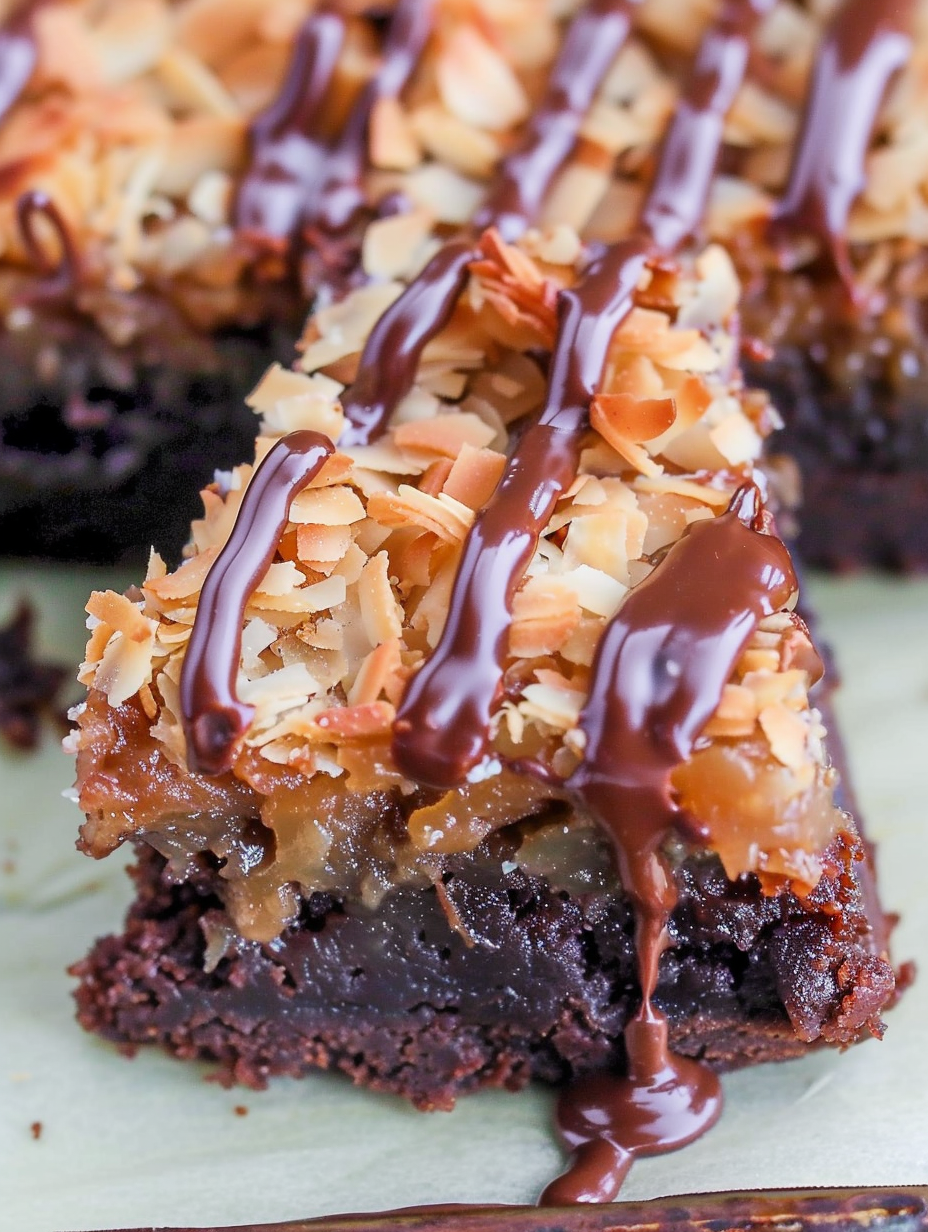
Serve squares slightly chilled or at cool room temperature alongside cold milk, coffee, or a scoop of vanilla ice cream for a truly indulgent experience. Garnish with a light dusting of flaky sea salt to heighten the chocolate and caramel contrast or top each square with a toasted coconut flake for an elegant presentation. These are perfect for potlucks, birthday parties, and holiday cookie swaps where a bar dessert is easy to share.
These bars are inspired by the Samoa cookie — a popular Girl Scout cookie featuring toasted coconut, caramel, and chocolate. The Samoa flavor profile has been widely adapted into brownies, cupcakes, and cheesecakes because its components pair naturally: sweet coconut, sticky caramel, and bittersweet chocolate. While not a traditional recipe from any single cuisine, these bars celebrate the layered dessert tradition of combining contrasting textures and flavors into a compact hand-held treat.
Make the brownie base a day ahead and refrigerate the pan wrapped tightly; assemble the toasted coconut and caramel topping the next day for the freshest texture. Alternatively, toast and store the coconut in an airtight container at room temperature for 2 days, then warm the caramel slightly when ready to combine. For travel, place parchment squares between layers in a container to prevent sticking and preserve presentation.
These brownies feel celebratory without a lot of fuss. The caramel-coconut layer turns boxed batter into something that tastes like you spent hours in the kitchen, and the method is forgiving enough to adapt on the fly. Share them warm with friends or chill for clean slices — either way they’re a reliable crowd favorite.
Toast coconut in a single even layer and stir constantly; coconut goes from golden to burnt quickly.
Warm caramel for 10–15 seconds in the microwave if it’s too thick to stir easily before combining with coconut.
Use a sharp knife warmed under hot water and dried between cuts for neat squares.
Chill the pan for at least 30 minutes so the caramel layer firms and slices cleanly.
This nourishing easy samoa brownies recipe is sure to be a staple in your kitchen. Enjoy every moist, high protein slice — it is perfect for breakfast or as a wholesome snack any time.
This Easy Samoa Brownies recipe makes perfectly juicy, tender, and flavorful steak every time! Serve with potatoes and a side salad for an unforgettable dinner in under 30 minutes.
Prepare and bake the boxed mix according to package directions in a greased or parchment-lined 9x13-inch pan. Bake until a toothpick inserted near the center comes out with a few moist crumbs. Cool on a wire rack while preparing the topping.
Spread shredded coconut on a parchment-lined baking sheet and toast in the oven for 3 to 5 minutes, stirring often, until evenly golden. Remove immediately to avoid burning and let cool slightly.
Transfer the warm toasted coconut to a bowl and stir in the caramel topping until evenly coated and spreadable. If caramel is too thick, warm it for 10–15 seconds to loosen.
Spoon the coconut-caramel mixture over the cooled brownie layer and smooth into an even layer with an offset spatula or the back of a spoon.
Melt semi-sweet chocolate chips until smooth. Transfer to a piping bag or zip-top bag with a small corner snipped and drizzle over the coconut layer in thin ribbons.
Refrigerate the assembled pan for at least 30 minutes so the topping firms. Use a sharp, warmed knife to cut into 16 squares and serve chilled or at cool room temperature.
Last Step: Please leave a rating and comment letting us know how you liked this recipe! This helps our business to thrive and continue providing free, high-quality recipes for you.
Leave a comment & rating below or tag
@flavest on social media!

Warm-spiced apple cider donuts with tender apple bits and a glossy cider glaze, fried crisp and irresistibly cozy for fall.

All-day slow cooking turns pork shoulder, potatoes, and carrots into a tender, savory classic with a rich homemade gravy everyone will love.

Tender layers of Yukon gold potatoes with seasoned beef in a creamy, cheddar sauce, baked until bubbly and irresistibly comforting.
Leave a comment & rating below or tag @flavest on social media!
Enjoyed this recipe? Share it with friends and family, and don't forget to leave a review!
This recipe looks amazing! Can't wait to try it.
Comments are stored locally in your browser. Server comments are displayed alongside your local comments.

Join to receive our email series which contains a round-up of some of our quick and easy family favorite recipes.
