
>>

Lighter bacon-stuffed mushrooms that are packed with flavor—simple to prepare, crowd-pleasing, and perfect for parties or a cozy snack.
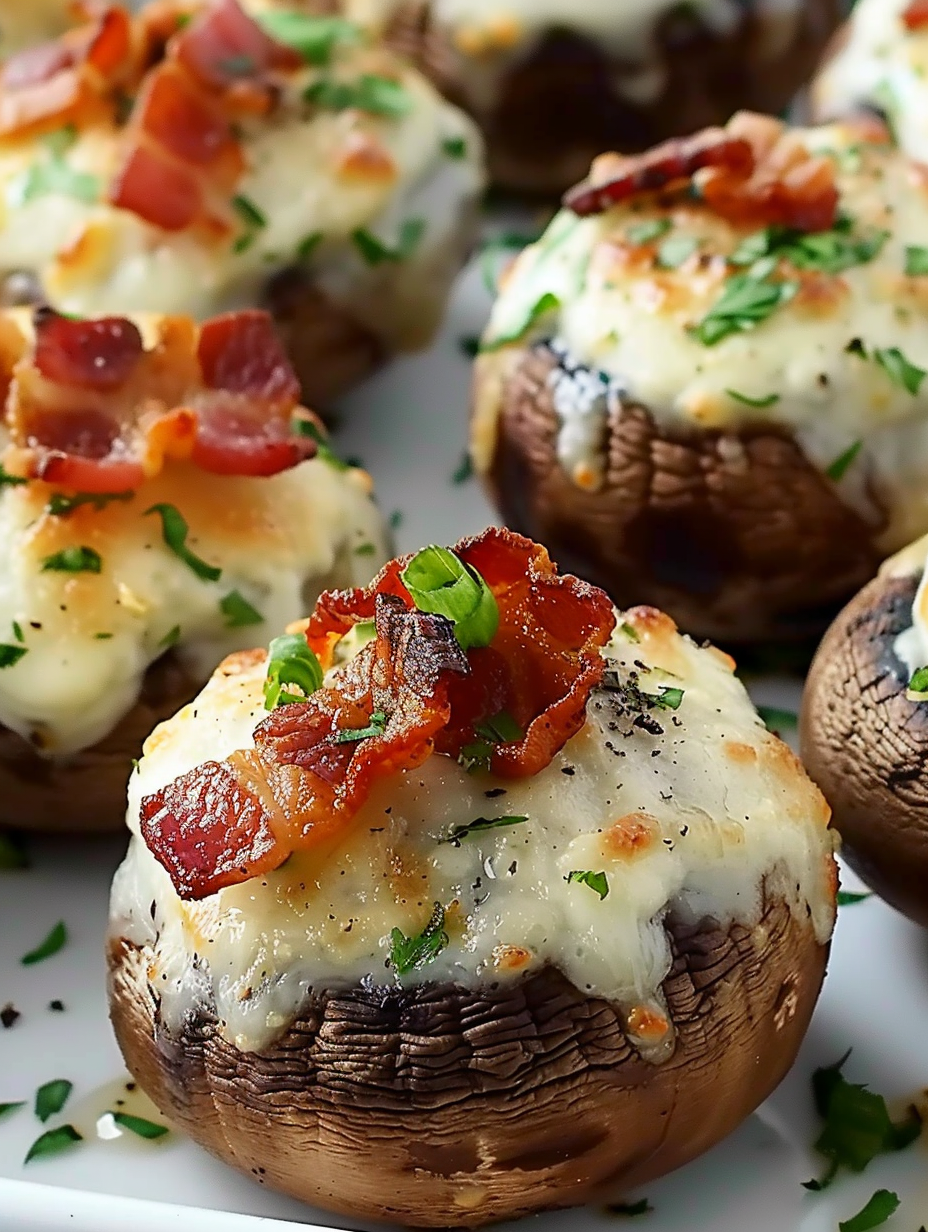
These lighter bacon stuffed mushrooms have become my go-to appetizer whenever friends drop by or when I want a cozy snack that feels indulgent without the guilt. I first developed this version during a busy holiday season when I wanted something that tasted rich but relied on pantry basics and a modest amount of bacon. The result was unexpectedly bright and savory: tender mushroom caps yielding to a creamy filling that has a slight tang from Greek yogurt, the salty snap of crisp bacon, and a nutty finish from Parmesan. They disappear fast at parties, and I always end up making a double batch.
I love how the texture balances: the mushrooms roast down and become almost meaty, while the filling stays silky and slightly golden on top. These are perfect when you want an appetizer that’s quick to assemble but still feels thoughtful. Because the filling uses light cream cheese and plain Greek yogurt, the overall dish is lighter than classic versions but still satisfying. Over the years I’ve learned a few small tweaks—like squeezing excess moisture from the filling or undercooking the mushrooms slightly if you plan to reheat later—that make a big difference in the finished bite.
My family’s reaction the first time I served these was immediate: everyone reached for seconds. I learned that a little crispiness from the bacon and a generous grating of fresh Parmesan on top creates irresistible color and flavor. They’re my go-to when I want an easy dish that looks like I spent more time on it than I did.
My favorite part of this dish is how forgiving it is—little adjustments make a big difference. When I’m prepping for a gathering, I’ll crisp the bacon a day ahead and blend the filling in the morning; the flavors meld beautifully, and I only need to stuff and bake just before guests arrive. The way the Parmesan browns and the bacon keeps a bit of crunch is what makes these memorable.
Store cooled leftovers in an airtight container in the refrigerator for up to 3 days. For best texture, reheat in a 325°F (160°C) oven for 8–10 minutes until warmed through rather than using a microwave, which can make the filling rubbery and the mushroom watery. If freezing, place stuffed caps on a parchment-lined tray and freeze solid, then transfer to a freezer-safe bag; bake from frozen at 375°F for an extra 6–8 minutes. Use glass or BPA-free plastic containers for refrigeration and label with the date; look for any change in aroma or sliminess in the mushrooms as signs they’ve passed their peak.
For a lighter pork-free option, swap regular bacon for turkey bacon (adjust crisping time since turkey bacon cooks differently). To make them vegetarian, replace bacon with smoked tempeh or chopped sun-dried tomatoes and increase the Parmesan slightly for savory depth. If dairy-free, use a dairy-free cream cheese and a thick coconut yogurt—note this will alter flavor and may add sweetness, so add a squeeze of lemon and extra black pepper. Want more herbs? Fold in a tablespoon of chopped parsley or dill. Spinach (squeezed dry) can be added at a 2:1 ratio to chopped mushroom stems to add volume and color.
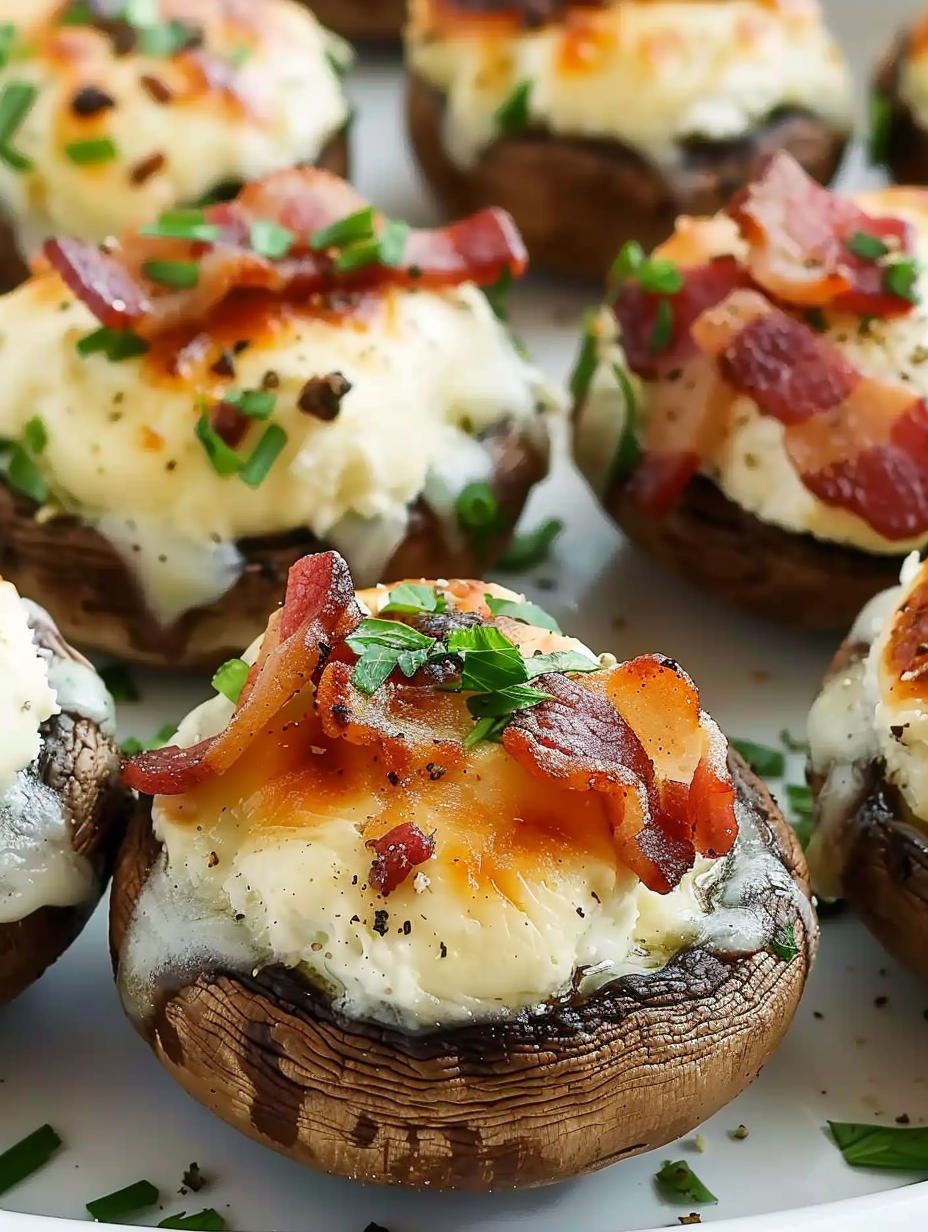
Serve warm on a platter garnished with extra chopped chives or a light dusting of grated Parmesan. Pair these with a crisp green salad, olives, and crusty bread for a relaxed appetizer spread, or include them as part of a brunch table alongside quiche and fruit. They also work well with a champagne or a light, citrusy white wine; the acidity helps cut the richness. For a finger-food buffet, keep them warm on a baking sheet in a low oven (200°F) and provide cocktail picks for easy serving.
Stuffed mushrooms are a classic hors d'oeuvre across North America and Europe, often showcasing local tastes—Italian versions lean on breadcrumbs and herbs, while American party variations favor cream cheese and cured meats. These lighter bacon stuffed mushrooms borrow from that party-appetizer tradition but emphasize fresher, lighter dairy elements. The combination of mushroom umami and cured meat saltiness is a universal flavor pairing found in many regional cuisines.
In spring, brighten the filling with fresh peas or ramps; in summer, add roasted red peppers or basil. For autumn and winter, include chopped roasted chestnuts or swap in smoked Gouda for Parmesan to create a heartier profile. Holiday versions can include chopped sage and a splash of balsamic for depth—adjust seasoning carefully when adding sweeter elements.
For efficient meal prep, crisp the bacon and blend the filling ahead of time, storing components separately. Keep caps and filling chilled in airtight containers, then assemble and bake 20–30 minutes before serving. Use muffin tins to keep caps upright and easy to transport. For work lunches or grab-and-go snacks, pack two stuffed mushrooms with a small green salad in a sturdy container and reheat briefly before eating.
These stuffed mushrooms are reliable, adaptable, and always a hit. Whether you’re entertaining or simply want a satisfying snack, they strike a lovely balance between indulgence and restraint. Give them your own twist and enjoy sharing them with friends—the little smoky bites always inspire conversation and compliments.
Bring cream cheese to room temperature so it blends smoothly with the yogurt for a silky filling.
Cook bacon until very crisp and drain thoroughly to avoid a greasy filling and to add a pleasing crunch.
Avoid rinsing mushrooms under running water; wipe them with a damp towel to prevent excess moisture in the oven.
If the filling seems loose, chill it 10 minutes before stuffing so it holds shape and browns nicely.
Use a small melon baller or teaspoon for consistent portioning when stuffing the caps.
This nourishing healthy bacon stuffed mushrooms recipe is sure to be a staple in your kitchen. Enjoy every moist, high protein slice — it is perfect for breakfast or as a wholesome snack any time.
Yes — assemble the mushrooms and refrigerate for up to 6 hours before baking. Allow them to sit at room temperature for 10 minutes before putting them in the oven for more even cooking.
Microwaving tends to make the filling rubbery and the mushroom watery. Reheat in a 325°F oven for 8–10 minutes for best texture.
This Healthy Bacon Stuffed Mushrooms recipe makes perfectly juicy, tender, and flavorful steak every time! Serve with potatoes and a side salad for an unforgettable dinner in under 30 minutes.
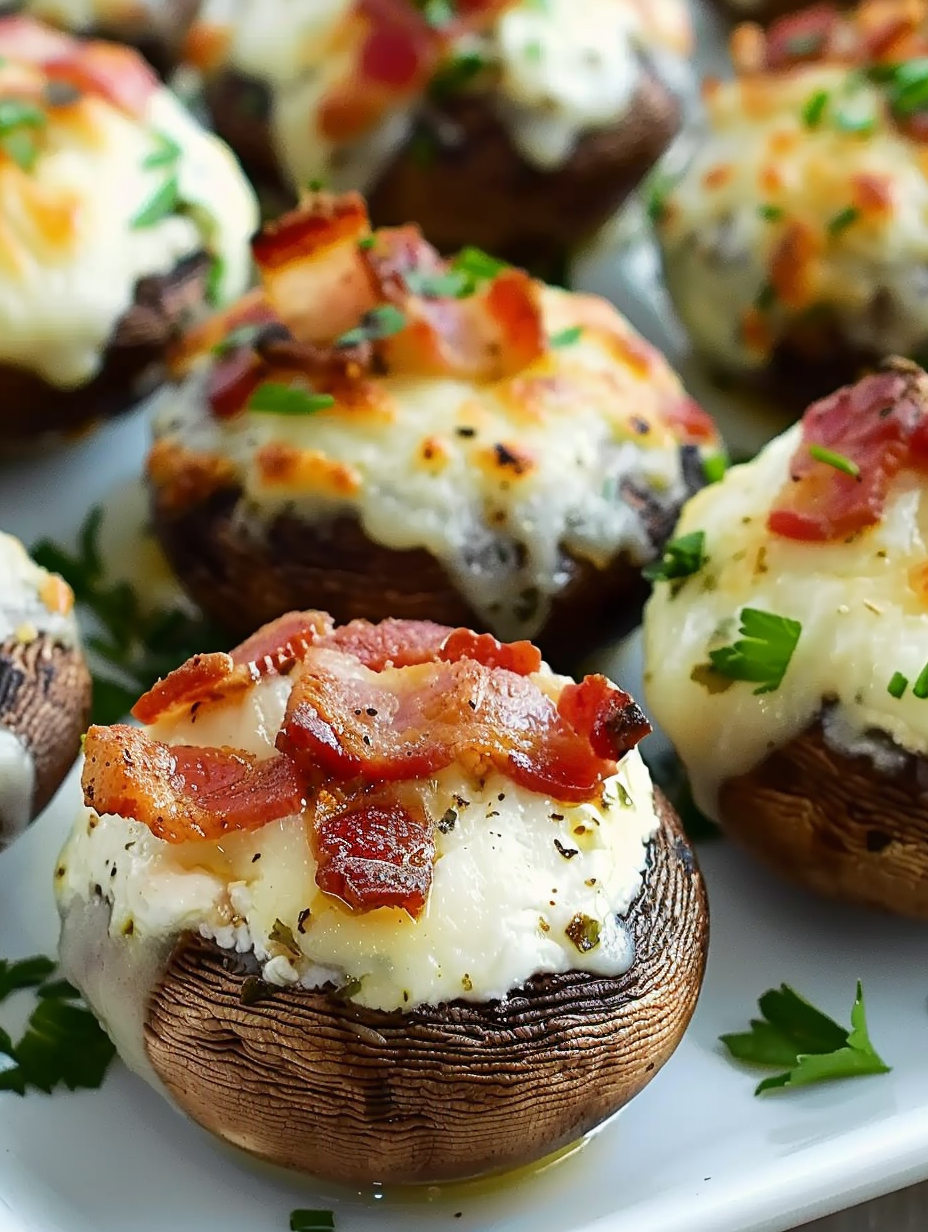
Preheat oven to 375°F (190°C). Lightly grease a baking dish. Wipe mushrooms with a damp paper towel, remove stems, and set caps gill-side up in the dish. Chop any usable stems for the filling.
Cook bacon in a skillet over medium heat until crisp, about 6–8 minutes. Drain on paper towels and chop finely to add texture to the filling.
In a bowl, beat softened cream cheese with Greek yogurt until smooth. Stir in grated Parmesan, minced garlic, chopped green onions, salt, and pepper. Fold in the chopped bacon and chopped mushroom stems.
Spoon the filling into each mushroom cap, mounding slightly. Place stuffed caps in the prepared baking dish without crowding to ensure even roasting.
Bake for 18–22 minutes until mushrooms are tender and tops are lightly golden. Let cool 3–5 minutes before serving. Optionally broil 1–2 minutes to brown the tops further.
Last Step: Please leave a rating and comment letting us know how you liked this recipe! This helps our business to thrive and continue providing free, high-quality recipes for you.
Leave a comment & rating below or tag
@flavest on social media!

Warm-spiced apple cider donuts with tender apple bits and a glossy cider glaze, fried crisp and irresistibly cozy for fall.

All-day slow cooking turns pork shoulder, potatoes, and carrots into a tender, savory classic with a rich homemade gravy everyone will love.

Tender layers of Yukon gold potatoes with seasoned beef in a creamy, cheddar sauce, baked until bubbly and irresistibly comforting.
Leave a comment & rating below or tag @flavest on social media!
Enjoyed this recipe? Share it with friends and family, and don't forget to leave a review!
This recipe looks amazing! Can't wait to try it.
Comments are stored locally in your browser. Server comments are displayed alongside your local comments.

Join to receive our email series which contains a round-up of some of our quick and easy family favorite recipes.
