
>>

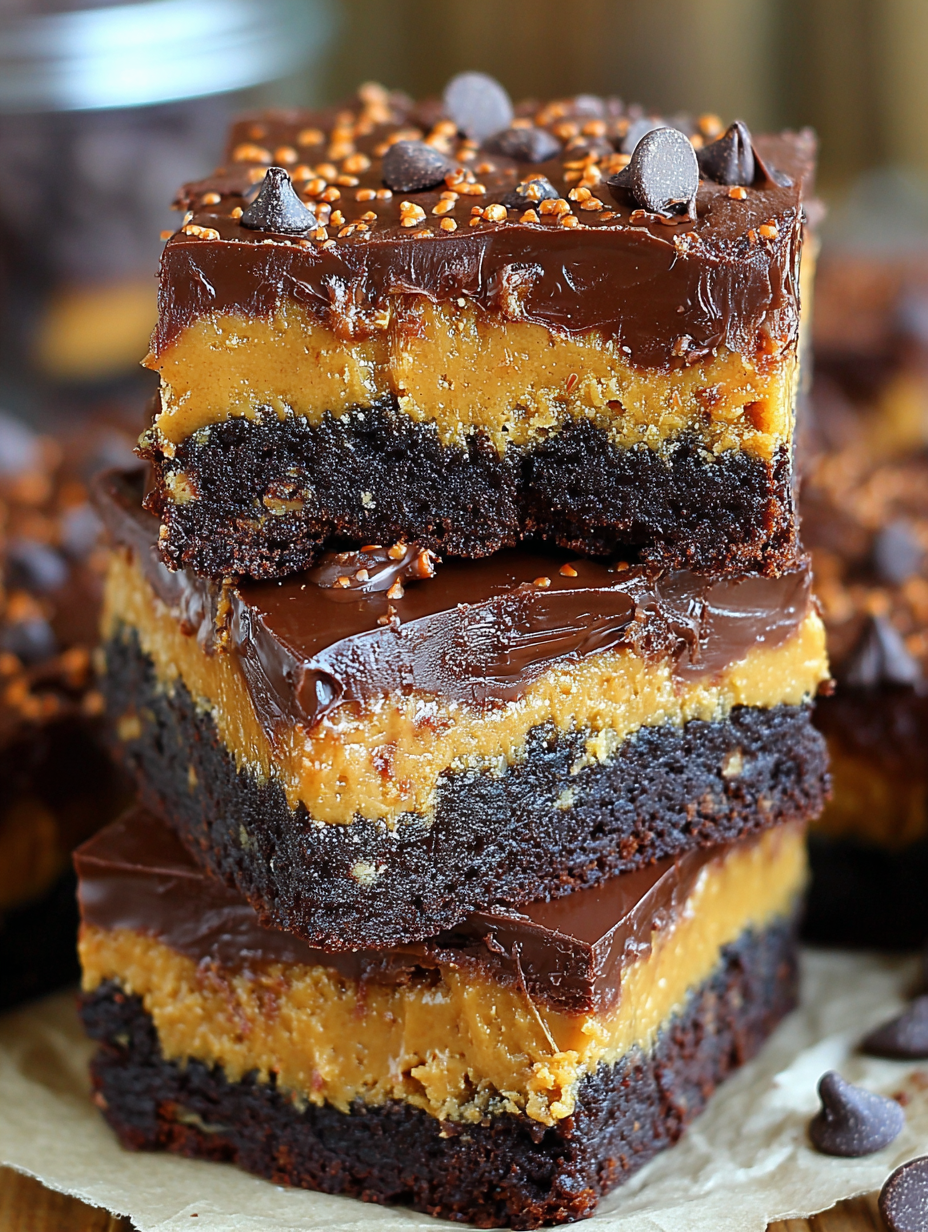
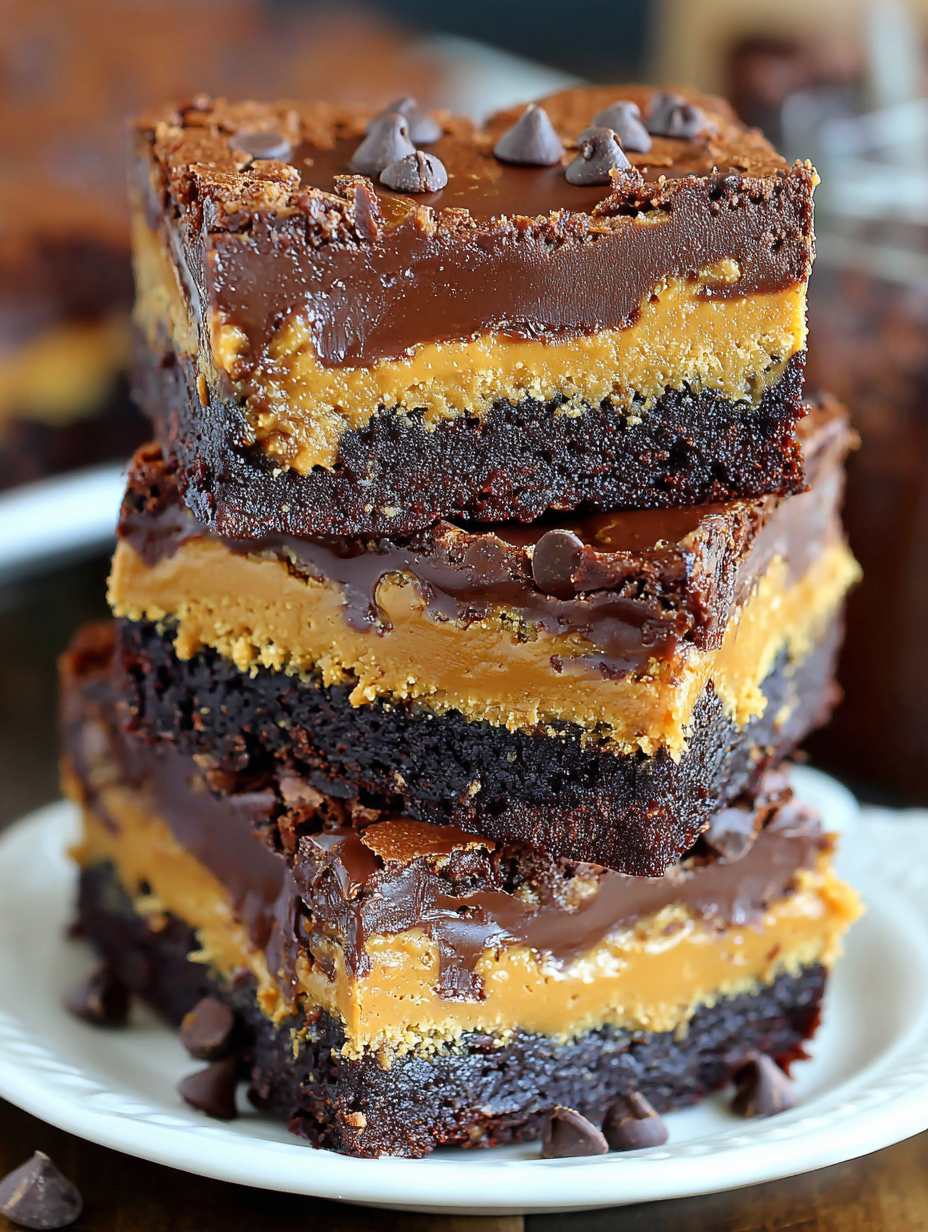
Decadent flourless peanut butter brownies with a fudgy interior, peanut butter swirl, and glossy bittersweet ganache—naturally gluten-free and no mixer required.
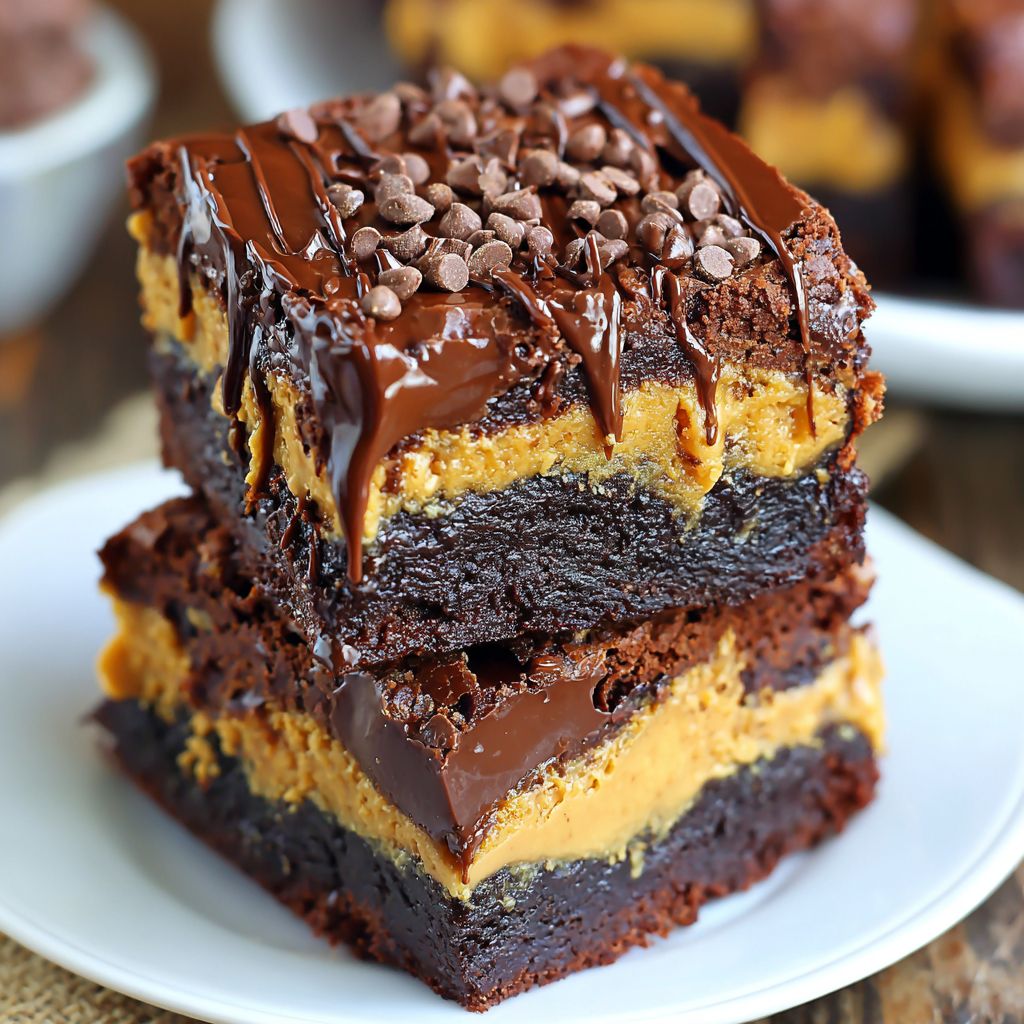
This recipe is my answer to chocolate-peanut butter cravings that demand something richer than a cookie but quicker than an elaborate torte. I discovered this combination on a rainy afternoon when I wanted a dessert that felt indulgent but used pantry staples I already had on hand. The result: an unbelievably fudgy, slightly chewy brownie, studded with mini chocolate chips, punctuated by pockets of sweet peanut butter, and finished with a shiny layer of bittersweet ganache. Every tray I’ve baked disappears within a day—friends call it the reason they RSVP early.
I first tested these for a neighborhood potluck and watched the plate of squares vanish faster than anything else on the table. The texture is the star here: dense, moist, and slightly gooey in the center with a crackly top. The peanut butter layer adds a creamy counterpoint, while the ganache seals everything with a glossy chocolate finish that sets beautifully in the refrigerator. These bars are great for gift boxes, bake sales, or anytime you’re entertaining a crowd—there are 36 bars in this batch, so it’s generous enough to feed a group and keep you satisfied for days.
My family reaction has always been enthusiastic—my kids beg for these to go into school lunches, and at holidays they’re the first to be requested. I’ve also learned through repeated batches to watch the bake time closely; the center should be set but still moist for the best texture, and a few moist crumbs on the toothpick are ideal.
 Prepare the Ganache:
Place 10 ounces chopped bittersweet chocolate in a heatproof bowl. Heat 1/2 cup heavy whipping cream until scalding (steam and tiny bubbles at the edge) and pour over the chocolate. Let sit 5 minutes, then stir until glossy and smooth. If any chunks remain, microwave in 15-second bursts, stirring in between, until completely melted.
Finish and Chill:
Pour the ganache over the cooled brownies and spread with an offset spatula into an even layer. Refrigerate until the ganache is fully set, at least 30 minutes. Use the parchment overhang to lift the whole slab from the pan and slice into 36 squares.
Store:
Store in an airtight container in the refrigerator for up to 3 days. Bring to room temperature for about 20 minutes before serving for the best texture and flavor.
Prepare the Ganache:
Place 10 ounces chopped bittersweet chocolate in a heatproof bowl. Heat 1/2 cup heavy whipping cream until scalding (steam and tiny bubbles at the edge) and pour over the chocolate. Let sit 5 minutes, then stir until glossy and smooth. If any chunks remain, microwave in 15-second bursts, stirring in between, until completely melted.
Finish and Chill:
Pour the ganache over the cooled brownies and spread with an offset spatula into an even layer. Refrigerate until the ganache is fully set, at least 30 minutes. Use the parchment overhang to lift the whole slab from the pan and slice into 36 squares.
Store:
Store in an airtight container in the refrigerator for up to 3 days. Bring to room temperature for about 20 minutes before serving for the best texture and flavor.
My favorite part of making these is the aroma—melted chocolate and peanut butter together take the kitchen back to childhood memories of stolen spoonfuls from the jar and birthday cake frosting. One holiday I brought a tray to a family gathering and an uncle declared them the best brownies he'd ever had—he went back for seconds and thirds, and I took that as a professional endorsement.
Keep the bars in an airtight container in the refrigerator to preserve the ganache gloss and prevent sandy texture. For short-term storage, place parchment between layers to avoid sticking. To freeze, cut into bars, place on a baking sheet to flash-freeze, then transfer to a freezer-safe container with parchment between layers. Thaw in the refrigerator overnight and bring to room temperature for about 20 minutes before serving to restore the fudgy mouthfeel.
Swap the peanut butter for almond butter for a different nut profile—use the same volume but expect a slightly thinner filling if almond butter is runnier. For a dairy-free version, replace the butter with vegan butter and use coconut cream in place of heavy cream for the ganache, though the ganache will be softer. If you prefer no ganache, dust the cooled brownies with cocoa powder or powdered sugar. For a lower-sugar option, try a sugar substitute suitable for baking, keeping in mind texture differences.
Serve slightly chilled with a scoop of vanilla ice cream and a sprinkle of flaky sea salt for contrast. For a party, plate squares with fresh berries or salted caramel drizzle. These are excellent with strong coffee or a nutty dessert wine. Garnish with crushed peanuts or a drizzle of warmed peanut butter for a photo-ready finish.
Brownies are an American classic that emerged in the late 19th century, beloved for their simplicity and portable format. This variation blends two iconic flavors—chocolate and peanut butter—popularized in American desserts and candies. The flourless approach leans on techniques used in fudgy European cakes, where eggs and chocolate create structure instead of flour.
Make the brownie base a day ahead and keep it chilled without ganache. On the day you need them, prepare ganache and finish the bars for a fresher appearance. Cut into bars after the ganache sets and portion into single-serve containers for grab-and-go treats. Label and date any frozen trays for up to 3 months of convenience.
These peanut butter brownies are a reliable treat that consistently earns compliments. They are forgiving enough for a novice baker and nuanced enough for experienced cooks who enjoy balancing texture and flavor. Make them for gatherings, gifts, or a cozy night in—then watch them disappear.
Use room-temperature eggs to ensure a smooth, glossy batter and better emulsion with the melted chocolate.
Start checking for doneness at 30 minutes; the center should have moist crumbs on a toothpick for a fudgy result.
Line the baking pan with parchment overhang to lift the slab out cleanly and make slicing easier.
Chill the brownies completely before pouring ganache to prevent it from sinking into the top layer.
This nourishing peanut butter brownies recipe is sure to be a staple in your kitchen. Enjoy every moist, high protein slice — it is perfect for breakfast or as a wholesome snack any time.
This Peanut Butter Brownies recipe makes perfectly juicy, tender, and flavorful steak every time! Serve with potatoes and a side salad for an unforgettable dinner in under 30 minutes.
Preheat oven to 350F. Lightly spray a 9-inch square pan and line with parchment leaving overhang for easy removal.
Combine 3/4 cup peanut butter, 1/2 cup sugar, and 1 egg in a medium bowl and mix until smooth. Set aside.
Melt 12 oz chocolate chips with 6 tbsp butter in 30-second microwave bursts, stirring between each until smooth.
Stir in 3/4 cup sugar and 1 tsp vanilla. Add 3 eggs one at a time, stirring thoroughly after each addition until glossy.
Whisk 1/4 cup cocoa powder, 1/3 cup cornstarch, and 1/2 tsp salt. Add to chocolate mixture and stir vigorously until smooth and slightly pulling from bowl sides.
Stir in 1 cup mini chocolate chips. Pour two-thirds of batter into pan, dollop peanut butter mixture, and top with remaining batter. Smooth lightly.
Bake 33-37 minutes until a toothpick shows moist crumbs. Cool completely on a rack or chill before adding ganache.
Pour scalded 1/2 cup cream over 10 oz chopped chocolate, let sit 5 minutes, then stir until glossy. Pour over cooled bars and refrigerate until set. Slice into 36 squares.
Last Step: Please leave a rating and comment letting us know how you liked this recipe! This helps our business to thrive and continue providing free, high-quality recipes for you.
Leave a comment & rating below or tag
@flavest on social media!

Warm-spiced apple cider donuts with tender apple bits and a glossy cider glaze, fried crisp and irresistibly cozy for fall.

All-day slow cooking turns pork shoulder, potatoes, and carrots into a tender, savory classic with a rich homemade gravy everyone will love.

Tender layers of Yukon gold potatoes with seasoned beef in a creamy, cheddar sauce, baked until bubbly and irresistibly comforting.
Leave a comment & rating below or tag @flavest on social media!
Enjoyed this recipe? Share it with friends and family, and don't forget to leave a review!
This recipe looks amazing! Can't wait to try it.
Comments are stored locally in your browser. Server comments are displayed alongside your local comments.

Join to receive our email series which contains a round-up of some of our quick and easy family favorite recipes.
