
>>

An irresistibly gooey pull-apart loaf layered with garlic butter and melted mozzarella — the perfect easy appetizer for parties, weeknights, or cozy snacking.
This pull apart garlic cheese bread is one of those simple treats that transforms a loaf of French bread into something celebratory and comfortingly familiar. I first made this on a rainy Saturday when friends were coming over with nothing more than their appetites and a bottle of wine. The aroma of warm butter and garlic filled the kitchen, the crust opened up to pockets of melted cheese, and everyone reached in before I could even get it to the table. It became an instant favorite — quick to assemble, impossible to resist, and endlessly adaptable.
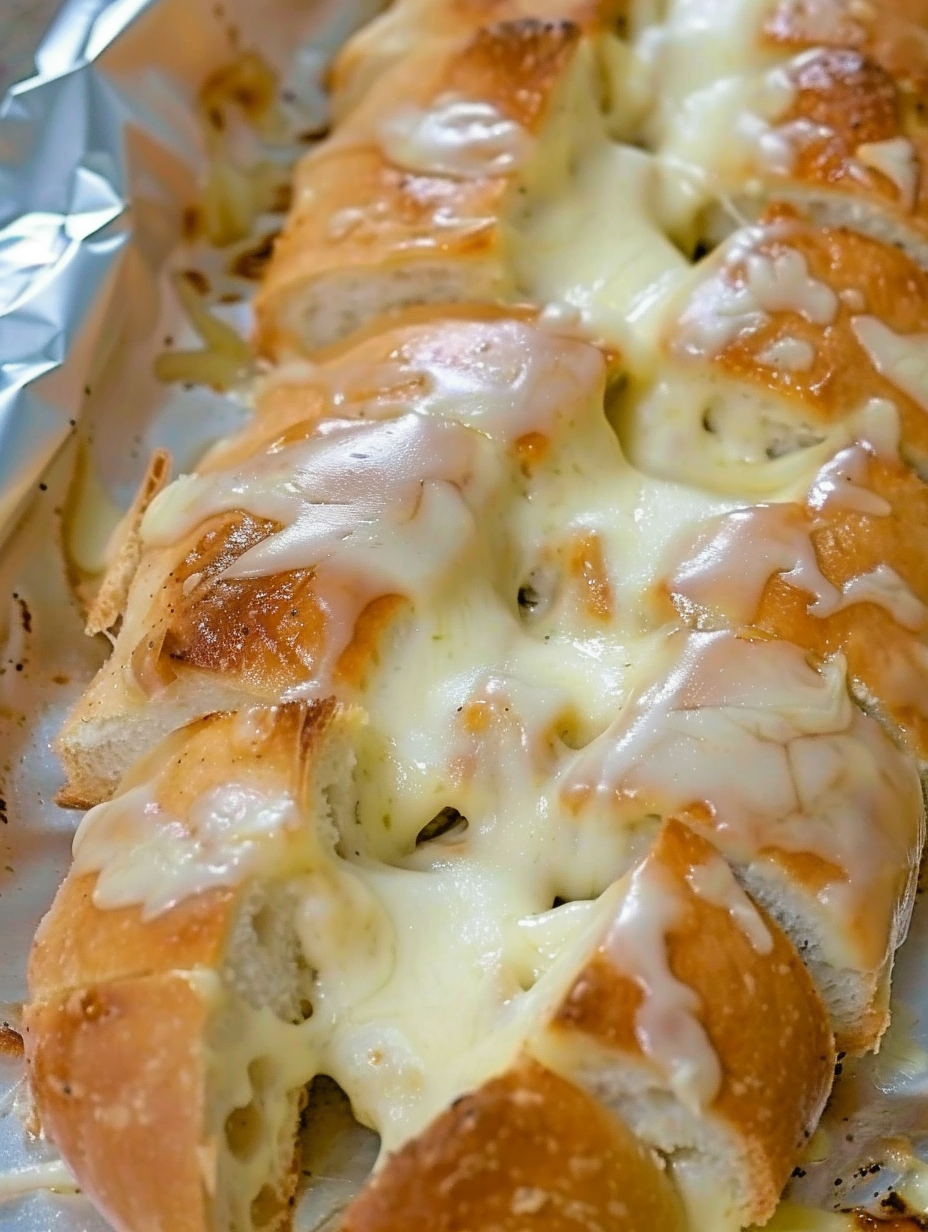
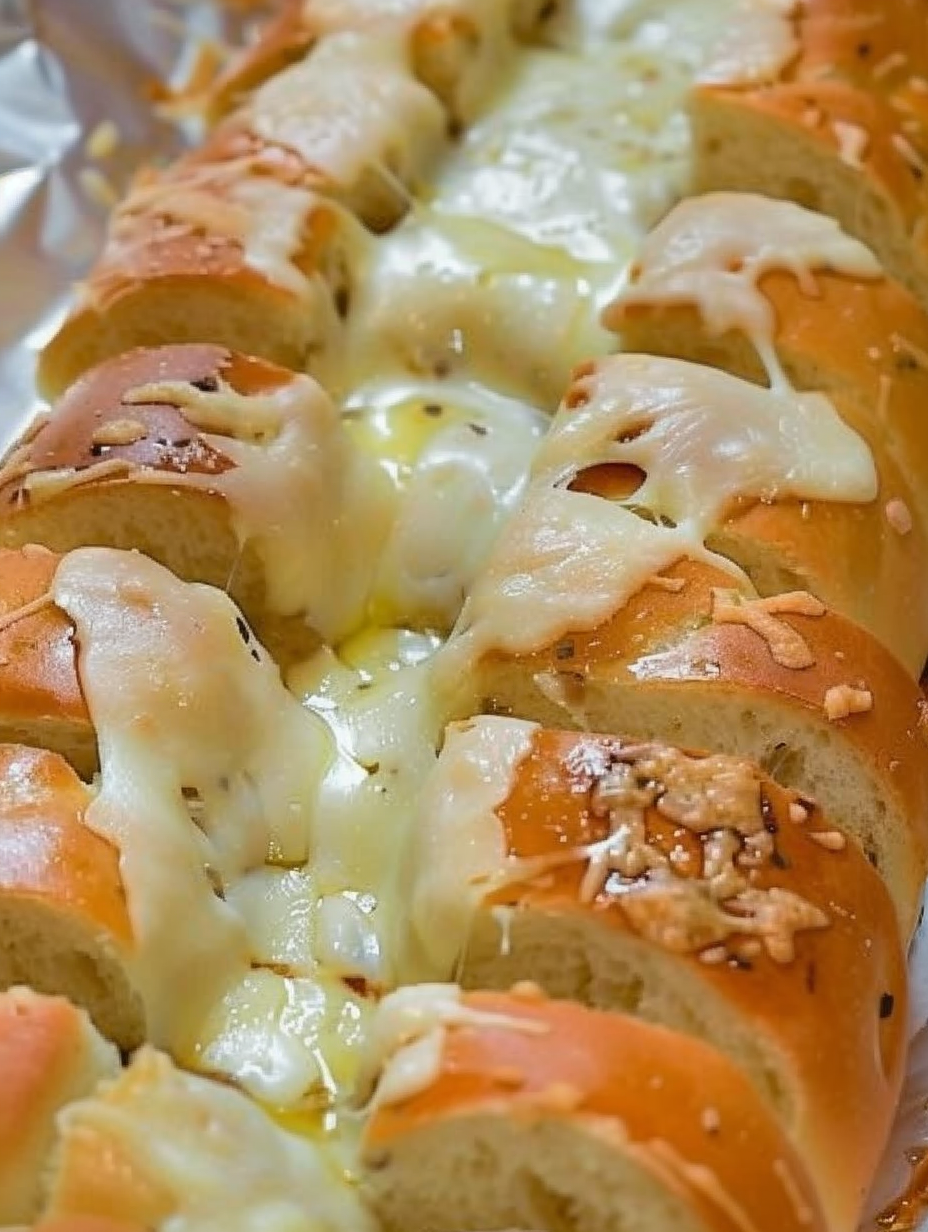
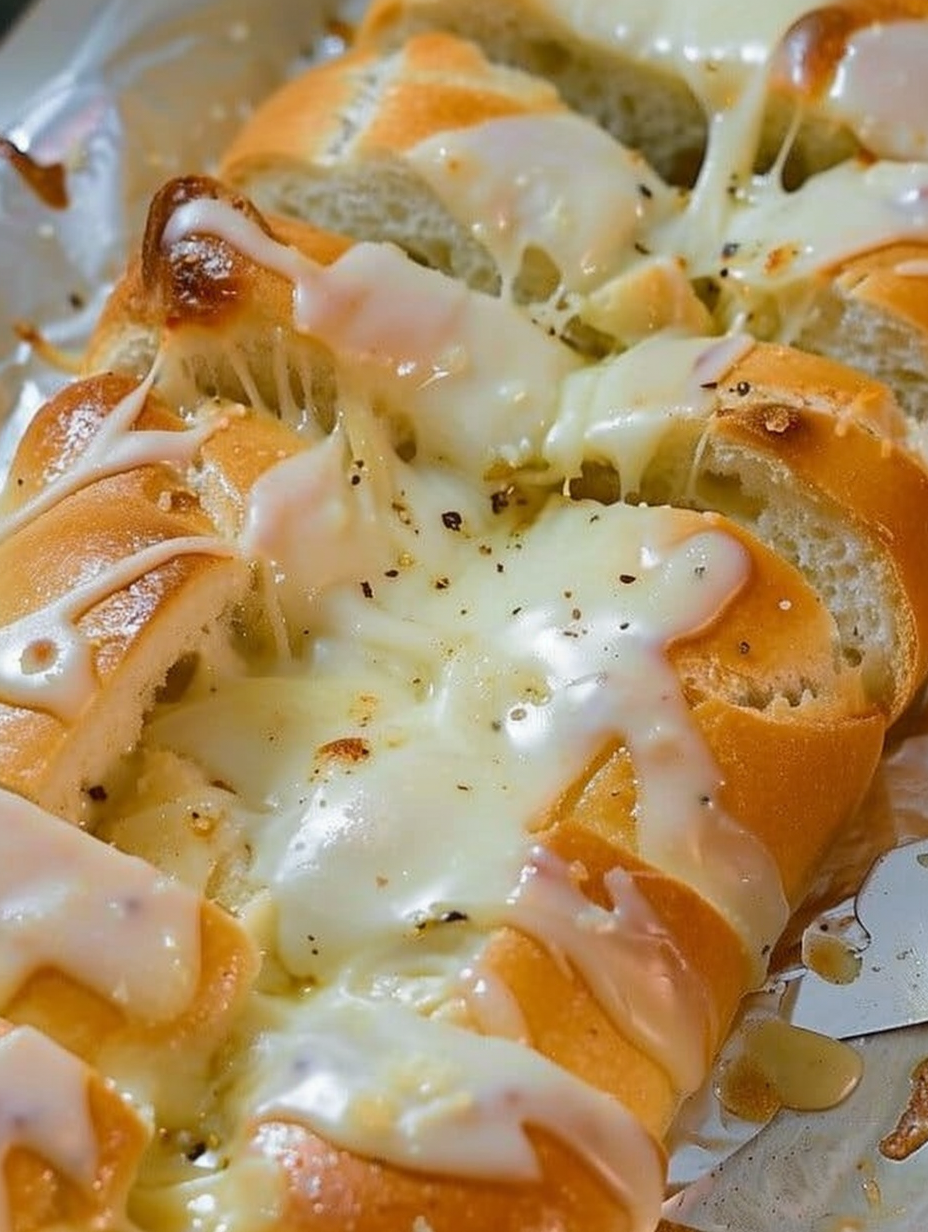
What makes this version special is the balance of garlicky butter and stringy mozzarella tucked between neat diagonal cuts, so each pull releases hot, cheesy strands. The technique is deceptively simple: you score the loaf, spoon fragrant melted butter into the crevices, and slide in handfuls of freshly shredded cheese. The result is a golden, bubbling exterior with soft, cheesy interiors — perfect for sharing and guaranteed to disappear fast.
Personally, this loaf has been my go-to when I need something that feels indulgent but doesn’t require babysitting. At one family get-together my niece declared it her favorite thing ever and attempted to “help” by pulling apart the whole loaf before anyone had a chance to take photos. It’s a crowd-pleaser every time.
My favorite part of this loaf is watching the cheese pull — it’s reliably fun for kids and adults alike. At potlucks this bread disappears first; friends like to customize their piece with extra herbs or a swipe of marinara. The method is forgiving, so even if you overstuff a little, the bread still bakes into golden, cheesy goodness.
To store, allow the bread to cool completely, then wrap tightly in plastic wrap and place in an airtight container or resealable bag in the refrigerator for up to 48 hours. For longer keeping, wrap the cooled loaf in foil and slide into a freezer-safe bag; freeze up to 3 months. When reheating refrigerated sections, place on a baking sheet and warm at 325°F for 8–10 minutes to melt the cheese through without drying the bread. From frozen, thaw in the refrigerator overnight and reheat as above, or bake frozen at 350°F for 15–20 minutes covered, then finish uncovered for 3–5 minutes.
If you don’t have mozzarella, swap in provolone, fontina, or a sharp cheddar for more bite — use the same volume. For a lighter finish, part-skim mozzarella can work but won’t be as silky. Replace butter with olive oil for a slightly different mouthfeel and to make it dairy-reduced (it won’t be dairy-free if using cheese). Garlic powder can substitute in a pinch: use about 1 teaspoon mixed into warm butter instead of fresh garlic. Add herbs like chopped parsley, oregano, or a pinch of red pepper flakes in with the butter for extra flavor.
Serve warm straight from the pan with small plates for pulling. It pairs beautifully with a simple tomato marinara for dipping, a crisp green salad to cut the richness, or a bowl of soup such as tomato bisque. Garnish with a sprinkle of fresh parsley, flaky sea salt, or a drizzle of high-quality olive oil for a restaurant-worthy finish. For a party, place on a wooden board with cured meats and olives for a casual sharing platter.
While not tied to a single traditional recipe, pull-apart cheese bread riffs on classic European trends of bread and cheese as communal foods. The idea of stuffing or topping bread with butter and garlic echoes garlic breads from Italian-American homes and bakeries, and this pull-apart format modernizes those flavors into an interactive, shareable centerpiece common in American casual entertaining.
Prep the loaf an hour ahead by making the garlic butter and scoring the bread, then store them separately. Shred cheese and keep it chilled in a small container. Just before guests arrive, heat the butter with garlic and pour it into the loaf, stuff with cheese, wrap in foil, and bake. This workflow lets you focus on other dishes and brings the bread to the table hot and fresh with minimal last-minute fuss.
There’s something comforting about passing a warm, cheesy loaf around the table. Whether you’re feeding friends or treating the family, this pull-apart garlic cheese bread delivers on flavor, texture, and fun — make it your own with add-ins and enjoy the smiles it brings.
Use freshly shredded mozzarella for the best melt and stretch; pre-shredded cheese contains anti-caking agents that can affect melting.
Tent the aluminum foil loosely while baking to prevent the cheese from sticking to the foil; remove for the last few minutes to brown the top.
When scoring the loaf, use a sharp serrated knife and stop before you cut through the bottom so the loaf stays intact while pulling apart.
This nourishing pull apart garlic cheese bread recipe is sure to be a staple in your kitchen. Enjoy every moist, high protein slice — it is perfect for breakfast or as a wholesome snack any time.
Yes. Wrap cooled leftover slices tightly and refrigerate for up to 2 days. Reheat at 325°F for 8–10 minutes to restore texture.
Freeze the baked loaf wrapped in foil and a freezer bag for up to 3 months. Thaw overnight in the refrigerator before reheating.
This Pull Apart Garlic Cheese Bread recipe makes perfectly juicy, tender, and flavorful steak every time! Serve with potatoes and a side salad for an unforgettable dinner in under 30 minutes.
Preheat oven to 350°F and place a large piece of aluminum foil on a rimmed baking sheet to catch any melted cheese and make cleanup easy.
Using a sharp serrated knife, slice diagonally about 1 to 1.5 inches apart, then rotate and slice the other way to create crosshatch cuts. Stop before cutting all the way through so the loaf remains intact.
In a small frying pan over medium heat, melt 1/2 cup butter and add 4 cloves minced garlic. Cook gently for 2–3 minutes until fragrant and softened but not browned, then remove from heat.
Carefully spoon the garlic butter into the crevices of the cut loaf, pushing some into the interior pockets. Stuff shredded mozzarella between the slices so each section has cheese.
Place the loaf on the foil, wrap loosely to create a tent, and bake for 15 minutes. Remove the foil carefully and return to the oven uncovered for 2–3 minutes to brown and crisp the top. Let cool briefly before serving.
Last Step: Please leave a rating and comment letting us know how you liked this recipe! This helps our business to thrive and continue providing free, high-quality recipes for you.
Leave a comment & rating below or tag
@flavest on social media!

Warm-spiced apple cider donuts with tender apple bits and a glossy cider glaze, fried crisp and irresistibly cozy for fall.

All-day slow cooking turns pork shoulder, potatoes, and carrots into a tender, savory classic with a rich homemade gravy everyone will love.

Tender layers of Yukon gold potatoes with seasoned beef in a creamy, cheddar sauce, baked until bubbly and irresistibly comforting.
Leave a comment & rating below or tag @flavest on social media!
Enjoyed this recipe? Share it with friends and family, and don't forget to leave a review!
This recipe looks amazing! Can't wait to try it.
Comments are stored locally in your browser. Server comments are displayed alongside your local comments.

Join to receive our email series which contains a round-up of some of our quick and easy family favorite recipes.
