
Seven Layer Magic Bars

A buttery graham cracker base topped with layers of chocolate chips, butterscotch chips, coconut, and nuts, finished with sweetened condensed milk for a gooey, irresistible treat.
This recipe is the kind of dessert that shows up at family gatherings and disappears before the coffee is poured. I first learned this layered bar from a neighbor who brought a pan to a summer potluck. The simplicity caught my attention. There is a real magic in building predictable layers and watching them transform into a rich, chewy bar that balances crisp base, melty chocolate, butterscotch sweetness, toasted coconut notes, and crunchy nuts. It is a joyful weekend bake and a reliable last minute contribution when guests are on the way.
I make these bars year round. In winter they pair with hot coffee. In summer I slice them small to serve with fresh berries. What makes them special is the contrast of textures. A buttery crumb base provides structure, while a blanket of sweetened condensed milk bonds the toppings and creates a caramel like chew. My family still teases me about how I scoop a warm corner piece while claiming we only need a small taste. These bars travel well and they always earn compliments.
Why You'll Love This Recipe
- One pan, minimal fuss, and family friendly results that please both kids and adults. Prep is quick and you can have pans ready in under 10 minutes.
- Uses pantry staples. Most of the ingredients are common in many kitchens so you can assemble without a special trip to the store.
- Versatile layering. The order of toppings is forgiving and allows substitutions based on preference or dietary needs.
- Make ahead friendly. You can bake the slab a day ahead and it actually slices cleaner after chilling overnight.
- Great for crowd pleasing. The full size pan yields about 18 bars which is ideal for potlucks, bake sales, and school events.
- Minimal technical skill required. This is a beginner friendly project with professional tasting results.
When I first baked these the toasted coconut smell filled the kitchen and my kids hovered near the oven. Over the years I learned to line the pan with parchment and to chill the bars briefly for neater slices. I now keep a can of sweetened condensed milk on the pantry shelf because it is that reliable for quick desserts.
Ingredients
- Crust 1 and 1 half cups crushed graham cracker crumbs. Look for full sheet style crackers. For home crushing use about 11 to 12 whole rectangle crackers and pulse in a food processor or place in a sealed plastic bag and crush with a rolling pin.
- Butter One half cup unsalted butter melted. I use a single stick that I melt gently on low heat then cool slightly to avoid cooking the crumbs.
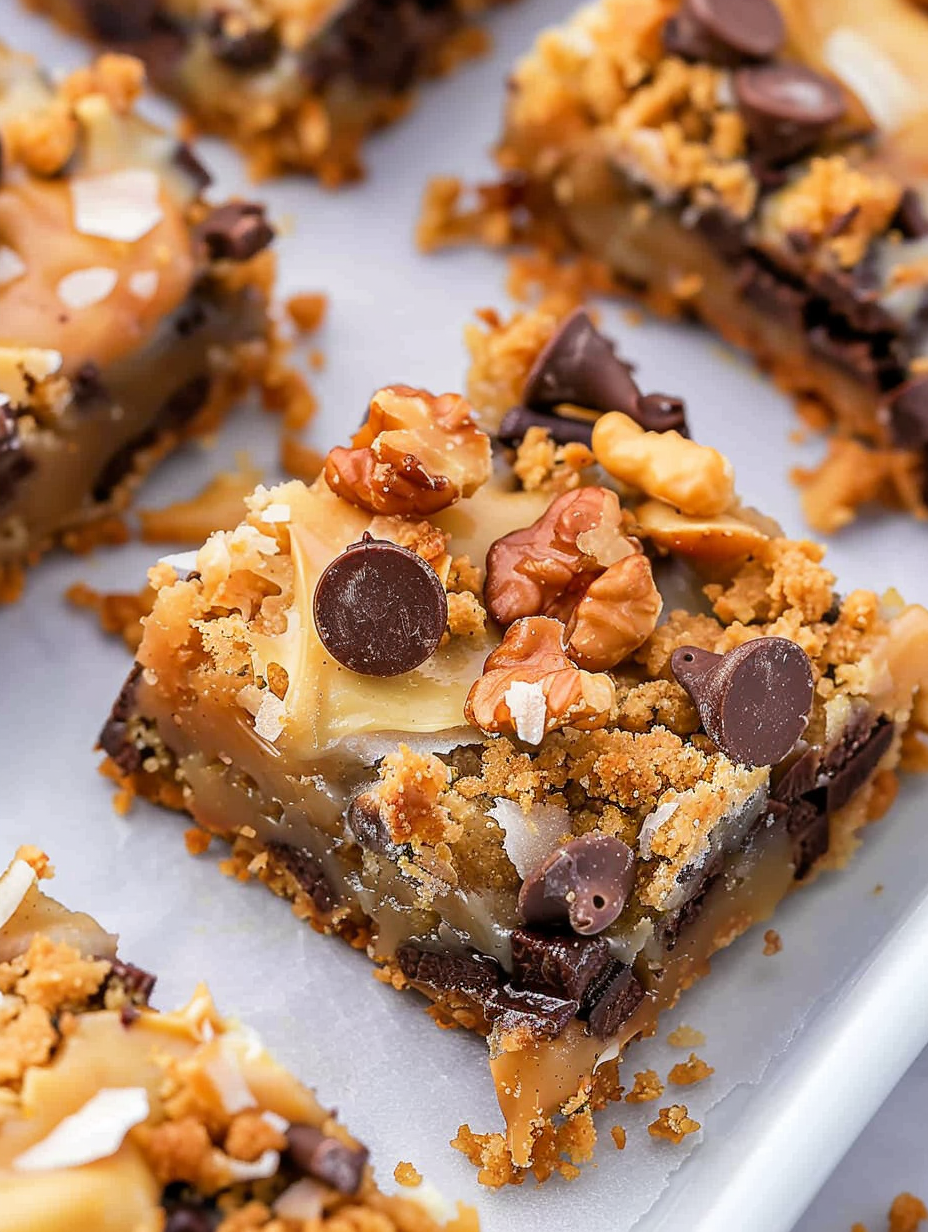
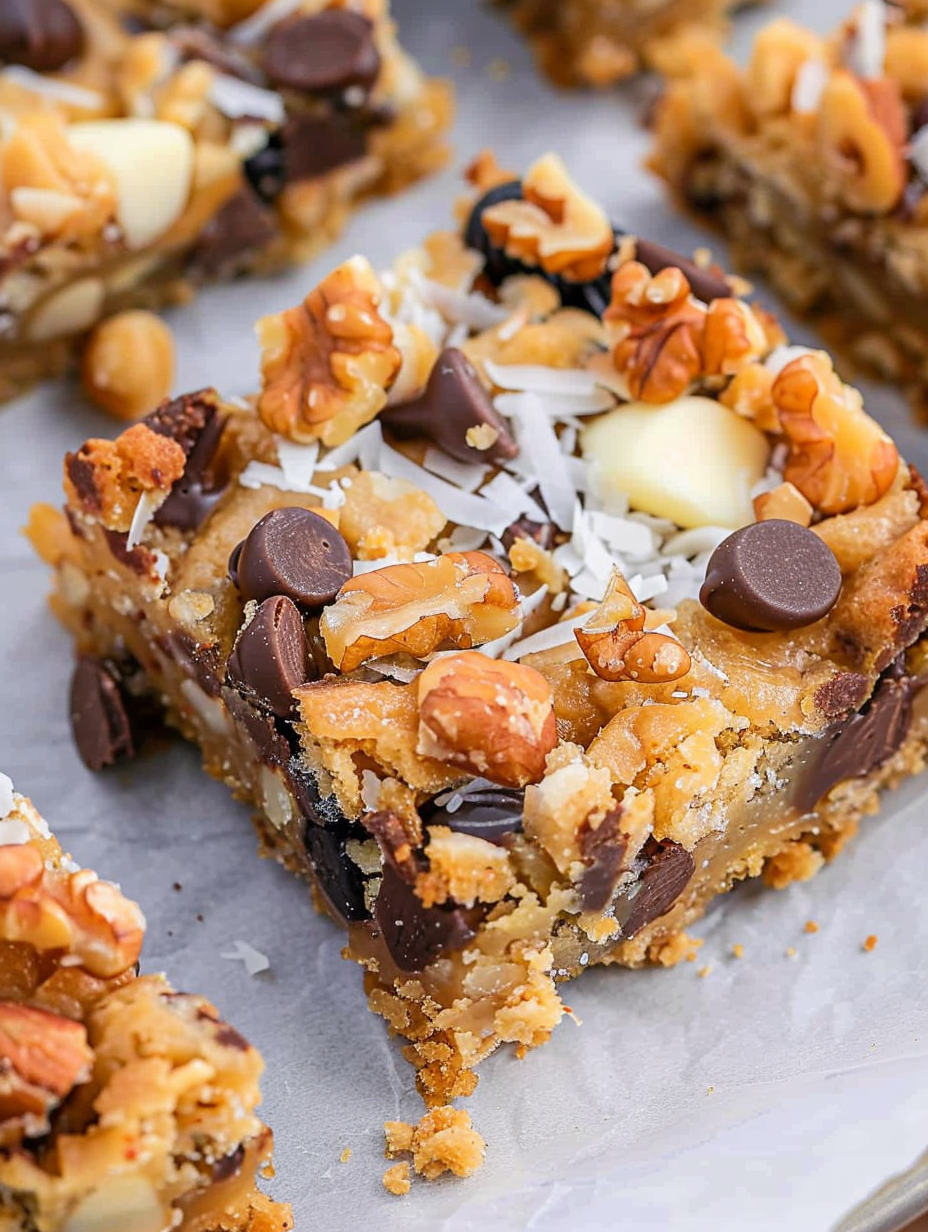
- Chocolate chips One cup semi sweet chocolate chips. Use a good quality brand like Ghirardelli or Guittard if you want deeper chocolate flavor.
- Butterscotch chips One cup butterscotch chips. These add a warm, toffee like note and pair beautifully with the coconut.
- Coconut One cup sweetened flaked coconut. Toasting it lightly in a dry skillet amplifies the aroma and texture.
- Walnuts One half cup chopped walnuts. Pecans or almonds are fine if you have a nut preference.
- Sweetened condensed milk One 14 ounce can sweetened condensed milk. This is the glue that gives the bars their signature chew and glossy top.
Instructions
Preheat and prepare the panPreheat oven to 350 degrees Fahrenheit. Line a 9 by 13 inch baking pan with parchment paper with some overhang on two opposite sides so you can lift the bars out later. Lightly spray the parchment with cooking spray to help the crust press evenly.Make the crustMelt the butter in a small saucepan over low heat or in a microwave safe bowl. Remove from heat and stir in the graham cracker crumbs until evenly moistened. The mixture should hold together when pressed. Press the crumbs firmly into the bottom of the prepared 9 by 13 inch pan to form an even base. Use the bottom of a measuring cup to smooth and compact the crust.Layer the toppingsEvenly sprinkle one cup chocolate chips across the crust. Follow with one cup butterscotch chips. Add one cup sweetened flaked coconut. Scatter one half cup chopped walnuts evenly. Layering ensures every bite includes multiple textures and flavors.Add the sweetened condensed milkOpen the 14 ounce can of sweetened condensed milk and pour it slowly over the toppings. Use a small offset spatula or the back of a spoon to gently spread the milk so it covers most of the surface. Be careful not to push the chips into the crust. This thin, even coating is what melds the layers.Bake until setBake in the preheated oven for 25 to 30 minutes. Edges should be golden and the center should be set but still slightly jiggly. Baking longer will deepen color and caramelization but watch closely after 25 minutes to avoid burning the coconut.Cool then sliceAllow the pan to cool completely on a rack. For cleaner slices chill the pan in the refrigerator for one to two hours, then use the parchment overhang to lift the slab onto a cutting board. Cut into 18 bars with a sharp chef knife. Wiping the knife clean between cuts helps produce tidy edges.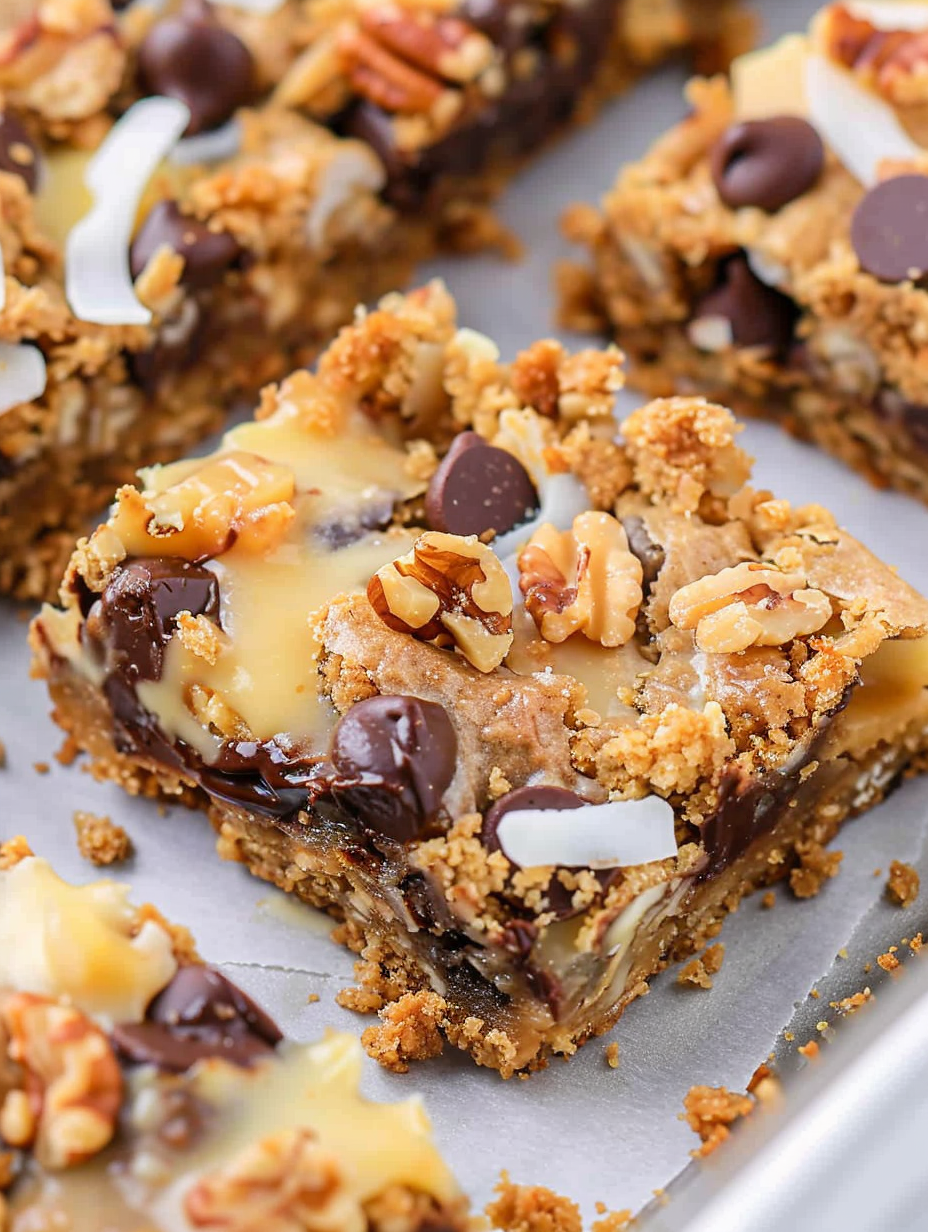
You Must Know
- Storage tip, these keep well covered at room temperature for one day. For longer storage refrigerate for up to five days or freeze for up to three months.
- Texture note, chilling before slicing yields cleaner squares and helps the topping set into chewy bars.
- Allergy note, contains tree nuts and dairy. Swap nuts or omit to adapt for sensitivities.
- Flavor tip, lightly toasting the coconut enhances the nuttiness and aroma before assembly.
My favorite part of these bars is the way the condensed milk caramelizes a little at the edges while staying soft in the center. I have shared these at holiday cookie exchanges and at book club meetings. One memorable time a neighbor who claimed to dislike coconut came back for a second piece and admitted the toasted flakes were what changed her mind. Those kinds of reactions make this bar a regular in my baking rotation.
Storage Tips
Store cooled bars in an airtight container. At room temperature they are fine for one day. For cleaner slices and firmer texture keep the container refrigerated up to five days. For long term storage wrap individual bars in plastic wrap then place in a freezer safe bag for up to three months. To serve from frozen thaw overnight in the refrigerator and bring to room temperature for 20 minutes before serving. Use parchment with overhang when baking to make removal easy and reduce breakage during transfer.
Ingredient Substitutions
Swap the walnuts with pecans or almonds in an equal measure. Use chopped pretzels in place of some of the nuts for a salty crunch. If you prefer a different chocolate profile use milk chocolate or chopped bittersweet chocolate bars. To make the crust gluten free use a gluten free graham style cracker and verify the chips and coconut are certified gluten free. For a dairy free version try a vegan condensed milk alternative and coconut oil in place of butter, though the final texture will be slightly different.
Serving Suggestions
Serve bars on a platter with coffee or a scoop of vanilla ice cream. For a party present them on a large board with parchment and garnish with a dusting of finely grated chocolate. Small squares are ideal at dessert buffets. Pair with fresh berries for acidity and to balance the sweetness. I sometimes drizzle a little warmed caramel over the bars for special occasions.
Cultural Background
These layered bars trace their roots to simple American pantry baking where quick assembly desserts became popular mid century. Variations of this concept exist across regions, often called layered bars or pan cookies. The use of sweetened condensed milk as a binding agent is common in many classic American bar style sweets and it creates a texture similar to homemade caramel without lengthy cooking.
Seasonal Adaptations
In winter add a teaspoon of ground cinnamon to the crust for warmth. For summer, fold some chopped dried apricot into the layer of chips for a bright note. During the holidays swap the butterscotch chips for peppermint chips and sprinkle crushed candy cane on top after baking for a festive finish. The recipe adapts well to small seasonal swaps without changing the method.
Meal Prep Tips
Assemble the crust and keep it chilled until you are ready to layer. You can pre measure chips and coconut in small bowls to speed assembly. Bake and then cool completely. Store in the refrigerator and portion into single serve containers for quick desserts through the week. These bars travel well which makes them ideal for packed lunches or potluck contributions.
These bars are about sharing comfort and quick joy. If you try them make them your own. Change one layer, test a new nut, and enjoy the smiles that follow a warm gooey square pulled from the pan.
Pro Tips
Line the pan with parchment that overhangs to make removal and slicing easier.
Chill the baked slab for one to two hours for cleaner slices and firmer texture.
Toast the coconut in a dry skillet on medium for two to three minutes until golden for extra flavor.
Use the bottom of a measuring cup to press the crust evenly which prevents a crumbly base.
This nourishing seven layer magic bars recipe is sure to be a staple in your kitchen. Enjoy every moist, high protein slice — it is perfect for breakfast or as a wholesome snack any time.
Tags
Seven Layer Magic Bars
This Seven Layer Magic Bars recipe makes perfectly juicy, tender, and flavorful steak every time! Serve with potatoes and a side salad for an unforgettable dinner in under 30 minutes.
Ingredients
Crust
Layers
Instructions
Preheat and prepare the pan
Preheat oven to 350 degrees Fahrenheit. Line a 9 by 13 inch baking pan with parchment and leave overhang on two sides. Lightly spray if desired.
Make the crust
Melt one half cup butter and stir into 1 and 1 half cups crushed graham crackers until moistened. Press firmly into the bottom of the prepared pan using the bottom of a measuring cup to compact.
Layer the toppings
Sprinkle one cup chocolate chips evenly, then one cup butterscotch chips, then one cup sweetened flaked coconut, then one half cup chopped walnuts.
Add condensed milk and bake
Pour the one 14 ounce can of sweetened condensed milk evenly over the layers and spread gently. Bake 25 to 30 minutes until edges are golden and center is set.
Cool then slice
Cool completely on a rack then chill if desired for cleaner slices. Use parchment overhang to lift from pan and cut into 18 squares.
Last Step: Please leave a rating and comment letting us know how you liked this recipe! This helps our business to thrive and continue providing free, high-quality recipes for you.
Nutrition
Did You Make This?
Leave a comment & rating below or tag
@flavest on social media!
Categories:
You might also like...

Glazed Apple Cider Donuts
Warm-spiced apple cider donuts with tender apple bits and a glossy cider glaze, fried crisp and irresistibly cozy for fall.

Slow Cooker Pork Pot Roast
All-day slow cooking turns pork shoulder, potatoes, and carrots into a tender, savory classic with a rich homemade gravy everyone will love.

Cheesy Hamburger Potato Casserole
Tender layers of Yukon gold potatoes with seasoned beef in a creamy, cheddar sauce, baked until bubbly and irresistibly comforting.
Did You Make This?
Leave a comment & rating below or tag @flavest on social media!
Rate This Recipe
Share This Recipe
Enjoyed this recipe? Share it with friends and family, and don't forget to leave a review!
Comments (1)
This recipe looks amazing! Can't wait to try it.
Comments are stored locally in your browser. Server comments are displayed alongside your local comments.

Hi, I'm Maria!
What's Popular

30-Minute Meals!
Join to receive our email series which contains a round-up of some of our quick and easy family favorite recipes.