
>>

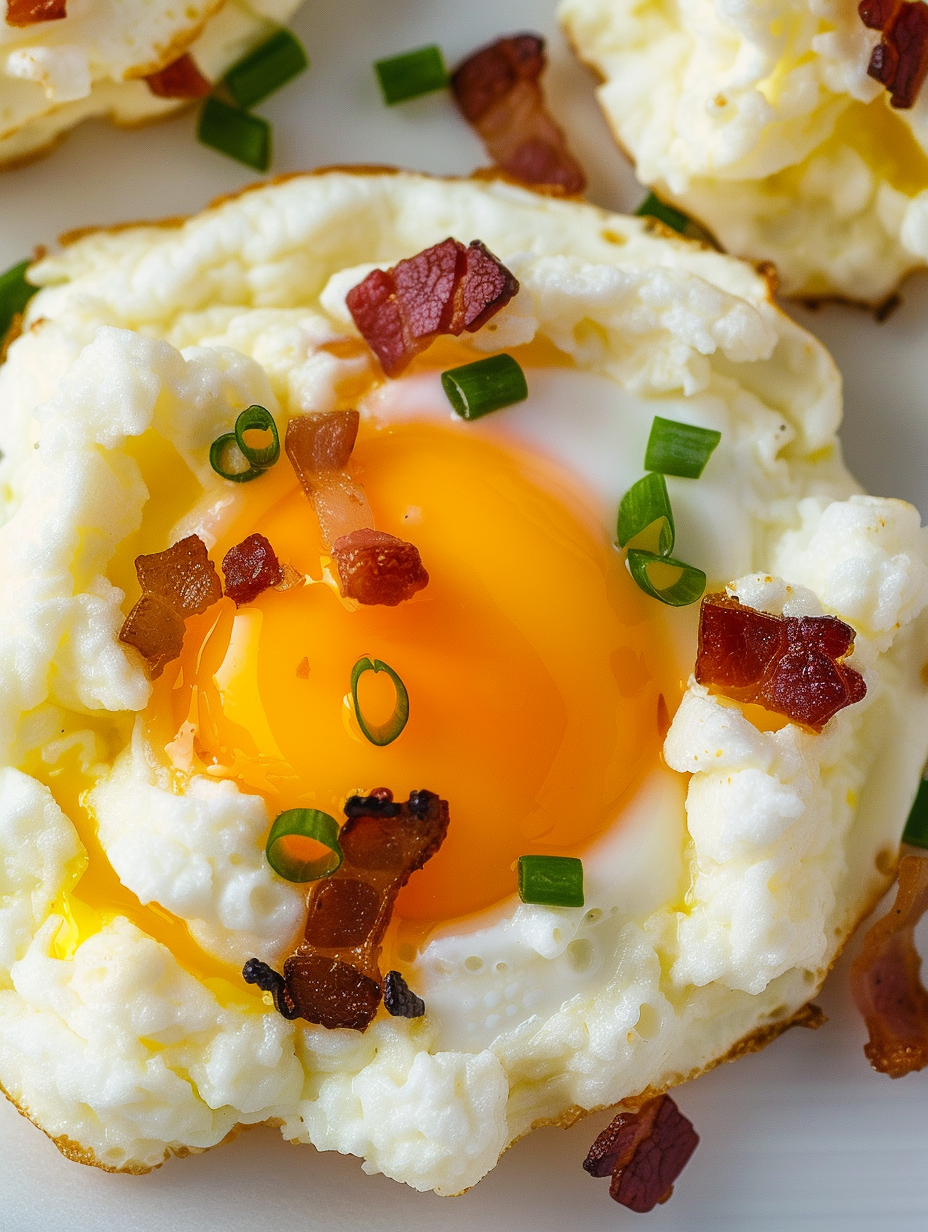
Fluffy, whipped whites crowned with runny yolks, crispy bacon and scallions — a show-stopping breakfast that takes just 20 minutes from start to table.

This Cloud Eggs variation is the sort of breakfast I make when I want something playful and elegant but impossibly quick. I discovered this technique on a busy weekend morning when I had a carton of eggs and wanted something that looked special without a lot of fuss. The whipped whites bake into pillowy nests that cradle a perfectly runny yolk; folded-through Colby Jack adds a savory, melty note and the bacon gives a salty crunch that turns a simple plate into a celebration.
What makes these mornings memorable is how everyone gathers around the oven to watch the little nests take shape. I usually serve them with buttered toast or a simple arugula salad and feel like I’m hosting a tiny brunch even on a weekday. The texture contrast — ethereal whites, glossy yolk and crispy bacon — is the reason these have become a weekly favorite in my kitchen.
I first served these for a small brunch and watched friends' faces light up when they saw the fluffy nests. Even guests who don't normally order eggs were reaching for seconds, and the runny yolk paired with toast made it irresistibly communal. Over time I've tweaked the salt and cheese ratio to keep the whites stable while still delivering plenty of flavor.
My favorite aspect is how reliably these lift a leisurely morning into something special. Once, making them for guests, the oven timer dinged just as a busload of family arrived and everyone paused to admire the little nests. The crisp bacon and warm yolk combination makes each bite an event. These are also wonderful for a light supper with a bowl of roasted tomatoes and crusty bread.

Store baked whites (without yolks) in an airtight container in the refrigerator for up to 24 hours. To maintain texture, reheat in a 300°F oven for 5–7 minutes to crisp the edges, then add warmed yolks or poach fresh yolks to nest on top. If freezing, place the cooled nests on a tray until firm, then transfer to a freezer-safe bag; they keep for about 3 months. Thaw overnight in the fridge and reheat gently to avoid rubbery whites.
If you don’t have Colby Jack, substitute grated cheddar, Gruyère or a mild mozzarella — use the same volume. For a dairy-free option, omit the cheese and add a teaspoon of nutritional yeast for umami; the nests will be slightly less rich but still airy. Replace bacon with cooked pancetta for a deeper flavor or smoked salmon for a pescatarian twist. For a vegetarian version, swap bacon for roasted cherry tomatoes or sautéed mushrooms.
Serve the nests on thickly toasted sourdough or rye brushed with butter for a classic contrast of textures. Pair with a simple arugula salad tossed with lemon and olive oil to cut through the richness. For a brunch spread, add roasted potatoes, fresh fruit and a pitcher of citrus-mint water. Garnish with microgreens or a pinch of smoked paprika for color and aroma.
The idea of baked whipped whites is a playful take on classic French techniques that emphasize aeration, similar to soufflés. The modern 'cloud' presentation has become popular online but draws from centuries-old methods of creating light meringues and egg-based bakes. This version — enriched with cheddar and bacon — reflects American brunch tastes, blending homey comfort flavors with refined plating.
Spring: add chopped fresh herbs like chives and tarragon, and top with peas for brightness. Summer: use blistered cherry tomatoes and basil instead of bacon. Autumn: fold a spoonful of roasted butternut squash puree into the whites for subtle sweetness and top with sage. Winter: swap Colby Jack for sharp cheddar and finish with a drizzle of truffle oil for a cozy indulgence.
For easy weekday breakfasts, whip the whites in the evening and pop them onto a tray lined with parchment; cover loosely and refrigerate. In the morning, preheat the oven and bake as directed, adding yolks only for the final bake step. Portion nests into individual airtight containers for grab-and-go mornings — include small packets of crumbled bacon and scallions to sprinkle on before serving.
These cloud nests are a celebration of texture and simplicity — quick enough for a weekday, special enough for guests. Try them once and you’ll find reasons to bring them back to the table week after week.
Use a very clean, dry bowl and beaters — any grease prevents whites from reaching stiff peaks.
Bring eggs to room temperature for faster, more stable whipping and easier yolk placement.
Cook bacon until crisp and drain well so excess fat doesn’t make the nests soggy.
Watch the second bake closely; yolks can go from runny to firm in a minute or two.
If nests collapse slightly after baking, a quick 30-second reheat in a 300°F oven will refresh them.
This nourishing cloud eggs with cheddar, bacon & scallions recipe is sure to be a staple in your kitchen. Enjoy every moist, high protein slice — it is perfect for breakfast or as a wholesome snack any time.
This Cloud Eggs with Cheddar, Bacon & Scallions recipe makes perfectly juicy, tender, and flavorful steak every time! Serve with potatoes and a side salad for an unforgettable dinner in under 30 minutes.
Preheat oven to 350°F and line a rimmed baking sheet with parchment paper. Ensure bowls and utensils are clean and dry.
Crack eggs and separate whites into a large mixing bowl, keeping yolks intact in a small separate bowl. Set yolks aside.
Beat the whites with an electric mixer until glossy, stiff peaks form, about 4–5 minutes. The peaks should hold shape without collapsing.
Gently fold 1/2 cup shredded Colby Jack and 1/2 teaspoon salt into the whipped whites using a spatula, preserving airiness.
Spoon the mixture into six even mounds on the prepared sheet and create a shallow well in the center of each with the back of a spoon.
Bake for about 6 minutes, or until the whites are set and do not jiggle when the pan is tapped.
Carefully place one reserved yolk into each well and bake for another 4 minutes, watching to keep yolks runny but warm.
Top with crumbled bacon and chopped green onions. Serve immediately with toast or a side salad.
Last Step: Please leave a rating and comment letting us know how you liked this recipe! This helps our business to thrive and continue providing free, high-quality recipes for you.
Leave a comment & rating below or tag
@flavest on social media!

Warm-spiced apple cider donuts with tender apple bits and a glossy cider glaze, fried crisp and irresistibly cozy for fall.

All-day slow cooking turns pork shoulder, potatoes, and carrots into a tender, savory classic with a rich homemade gravy everyone will love.

Tender layers of Yukon gold potatoes with seasoned beef in a creamy, cheddar sauce, baked until bubbly and irresistibly comforting.
Leave a comment & rating below or tag @flavest on social media!
Enjoyed this recipe? Share it with friends and family, and don't forget to leave a review!
This recipe looks amazing! Can't wait to try it.
Comments are stored locally in your browser. Server comments are displayed alongside your local comments.

Join to receive our email series which contains a round-up of some of our quick and easy family favorite recipes.
